There are many options on how to mount a gas tank, this is just one of many methods you can choose for yourself. With Lowbrow's motorcycle fabrication parts such as bungs, tabs and brackets, mounting a gas tank could never be easier. So, fire up those welders and let's get after it!
Another option, if you have a 1986 - 2003 Harley Sportster, check out our gas tank adapter brackets as a bolt-on solution for a custom Sportster gas tank!
VIDEO: LEARN HOW TO MOUNT A CUSTOM MOTORCYCLE GAS TANK
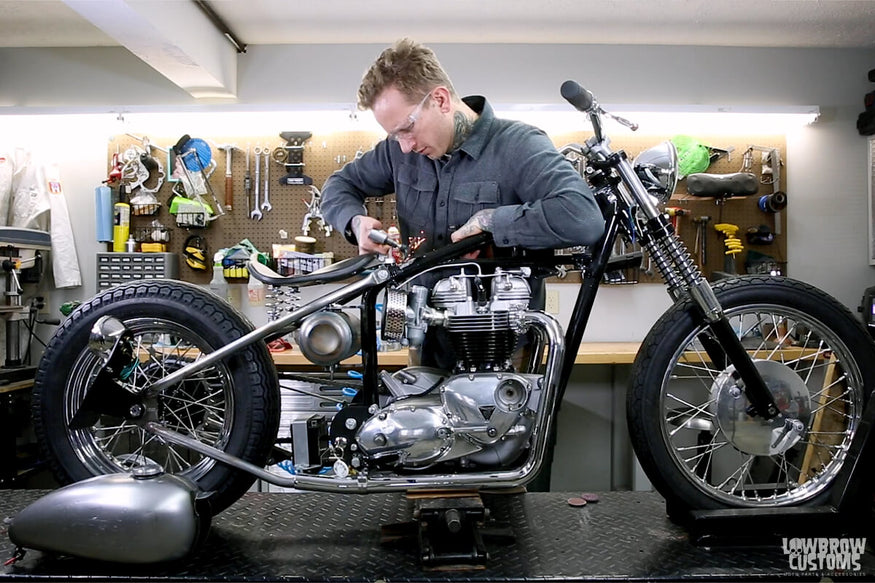
In this step by step how-to video, Tyler shows you how to install a Lowbrow Customs Banana Tank on Todd's custom Triumph chopper utilizing our Lowbrow Customs tophat and coped bungs.
There are many options on how to mount a gas tank, this is just one of many methods you can choose for yourself. Enjoy!
Step 1: Strip the Paint off of the Frame
First up, I'm going to just pop this tank off and strip some paint so we can properly mark the center point of the backbone and I will show you guys how to install this tank.
Got my safety glasses on and the way I'm going to strip the paint off of this frame, this little die grinder. This is the basic Scotch-Brite. I'm going to use this to remove the paint in the area where I know the tank tabs are going to sit. One thing I might mention, this Triumph frame and many other older motorcycles, this is furnace brazed, meaning these tubes slipped into these cast portions, and then it was all brazed, furnace brazed at the same time.
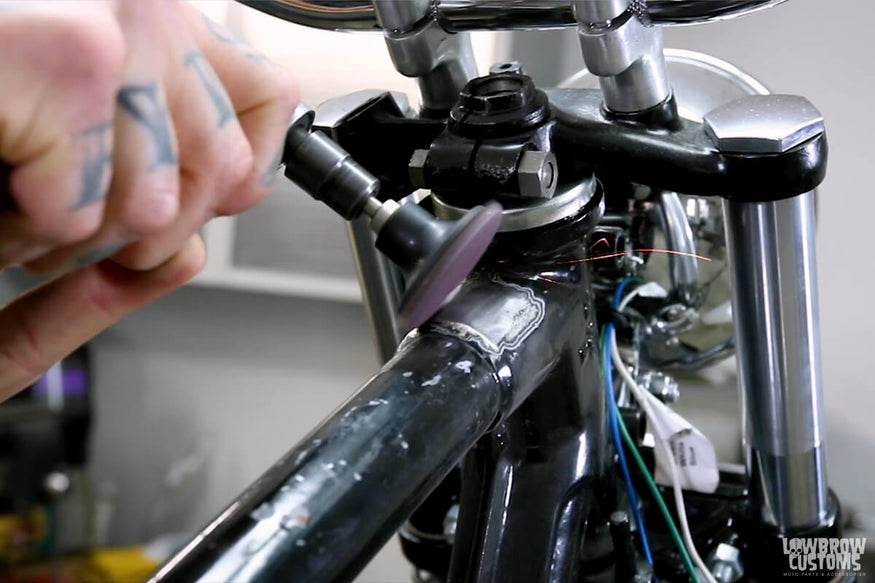
With a dye grinder strip off paint on the back bone where you want to weld bungs for your gas tank.
I can actually see a yellow gold braze peeking out here and over here. You can't TIG weld with braze. It'll corrupt your weld and you'll get porosity, it'll pop. It's a total pain in the butt. The braze being on top of this tube here, I'm going to strip the paint, and then if this isn't abrasive enough, I use a little sanding disc, but I'm going to actually make sure to get that braze off of there. It's not going to hurt anything.
This seam, because we're going to be welding pretty close to where this tube slips into this cast boss. I got to really watch it. If there are any brazes sticking out proud there, I will remove that, the strength is where those two pieces made up on the inside, but it's something just to watch out for it's really frustrating to have a simple welding job, and then have it start popping and getting holes in your weld and you got to grind it out, and then reweld and it's just a pain in the butt. Anyway, just something to watch out for.
 Using a larger sanding disc I can get into hard to reach areas to grind off paint on the backbone.
Step 2: Using a Sanding Disc to Take off Braze
All right, I pulled the paint off, no problem. There's a little bit of light braze here that this took off as well. There's actually a big lump of braze right here that I'll end up using a sanding disc to get rid of. I'll strip back here first and then I show you a couple of different options for the sanding disc. Similar situation, not bad though at all, but there's a little bit of brace here. I'll go ahead and sand it off and get it out of the way.
Another thing I might mention is, I'm clearing a little more room than I need. this plex can get stripped down and the frame is going to be stripped and repainted anyway. If you leave the paint or epoxy or whatever too close to your weld, it smokes and I'm sure it'll give you cancer, [chuckles] something eventually. No one wants to smell that anyway.
All right so a couple of options just real quick with a little die grinder like this, with this quick change attachment, cheap, common. I can switch to a sanding disc like this little 36 grit, 2-inch diameter or something I like to do that helps you get into little crevices, you can put a larger one like this 3-inch disc on which overhangs that, but however it allows you to work it into little grooves, I want to use this to really get the braze out of my way on this rear one.
Perfect that worked really well, Got rid of all that braze in the entire area. I had it once more with a Scotch-Brite just because I'm a little OCD to even out the gutter. That rear is cleaned up and good to go. Now that we got that paint cleared out of the way.
Step 3: Marking the Center of Backbone
The way I'm going to tackle this gas tank mounting is I want to mark the center of this backbone. You want to make sure your tank isn't tilted one where the other crooked. I'm going to mark that, center punch it, drill it for the thread steel bung that I'm going to put in there which is a 1/2 inch diameter on the body. I need to drill a 1/2 inch hole in here, which is a decent-sized hole.
One thing I might mention, some people are nervous about modifying their frame, drilling into their frame. I've bought old bikes in the past, and stuff where guys literally just drill a hole right through the back one or torched, burned a hole through the back one, and then bolt the gas tank through their backbone, and I think it's a job well done.
It's a very bad idea. You're messing with the integrity of the tube when you drill a hole, in this case, a 1/2 inch hole, drop this bung and weld it around it's not weakening that backbone in any way, it's going to be just as strong as it was before you drilled into it, not a problem. That being said, if you're not a talented or a good welder, get a buddy who is or take it to a shop or a professional shop and have them weld it for you.
Using Dykem before a Simple Scribe
The first thing I'm going to do to aid in marking this, it's called a Dykem. It looks like a thing for marking bingo cards. This is layout fluid. You can buy this for a few dollars from welding supply shops, McMaster-Carr, things like that. It dries really fast. I'm just going to slop it on in the general area, and then that dries and allows me to use a simple scribe.
Perhaps this one. This cost me I think $1.50 scribe where I can just scratch the centerline giving me a relation on this direction on the tube where I want to drill, and then I'm going to end up just visually, eyeballing, looking and marking the center backbone of the tube.
I'll show you a little trick once you drill the hole to make sure that bung is in there nice and straight, though my methods do you rely in this case by closing one eye and eyeballing it.
Setting up the Tank to Mark Exactly
That's dry. I'm going to go ahead and set the tank up here, and just get an idea of where I want the tank in this relation. The banana tanks like many of our gas tanks have slotted holes in the tabs.
That's great. It makes it a lot easier when you're mounting because it gives you a little room for error. If you change your mind you want to move your tank up a little here. It gives you a little adjustability. Even if this is where you want it, but maybe you're running your fuel lines and it's too tight, you can loosen the bolts, slide your tank up about 1/4 inch and it can make a huge difference.
What I'm doing right now is I'm just seeing where the tanks sitting. In this case, I basically want to get the tank is far forward up the backbone as I can. The tab right now is essentially touching the steering neck right there a little, which is fine.
What I'm going to do is I can see my purple Dykem. I actually didn't quite get it up high enough, but it'll work fine. I'm just going to make a simple scribe mark in the middle of the slot. I can just very lightly and it scratches right into the purple Dykem. Move the tank. Now that it's out of the way, I can make that a little darker if I want.
Using a Simple Scribe to Mark Cross Hairs
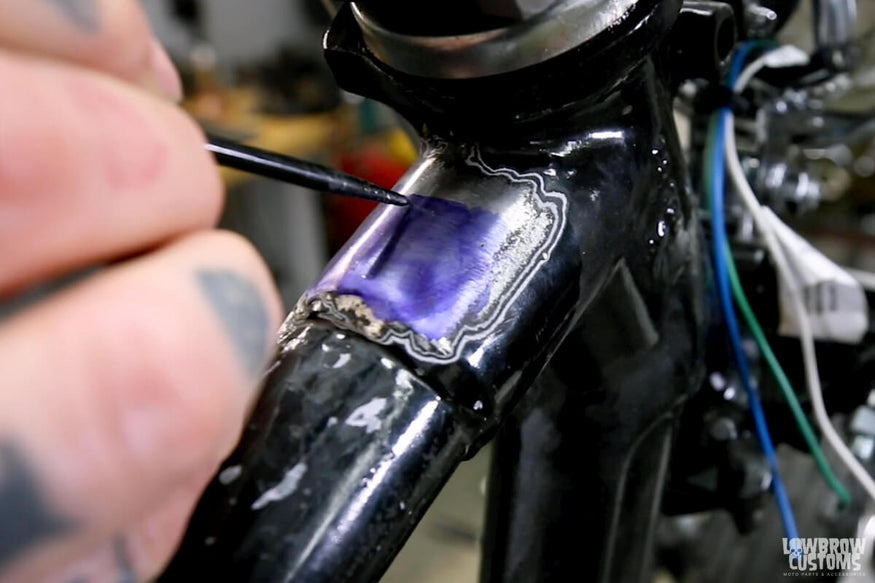
Using a simple scribe mark your cross hairs on where you want to drill your hole.
I've got that marked. Once I drilled the hole for the bung, you'll have ability to oval your hole, file it out a little by hand et cetera, if you need just like a slight correction. Say you're drilling it and you drill it crooked or the bit wanders or something, it gives you an ability to fine-tune it. Take your time. Don't just drop it in, weld it, assume it's fine because it's way harder to undo that and fix it and make it right than it is to just take a little extra time in the process and really look at it spend your time making sure it's right where you want it to be before you weld it.
Step 4: Setting a Center Punch
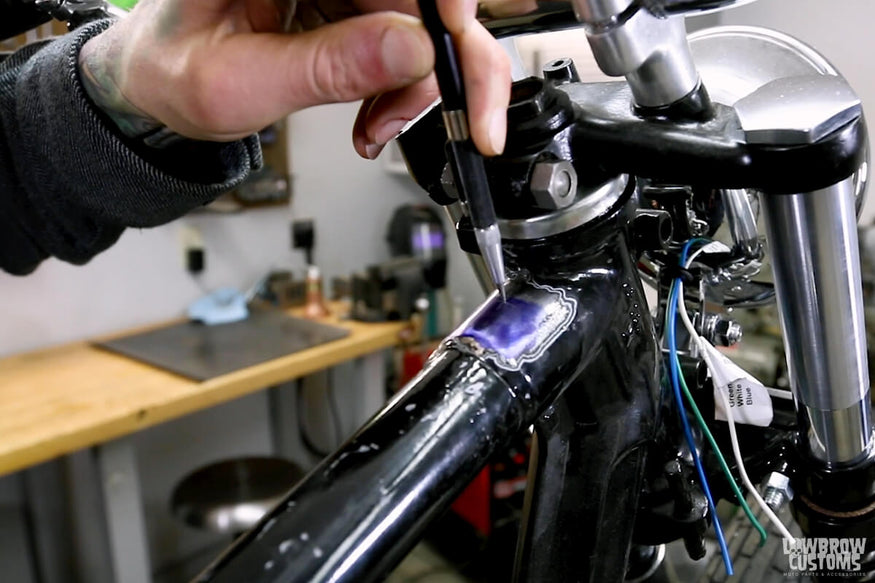
Use a center punch on your cross hairs to help with your pilot hole.
Basically, I have my crosshairs, my line down the backbone, my line across the center of the tab where I want it to sit. I'm just going to put that right on the crosshair. This is spring-loaded. Makes a perfect little divot in there which is the pilot for the first hole I'm going to drill.
Step 5: Drilling a Hole for The Top Hat Bung
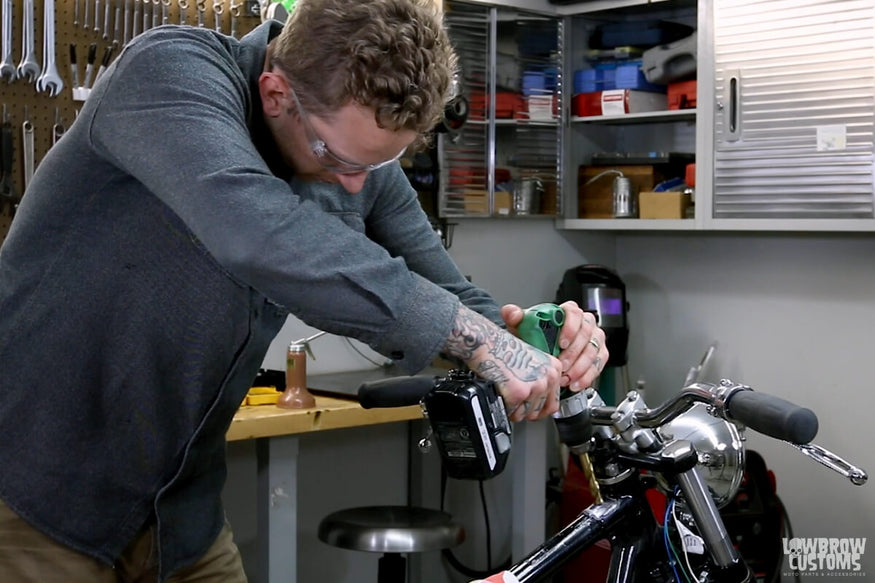
Using a drill with step down bits will help get the desired hole for the top hat bung to be sunken into the backbone.
Also, I have a 1/2 inch regular shank drill bit we can use, but these are nice. You don't have to keep changing drill bits. You can just basically keep drilling and it keeps dropping in each step along the way hence the name step bit. I lowered the lift so I can make sure I'm centered over the backbone, keep this square, perpendicular to the backbone. This is- I don't even know what I grabbed, 1/8 inch roughly. Just a nice sharp bit. I don't want to start with the step bit. This will give me a good pilot hole. I might use a little bit of oil here just keep my bits sharp and keep everything lubricated. I'm just going to go ahead and find my center punch mark.
There's no rush. I'm just making sure it's right where it should be.
Eyeballing it again.
I've got pilot hole drilled and it did wander a little even though I was paying attention and going slow. It's not good for the side of your drill bit but I went ahead and put a little pressure this way and brought that hole slightly towards me to get it squared back up. It was minor. The next thing is step bit.
Using Step Bit to Drill
Hopefully, the top tree here is not going to get in the way too much. Luckily, it should just make it.
- On this one for sure, I want to use some oil.
- Also, I don't want to just go ahead and run it into 1/2 inch. I want to open this hole up a little, stop, check it out.
- Again, make sure it's not moving to the side because if it is, you can take a rat-tail file or something.
- You can move it back where it should go and then the bit will fall back in line with it.
I'm going ahead and get a few steps in here.
Actually, I'm going to cover Todd's motor with a sheet real quick. I don't want to be throwing hot bits of metal on there. I covered up Todd's motor just so I don't shoot little bits of hot metal on his nice rebuilt engine. The step bit, the head of the drills actually getting in the way here on this top tree.
It's an issue for where we're mounting it on this bike. Ideally, it's not and I would have been done drilling that hole already.
Using Standard bits to Drill
What I'm going to do is just use standard bits. Right now this is that 3/8 of an inch, I need to bring up to 1/2 inch. I'm not going to jump right to 1/2 inch, I'm going to go ahead and do several steps so it's not catching and taking huge swerves of metal out or trying to stamp my wrists. A lube on there.
There we go, easy peasy. A little bit of a brake cleaner, carb cleaner, gasoline, whatever. It'll wipe the Dykem right off. All right, I've got the hole in the backbone here. Let's see. Hopefully, it doesn't quite when I slide in. I might have the angle off a little bit because I've got a clearance issue with the drill motor and this top tree maybe I wasn't going perfectly straight in perpendicular to the backbone. I'll go ahead and run it through again real quick to make sure.
It's likely a little- there's a little burr. Since I'm going through a casting and the tube, it's pretty thick. A little something hanging up there.
There you go. All right. We've got our bung sitting in the backbone now. A little tip, you can visually sight before-- You don't want to just go weld that guy in there. It's a little tough to tell if it's perfectly centered on the backbone or not. In this case, I believe that it's slightly to the right because I had to stop using the step it and switch between standard drill bits. I think my hole wandered a little bit, not bad and nothing we can't fix. I'm going to go and thread just whatever a longer bolt in here. It gives you a visual reference like right now it's leaning that way, that way.
 Using a long bolt allowed for tack welding up this bung straight and with out holding it with your fingers for safety.
When I go to weld this in, I can go ahead and hold it nice and straight tack weld it. Actually, that looks quite nice and centered. Maybe it didn't wander. I'll just put bung in there and the bolt. It looks great. What I'm going to do is I'm going to go ahead and wipe this down and that down and make sure there's no grease on it. I'm just going to go ahead and tack weld that in place for now. Then I can mount the gas tank. I can thread a bolt in there, hold it in place and mark the rear mount and we'll get that one set up.
Step 6: TIG Welding Steel
All right, I set up my Lincoln Electric Precision Tig 185 real quick. I'm going to TIG weld this. It is mild steel to mild steel, you could MIG weld it. You could even braze this. I'm going to TIG weld it. Right now I'm just going to throw a couple of tacks on there. I left that bolt in place which is convenient for you to hold it in place. I'm just going to use that also as a visual indicator and go ahead and get one tack.
Looks good. That was just a fusion tack, meaning no fill rod since it was just easier one-handed. Then get another tack on here and then a tack on the other side and move to the rear mount.
Okay. That's tacked in place, good enough for now. Once we get the rear mount in position, I'll remove the tank and finish weld around these two bungs. I've got the front mount tacked in place. The reason I didn't just go ahead and finish weld that real quick is because maybe while I am figuring out the rear mount, that needs to change angle or position or something, I don't know. Tacks are very easy to break. If the thing was already welded in you have to like drill it out and it's a total pain. I'll just finish-weld everything at the end.
Step 7: Putting the Tank on Using a Front Mount
I'm going to put the tank on using that front mount.
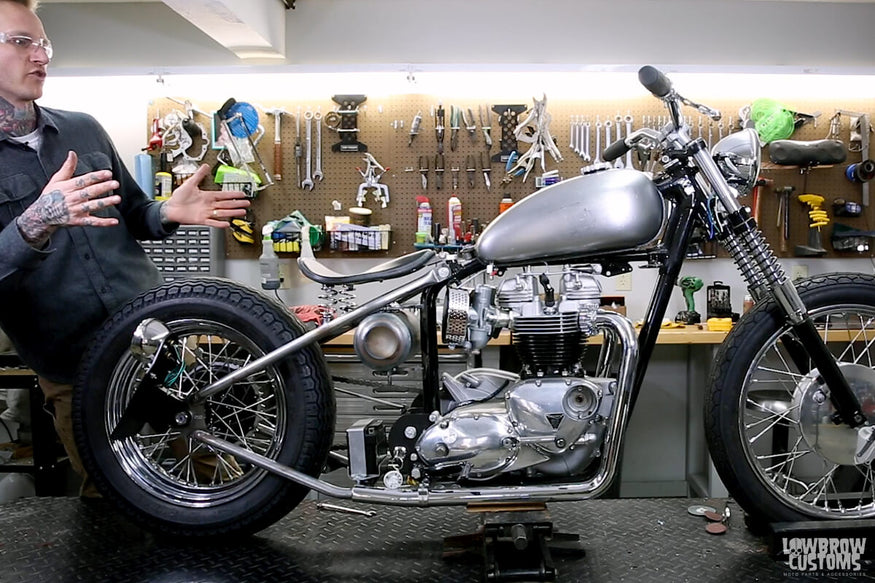 Having the tank bolted to the front bung you can tell how straight and level it needs to be to set your rear coped bung location.
I just got some 5/16 hardware and a washer, this isn't the final hardware. I also grabbed a couple of leather washers. Since the tab is curved, it's a good idea, something that we do and it's a popular thing as well to put a leather washer there. It takes up a little that space. It cushions the tank a little bit. One thing I might mention is over time, your leather washers will compact and like become their final shape.
What happens is as those compact a little bit, it might give you a hair bit of looseness so every once in a while it's not a bad idea to throw a wrench or socket under your tank mounting bolts before a ride and just make sure they're nice and tight or pull them out, lock-tight them and reinstall them. Just make sure everything's snugged up real hard against the washer. I'll set that leather washer in place. You can buy those leather washers at Lowbrow. We've got 10 packs available. They're inexpensive and are available in two sizes for 5/16 hardware and then for 3/8 hardware.
I've got the bolt, a washer, the tank, the leather washer, and then the threaded bung. Again, with these tabs being slotted, it allows you some adjustability there. I'm not going to tighten this all the way up. I'll just get it somewhat snug to hold the tank. It looks really nice. The way Todd wanted this mounted in the rear is using again one of this 1-inch diameter, a larger diameter coped bung. This is again for 5/16 hardware, the same size as a front.
That cope is for a 1-inch tube handlebar. It's a perfect fit but since this is about 1.5-inch diameter, I'm going to go ahead and grind down these wings a little bit and I'm going to have to just open that up so it fits nice and snug against that backbone. I don't want a big air gap in there. It's just sloppy. I want a nice tight fit so I get a nice clean weld around the outside edge. I'm going to go ahead and do that and get that fit correctly and get that bung in position so we can tack it.
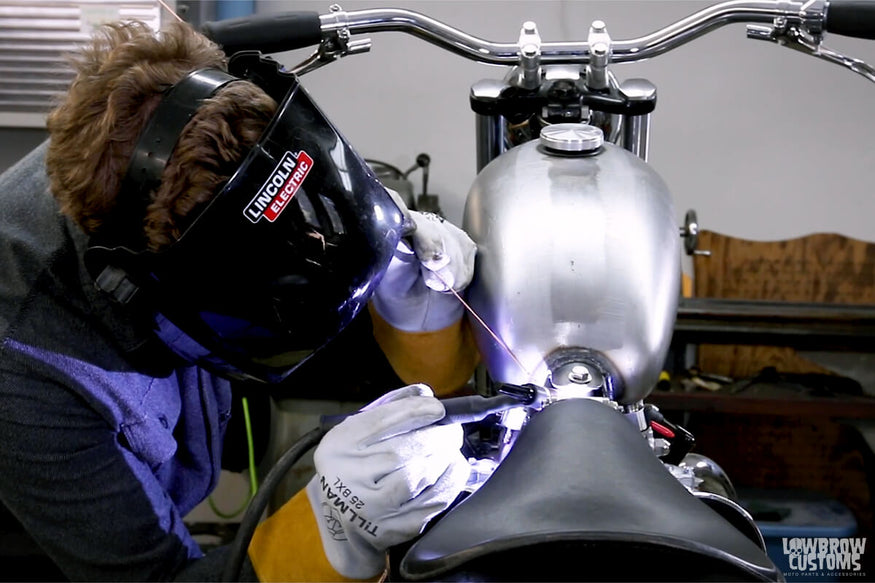
Tack welding with the gas tank mounted to the bung to ensure your location doesn't change.
I got that bung opened up so it fits the backbone really nicely. This part of the gas and mounting is quite easy.
- I'm going to go ahead and wipe down the steel bung and backbone, clean it real quick, but
- Then what I'm going to do is go ahead and just bolt it in position to the tank and visually make sure everything's nice and lined up which it is right now.
- Then I'll go ahead and tack this rear bung, remove the tank, finish-weld and that'll be that.
I went ahead and cleaned the bung and the backbone to get any grease, dust, dirt, et cetera off of there.
Take another leather washer, slip it on top of the bung, same 1-inch OD, outside diameter as the bung so it's nice and clean. This hardware is not the final mounting hardware, but it'll do the job to locate the bung in the tank. Again, with the slotted tabs, it allows me to move this where I want and as far as where that bungs positioned in that slotted tab, it's not really a big deal. I'll put it slightly forward of midpoint on the slot. It aligns thread to that one so the tank will have a little bit to move.
Also, it'll keep this weld a little further away from the joint where I know there's braze waiting to frustrate me and suck into my weld. All I'm doing here now is looking at the tab of the tank compared to the backbone and it looks great. I'll actually step back and you just want to make sure everything looks nice, the tank looks- everything looks great.
It looks nicely aligned on the backbone. It's not tilted side-to-side. It's not cattywampus this way. It looks good. I believe I'm ready to tack weld this bung in position, get a few nice tacks on it. I'm going to remove the tank, finish weld it, mount it back up and we are done. All right, I am going to tack town.
Step 8: Tacking Weld the Bung
I went ahead and just put one solid tack on each side using some fill rod. That should be sufficient. I'm going to go ahead and get this tank out of the way so I can finish weld. One thing I might mention is the leather washers will burn. If you went ahead and welded that up with those bolted in place, these got a slight bit toasty and they will catch on fire if they get hot enough which isn't a big deal. They just stink. The same thing goes with rubber grommets like in our different mounting tabs, finger tabs, triangle rubber-mounted tabs when you weld those in place sometimes with components bolted to them, it'll melt the rubber or catch on fire and it really smells bad. Something to remember.
Get another tack in the front here.
I'm actually going to move that seat pivot out of my way.
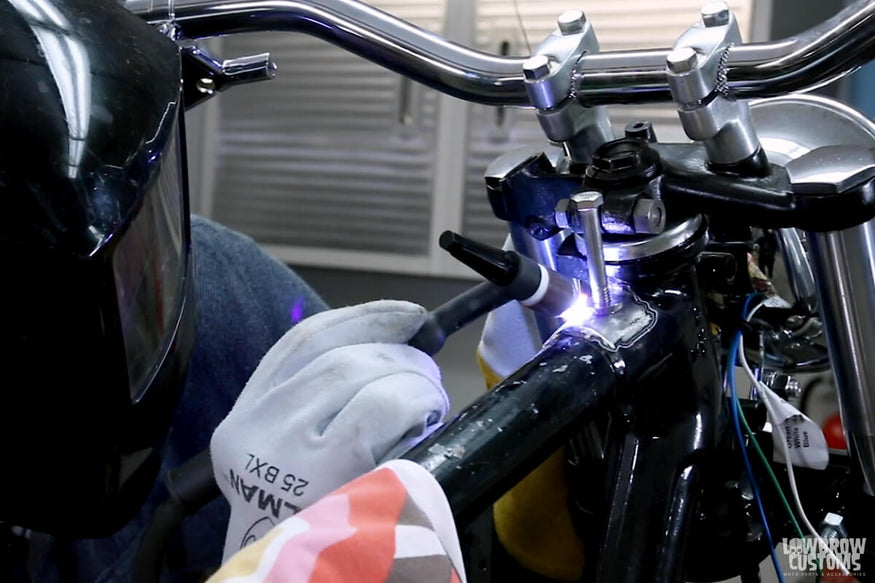
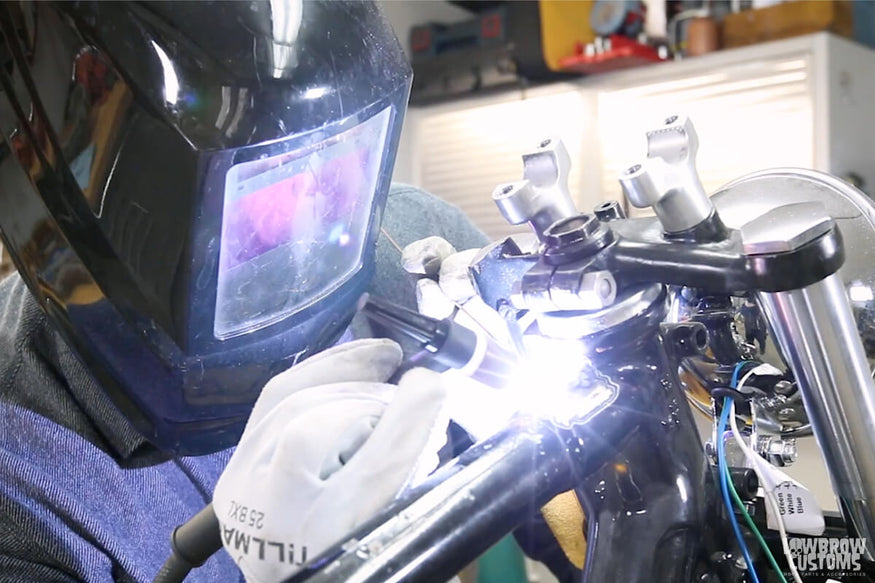 Finish welding bungs on front and back of the backbone once you are happy with the way the tank is sitting.
*Safety First: When welding threaded bungs, you want to take care not to overheat them so bad that they warp and distort the threads. You could use anti-seize on the threads of a bolt and thread it in place before welding. If you don't use anti-seize, guess what? Your bolt may seize in the bung and make you really bummed.
Quick and easy. The smoke rising was from the paint bubbling off, no big deal. Got past the area I was thinking might be a problem because of the braze, no problem. Good clean preparation made for a nice easy weld onto the front.
We're going to go ahead and bolt this up. It's not the final hardware but this is how it will be for now. When Todd tears this thing down and paints it, puts it together, he can choose what he wants. I found a pack here in the garage of a cycle standard 5/16 leather washers. The OD is 1 inch. ID is 5/16. I'll go and use one of these on top of the tank tab as well as underneath. It adds cushion.
Also, with a tank as being curved and say the washers and the bungs being flat, it takes up some of that room. These are snug fits. You can actually thread the bolt right into it. I'll go ahead, drop that in there. You can actually use the washer to hold the hardware and everything in place. As you see. I'll do the same for the rear hardware. Okay. Got our hardware with our double-dip leather washers. Go ahead and start these bolts into the bungs.
Make sure those leather washers are centered in there because visually it looks nicer. These leather washers do protect the paint. That's actually a good point to make. If you have your final tanks all nice and painted, leather the washer top and bottom, it just keeps the washer from digging into the clear coat and stuff as much as it would without. There you go. Looks great. Straight, hold the gas, lets you ride your motorcycle down the road. Another job well done. Until we see you next time where we'll be mounting up the rear fender struts on this bike. Beside this article, we spend a lot of time and effort creating motorcycle how-to guides for your enjoyment. Thanks for reading!
Related Products


