That is the image you will see when your bike begins to wobble at high speed and you suddenly realize the goldfish you are riding is going to take a huge bite out of your backside!
A bike that is not set up properly can really ruin your day.
The folks at Lowbrow Customs have created this article to help you avoid that experience. You’re Welcome!
When you decide to customize your motorcycle's stance, consult your Harley repair manual to determine your rake and trail. The first thing you need to understand is the importance of what you are doing here.
This exercise is not about the aesthetics of your bike as much as it is about being able to stay on your bike when you ride it.
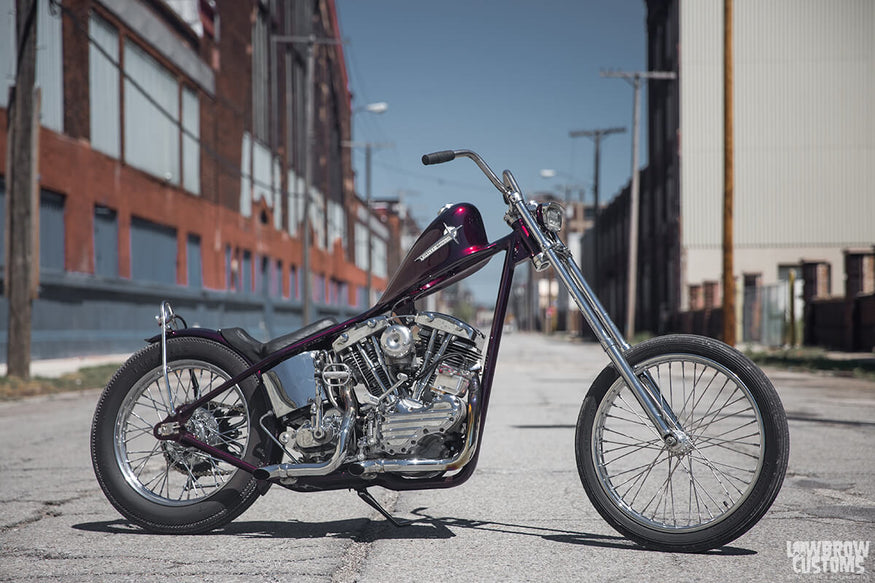 Bob Millerleile's custom chopper build.
Wheelbase Rake and Trail
First thing to understand is what you can expect depending on how you setup your bike. Let’s start with your wheelbase. Wheelbase is the measurement from the center of the front axle to the center of the rear axle. Typically, a bike with a shorter wheelbase is going to handle much quicker than a bike with a longer wheelbase. A shorter wheelbase also translates to less straight-line stability. Just like a relationship, it’s a compromise.
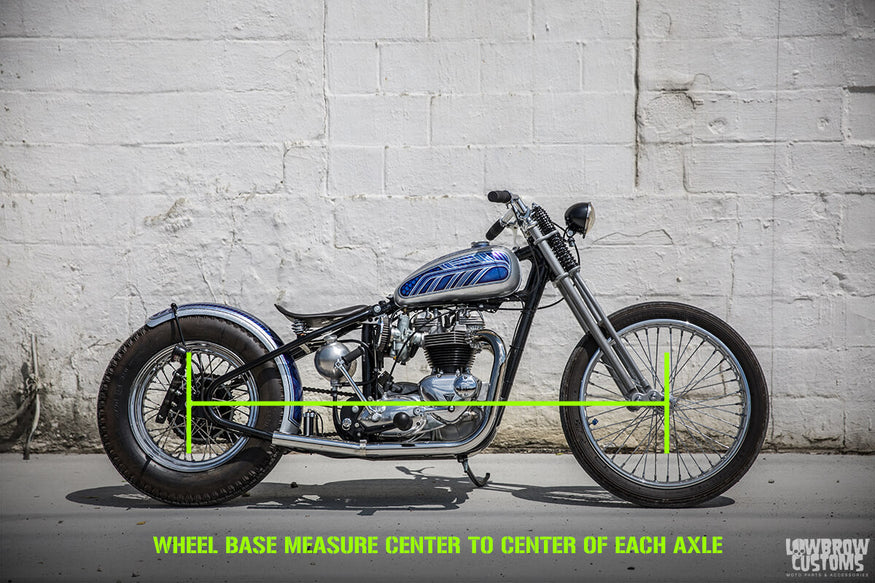 Compare the wheel base on two of Todd's Triumph Builds.
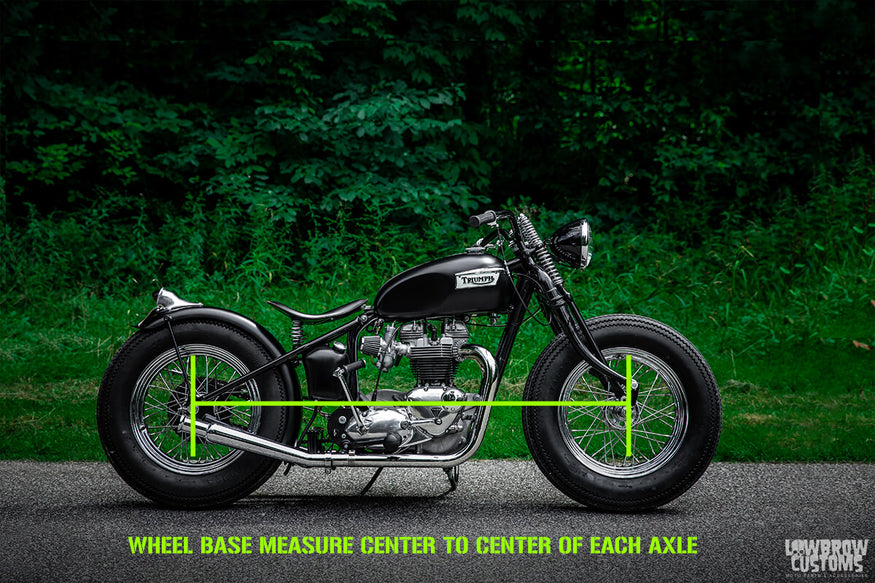 You can see this one is much shorter.
6 Measurements
For all of you reading this that hate math as much as I do, we are going to try to keep this all in the simplest terms possible. It is important that all of these measurements are accurate. No cutting corners here.
Make sure your bike (or frame) is upright and vertical. If you are measuring a frame, make sure it is set at a level ride height with the rear wheel attached. Use a plum bob to make sure all the measurements are square. Lay off the booze and the weed for a few minutes before you go busting out these measurements. These need to be correct or you are going to hate yourself later.
Rake is the first thing we are going to determine. This is the angle in degrees of the steering neck from vertical. Imagine a straight line going from the ceiling directly through the center of your front wheel. Now imagine another line going through the center of your steering stem to the center of your front wheel. The distance from the top center of your steering stem to the imaginary straight line from the ceiling through the center of your front wheel is the rake measurement.
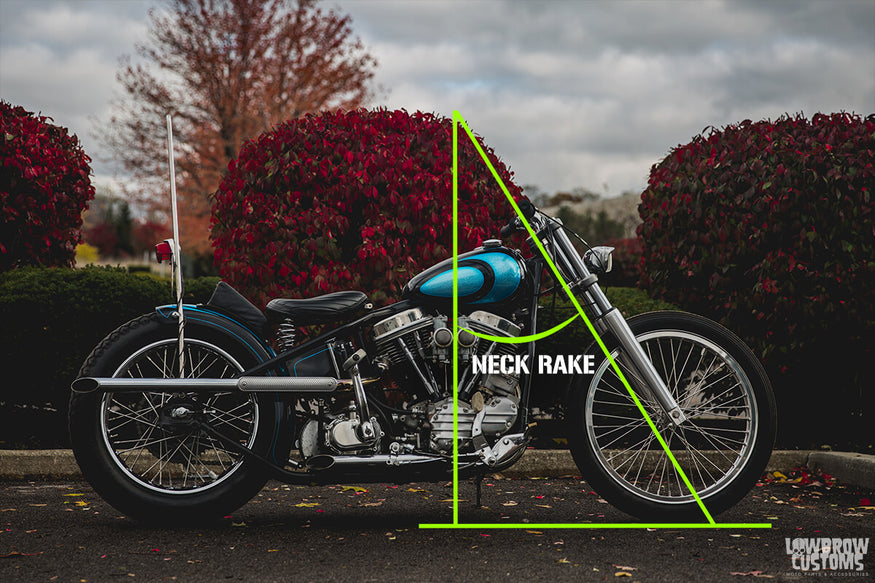 Visually it's a bit easier to understand.
An easy way to verify this measurement is to go online and buy a cheap digital angle finder and hold it against your frame neck. There are also manual versions called an inclinometer that you can find inexpensively (around $15). The key to getting an accurate measurement of your rake (the angle of the steering neck a.k.a. frame head tube) is to be sure that your frame is level. This can be accomplished by putting your bike frame up on blocks and using a traditional level to ensure the lower frame rails are completely level before measuring the angle of rake with a digital angle finder or inclinometer.
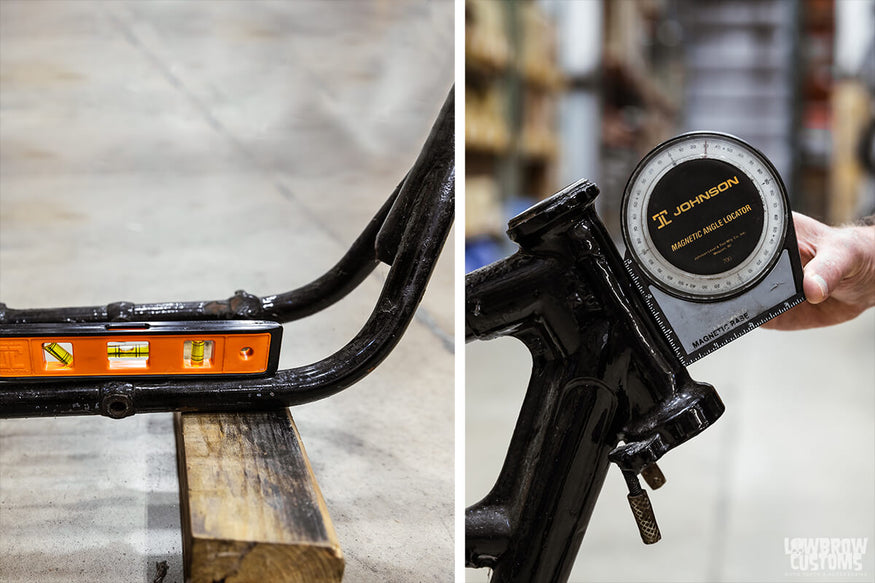 Make sure you frame is level before using and angle finder on your neck to get most accurate reading. You can see this neck is at 30 degrees.
Trail uses the same two lines, but it is measured at the bottom of the wheel. That same line going from the ceiling through the center of your front wheel and extending down to the floor. Now take the same line through your steering stem and extend it to the floor. The distance between those two lines on the floor, is your trail.
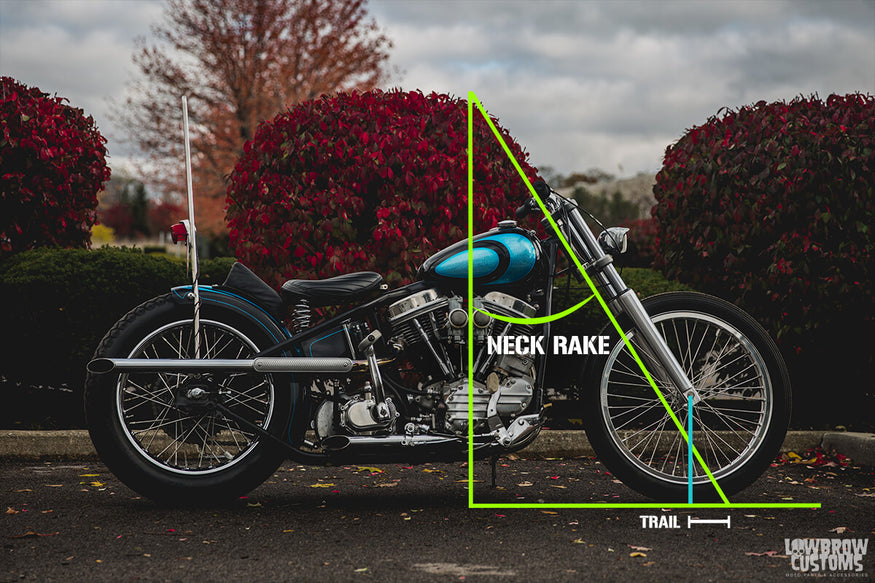 How to figure out your trail.
Front wheel diameter is the next measurement you need. This is the diameter including the tire. So, typically a 21” tire measures 27.60” for example. It is easy to get an accurate measurement of the front wheel diameter when the wheel is off of the motorcycle. Check your tire pressure and ensure it is at the level you would normally run it at. You can lay the wheel on the ground and put the tire against a wall. Use a square against the other side of the tire and make a mark where it meets the ground. Now measure between the wall and the mark on the ground to get your accurate wheel diameter measurement.
 Diameter measurement top to bottom of the tire.
Next measure your triple clamp offset. This is the distance from center of top of steering neck pivot to centerline of top of fork tubes. The offset of your triple clamps affects the trail of your motorcycle. The larger the offset, the smaller the trail. You can use the offset to help compensate for too much or too little trail. If you are using common, stock triple clamps, you can find this information by checking a shop manual or doing some internet research.
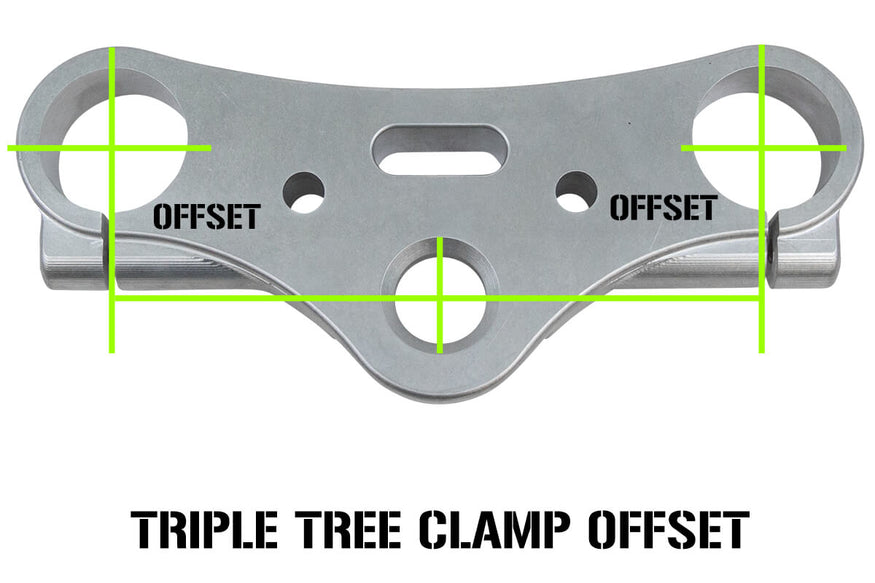 How to measure triple tree offset.
Now measure your fork length. This measurement is taken by measuring from the top of the fork tubes, to the center of the axle.
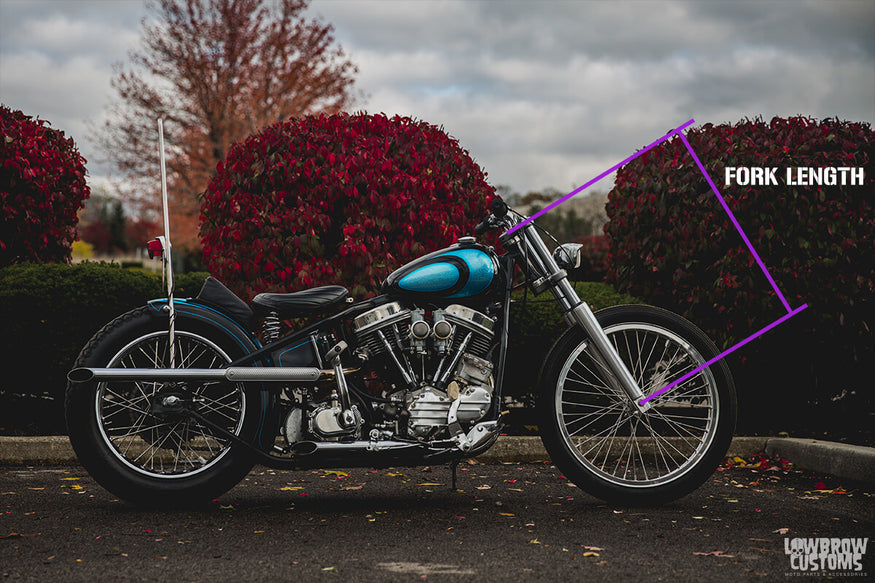
How to measure fork length.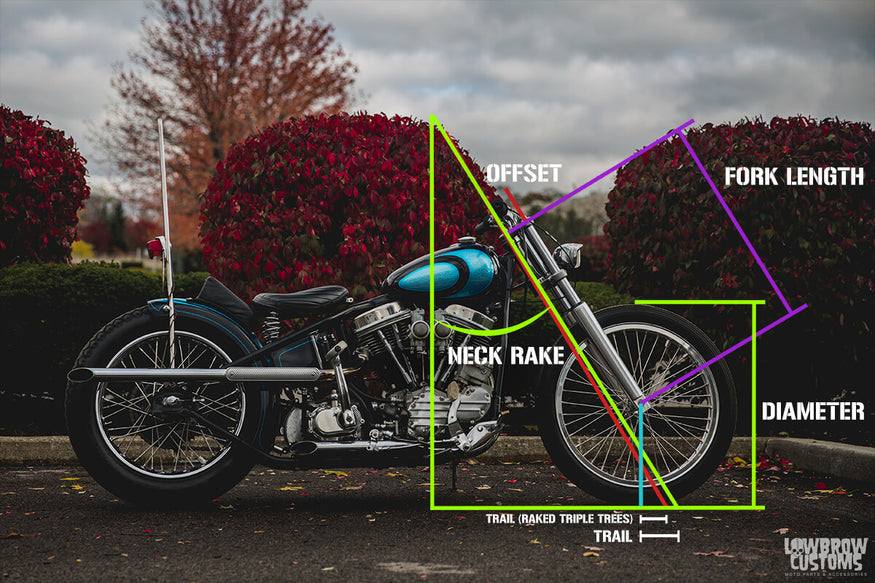 All the measurements in one.
Now measure the steering neck height. This is the measurement from the center of the steering neck at top of triple clamp perpendicular to the ground. If you only have the frame, measure from center of top of steering neck perpendicular to the ground and add 1" to this measurement.
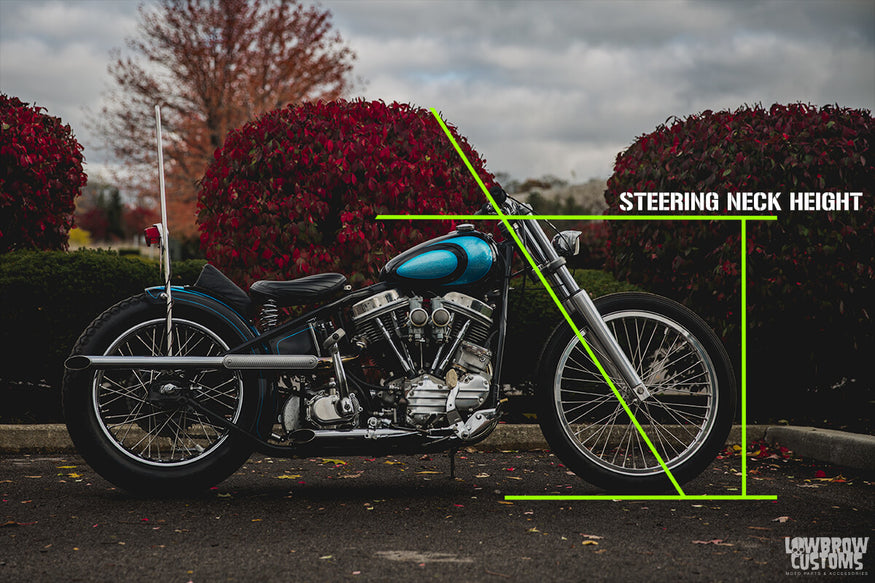
Normal trail should be somewhere between 3 and 6 inches. Over that your bike will not to be responsive at high speeds. Under 3 inches and your bike will not be stable at high speeds.
 Joel Hauenstein's "The Jart"
Measuring for a Springer Front End
If you are intending to install a springer front end there are a few ways to figure out the length springer you need / want. There can be a different between need and want, for instance, you may WANT a super long springer but after calculating rake and trail, you may find out you NEED a different length to ensure that your bike will handle safely.
The first way to calculate the springer length you need would be if you want to maintain your stock length front end and handling. You can measure your stock fork length and simply purchase a springer front end motorcycle of the same length.
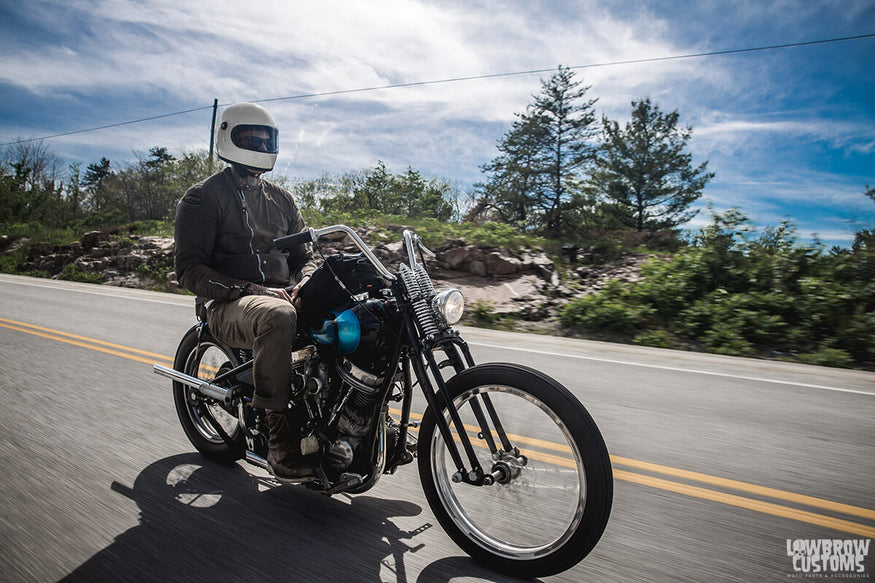 Tyler changed from a 39mm front end to a Cannonball I-Beam Inline Springer on his Panhead
Often times springer lengths listed are measured from the bottom of the top triple tree to the center of the axle, but make sure you verify how the springer dimensions are listed so you can properly compare them to the measurements you take of your stock front end.
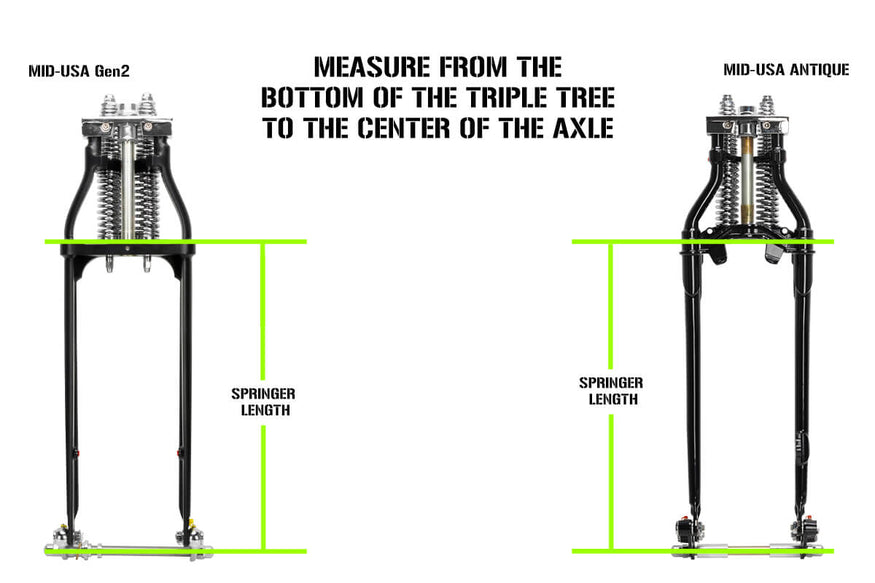 Examples on how to measure MidUSA springer front ends length: The diagram compares the MID-USA Gen2 and MID-USA Antique springer front ends, showing how to properly measure the springer length from the bottom of the triple tree to the center of the axle, indicated by bright green measurement lines on both models.
Another method is to measure the upper neck height, which is measured from the center of the neck cup at the top of the steering neck directly to the floor. The next measurement is taken from the bottom of the steering neck, center of the neck cup, to the floor. The bottom triple tree of the springer front end is fixed, so this is an important measurement. Be sure that your frame is level when taking these measurements.
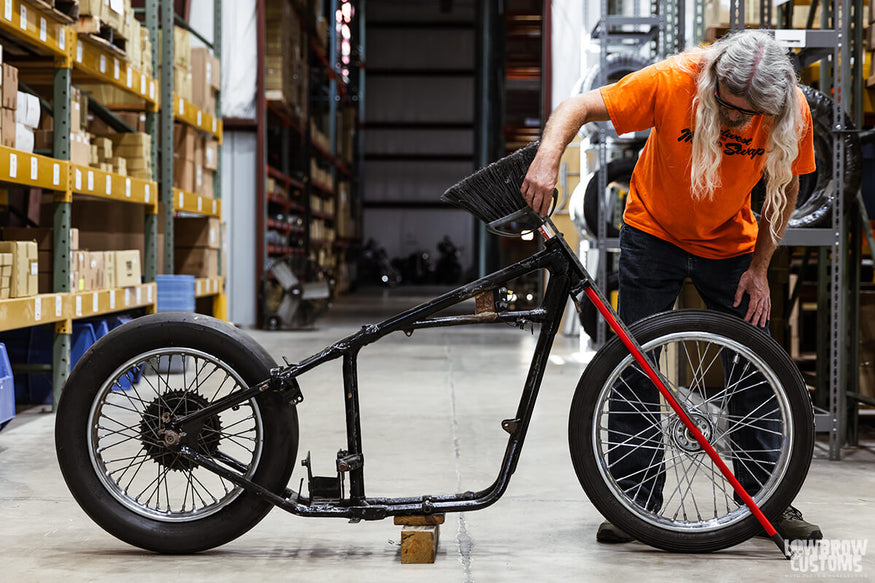 The broom method.
The last method can help visually determine the springer length you would like. You also need to calculate the rake and trail fully afterward if you would like to ensure proper handling (which we highly recommend!).
If there is no front end currently installed, you can put blocks under the frame to level it (or get the angle of the frame you desire) and slide a broomstick through the neck of the frame. You can also set the front wheel in the proper location. It is best to use the front wheel and tire you plan to run on the finished bike.
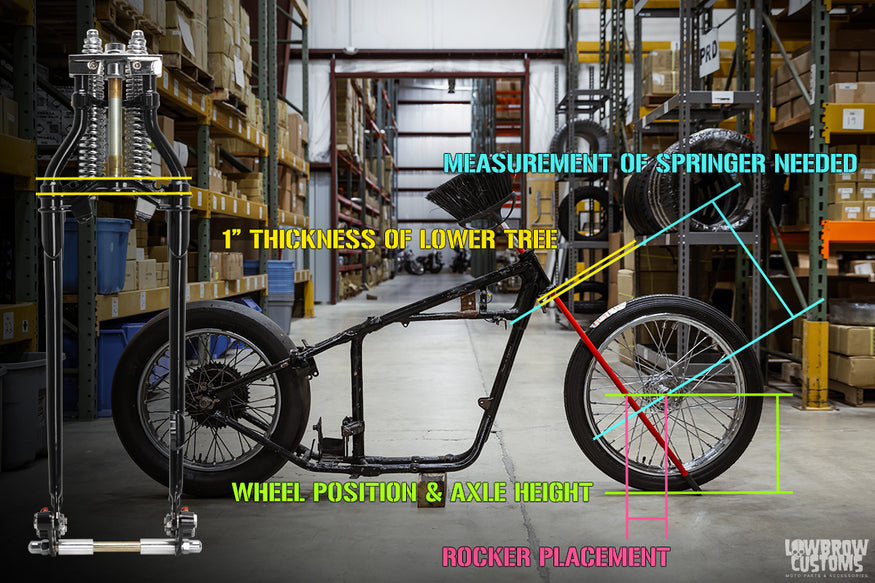 Broom trick measuring for a springer front end.
1. Support your bike with a block of wood to desired ride height.
2. Insert broom through frames neck. (The Broom)
3. Place front wheel into position and measure axle height. (Measure Neon Green lines vertically)
4. Rocker placement could be 3.5" in early style forks to 4.5" for late style forks. See what the rocker distance is for your desired springer and set wheel to that distance. (Measure Neon Pink lines horizontally)
5. Allow 1" of thickness at least to accommodate for lower triple tree. (Measure Yellow line to line)
6. Measure from 1" below neck to center of wheel to determine size springer you need.(Measure the Teal Blue lines)
This can give you a good visual on the angle of the springer and the length you would need. Keep in mind when measuring that the additional weight of the engine and other components may compress the forks, so it is better to go with a bit longer, versus a bit shorter, for the length if you are in between sizes.
Again, take the time to figure out the rake and trail measurements and calculate it fully to be sure you are going to have a solid handling machine that you enjoy riding!
Related Products


