How to Disassemble and Properly Tuning Your S&S Super E Carburetor
If you have a Super E on your bike, or are thinking of getting one, this video article will give you a great overview that will get you familiar with the components and how they work. For maintenance, consider using an S&S Super E Carburetor Rebuild Kit to keep it running smoothly. Super E carbs are found on many Harley-Davidsons and have been a popular aftermarket carburetor for decades.
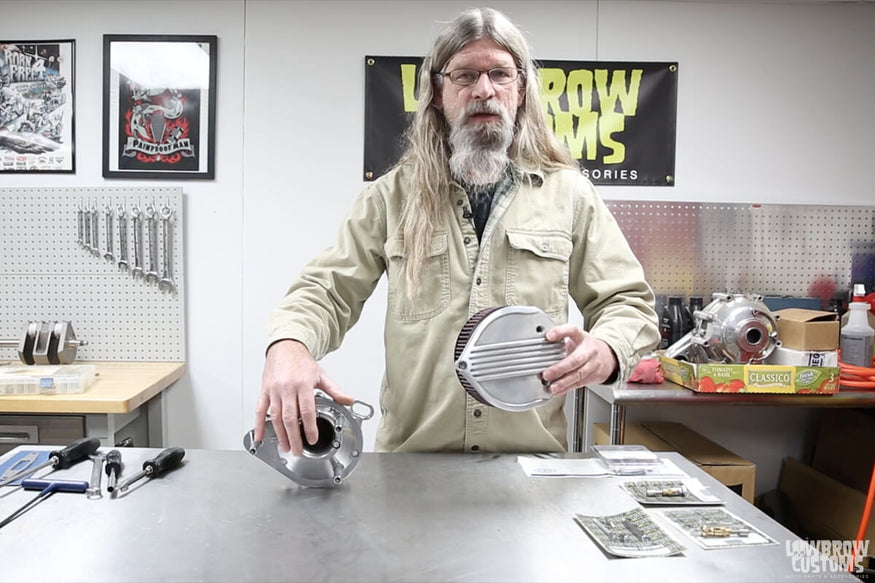 Check out out the Lowbrow Customs Finned Air Cleaner Cover for S&S Super E/G carburetors.
WATCH VIDEO: S&S SUPER E CARBURETOR STEP-BY-STEP DISASSEMBLY AND EXPLANATION
In this video article, Todd goes step-by-step through an S&S Super E carburetor, explaining what each part does, showing how to disassemble and reassemble, and talks about basic tuning information. For more advanced tips about disassemble and reassemble, Todd will walk you through in this blog post and show you the correct way to dissemble a 883cc engine from a Sportster.
STEP-BY-STEP PHOTO DISASSEMBLY OF AN S&S SUPER E CARBURETOR
Step 1: Removing the Stock S&S Backing Plate
All right, the first thing we're going to talk about is the stock S&S backing plate for the super E carburetor, one thing worth mentioning if you are going to switch out your stock air cleaner, this is your float bowl vent hole right here. Pay particular attention to the new aftermarket air cleaner of which we have many to choose from on our web store, so that it does not block this hole.
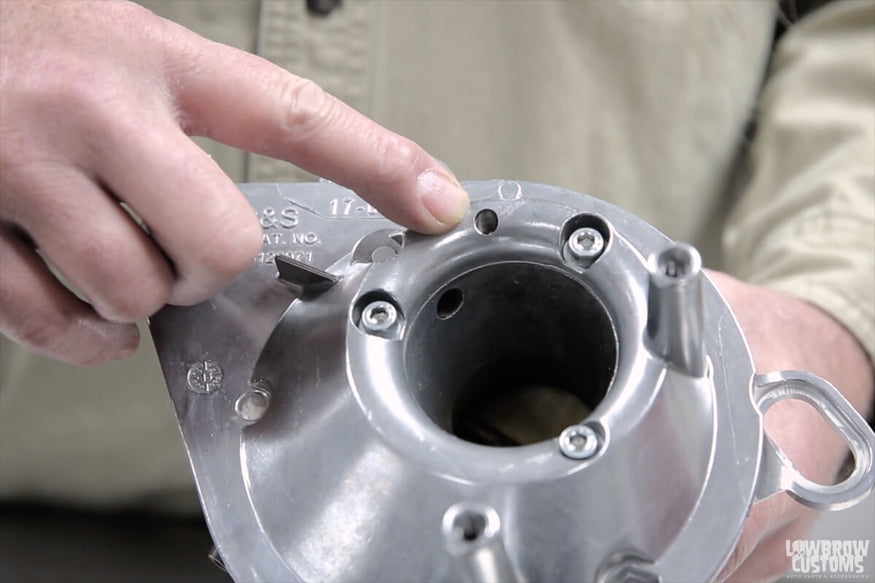 Float bowl vent, make sure your air cleaner doesn't block that hole
If it does, once I get the cover off, I'll show you a plug you can remove if it is blocking that hole. If that is blocked the gas won't flow very well because it needs to vent to the atmosphere, one other thing about the-- I don't have the part but on a stock plate there’s a level attached to this hole right here. The screw right here controls your enrichment circuit, this is not a choke. It basically adds more fuel for startup.
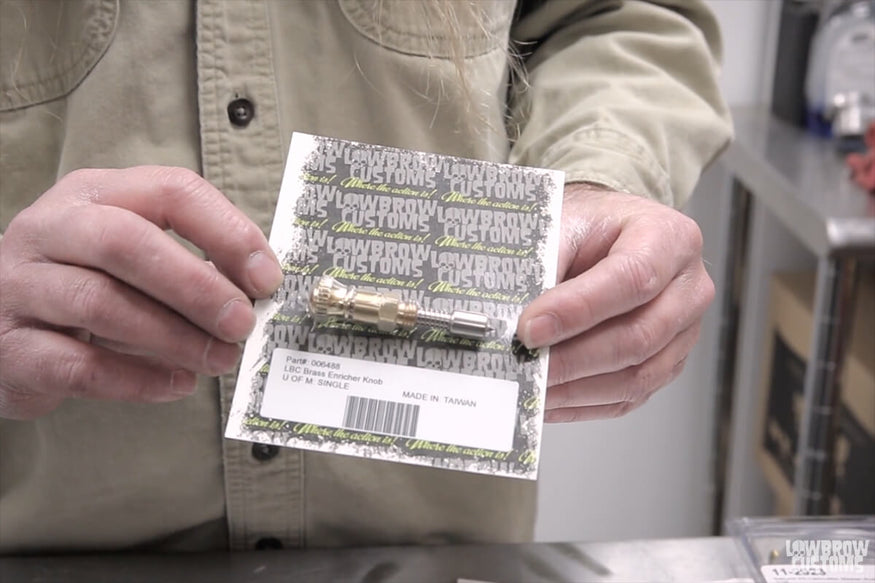 This is not a choke! this is a enricher knob.
We also have some enricher knobs available on the website, Lowbrow Customs brand this will take the place of the lever one changing to an aftermarket air cleaner. If you are going to run your stock S&S backing plate and you want an alternative to the standard S&S teardrop air cleaner, Lowbrow Customs has come out with this nifty product here, the Lowbrow Customs Air Cleaner Cover for Super E carburetors. Which takes the place of the stock air cleaner cover, simply remove your stock one replace it with this. Has a correct bolt pattern for the S&S backing plate, we have these available and ribbed like the one I have here. We also have them available smooth and fish scale in aluminum, polished aluminum like this one and they're also available in black.
Okay, we will go ahead and remove the backing plate now. One other thing worth noting very important that these three screws on this any are sufficiently tightened and it is not a bad idea to use Loctite because if one of these screws does come back itself out, guess where it's going to go? It's going to get sucked in your carburetor right on through the other side and head on into your engine. Stock backing plate, see how these factory screws have a blue lock patch on them when you are assembling it and that basically.
Once again, you want those to be nice and tight and you don't want to over tighten them because this is an alloy carb body and you don't want to pull the threads out of here because you're cranking them down hard.
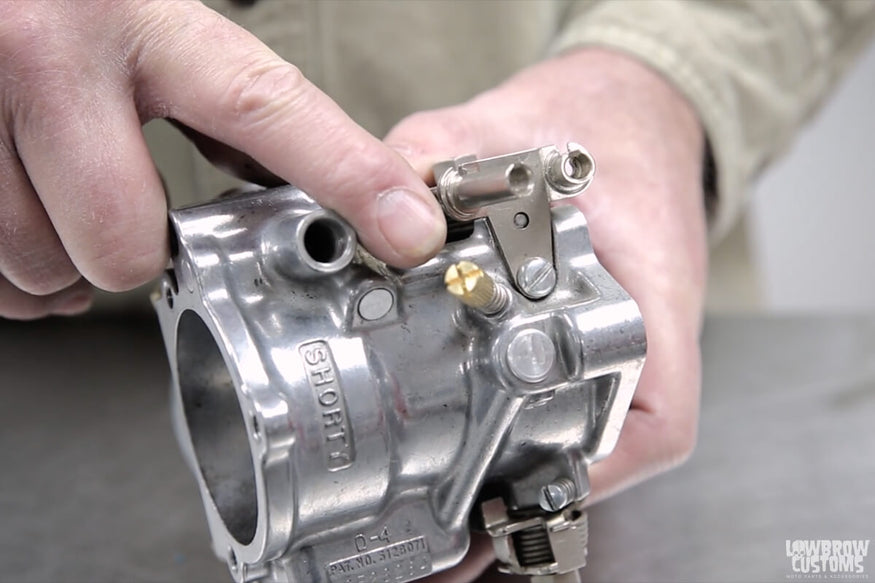 This is your air fuel mixture screw.
Step 2: Removing The Enrichment Device / Enrichener Knob
Okay, now that we've gotten that off we can see some of the other features of these carburetors, this large brass screw is going to be your air fuel mixture. Once again this is your enrichment, this is your throttle stop screw right here and this is your accelerator pump adjustment.
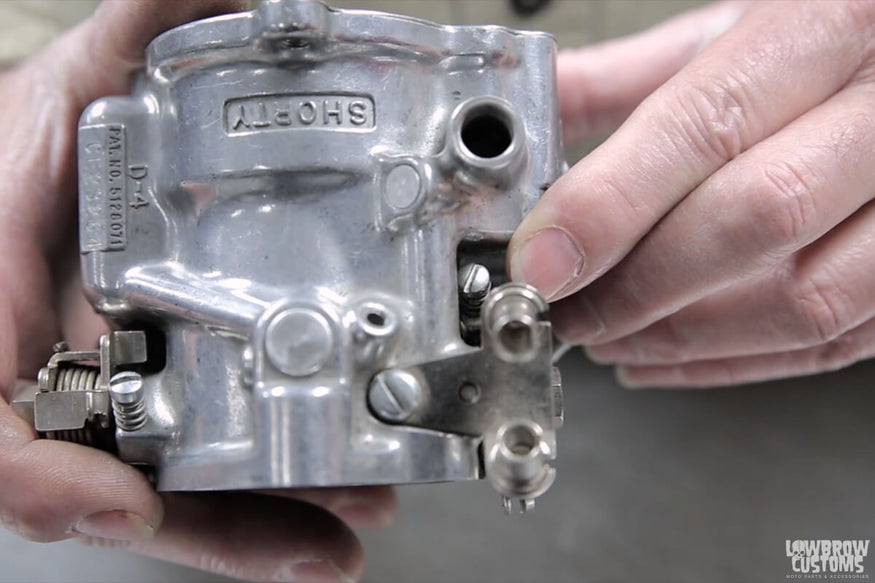 This is your throttle stop screw.
Very frequently when I worked at a Harley dealership, bikes would come in with these carbs on and the customer would say keep fouling plugs. A lot of times I would find that the customer thought they were turning their idle up when they were turning the accelerator pump adjustment upward, basically giving it a bigger squirt of gas.
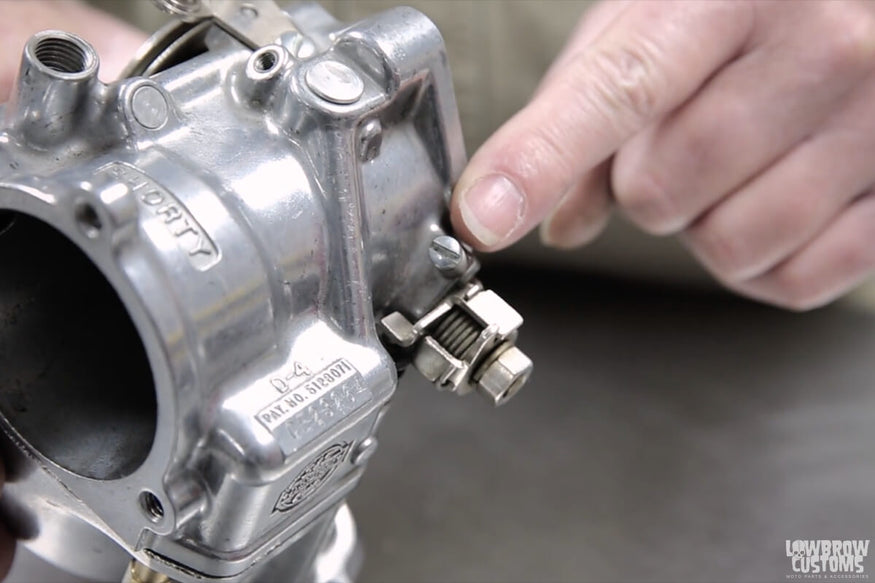 This is your accelerator pump adjustment.
The other thing I forgot to say about the enrichment is, when using these carburetors when you're starting your bike you want to-- it does have an accelerator pump so if it's an older bike, you want to give it a couple squirts before you turn your ignition on in a prime kick as is a very ritualistic thing to do with older bikes.
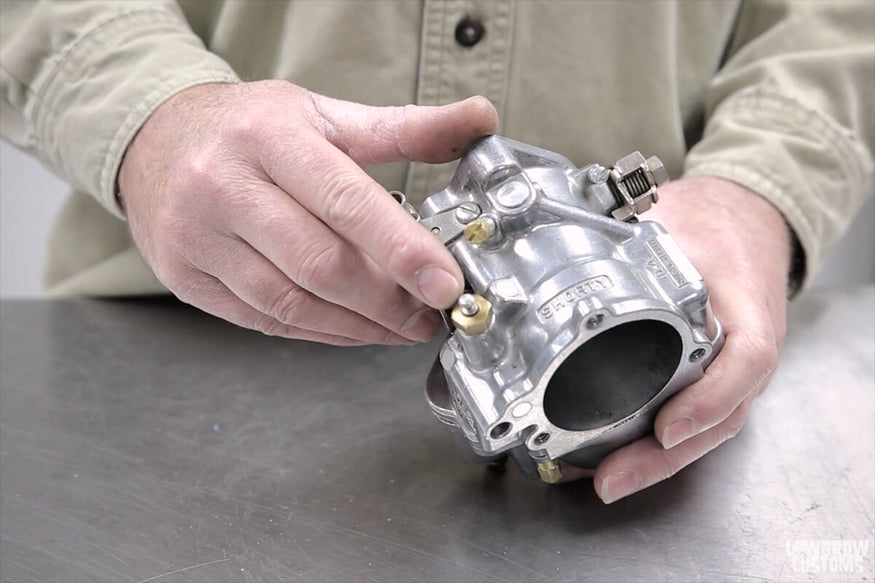 Your enricher nob location.
When you're using this enricher, once the bike has started, the enricher is in the up position you want to shut it off right away. If you do not it will more than likely fail your plugs within a matter of minutes because it's adding fuel to the mixture for startup.
The other thing I did forget to mention here is earlier, I did tell you about how we have this ball vent which is right here. That coincides with the hole on the stock backing plate right there.
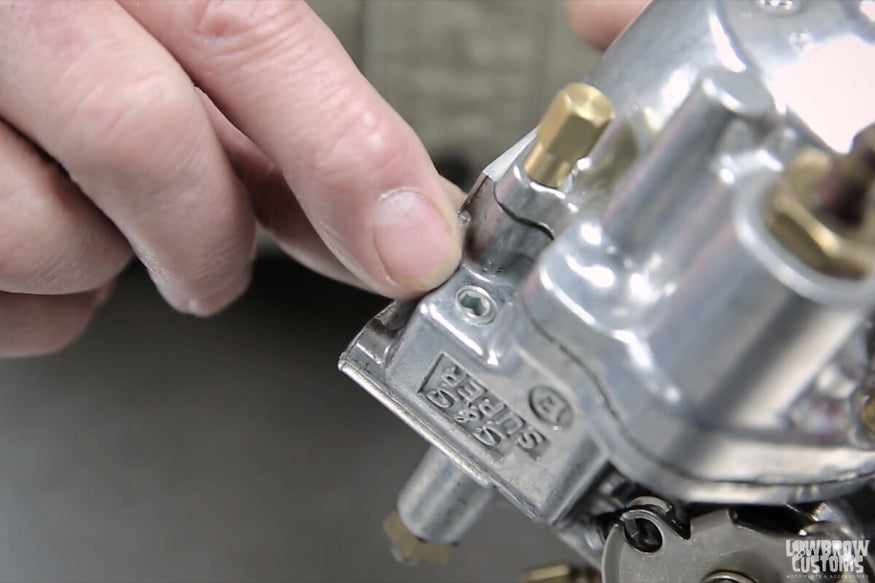 If your air cleaner is blocking your float bowl vent you can remove this fitting from the carb to allow to vent to atmosphere.
If you can see it on the other side there and if you remember I was talking about putting an aftermarket air cleaner on. You don't want to, if it does block that hole, you can remove this plug right here because, if you look down in there you can see that that passageway connects with this. If your aftermarket air cleaner is blocking that hole remove that plug, it'll still vent to the atmosphere.
We can go ahead remove this and take a quick look at that. As with any air fuel screw, it's going to have a tapered end on it and that's going to regulate the air fuel mixture. Supporting that the spring is on there keeps tension on the screw, so the setting doesn't go away, go ahead and take out the arrangement circuit.
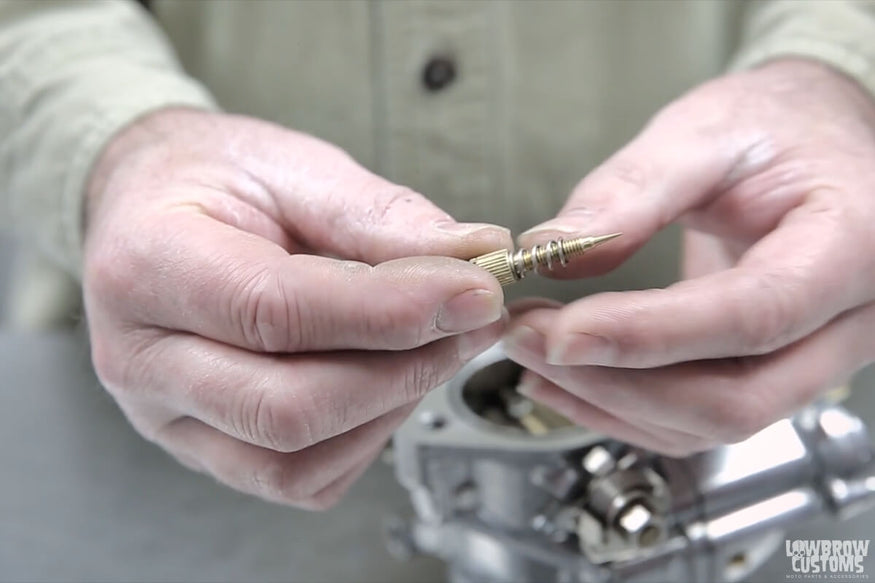 Air fuel mixture screw what it looks like out of the carburetor.
Half inch wrench. You've got spring and a plunger. Right now, that we have the stock in enrichener [sic] removed I'll show you how easy it is to put one of these lowbrow customs enrichners but basically has a knob and that will allow you to turn it on without having the stock backing plate we have those available in brass and chrome. Really simple thing to do, just threads in no big deal.
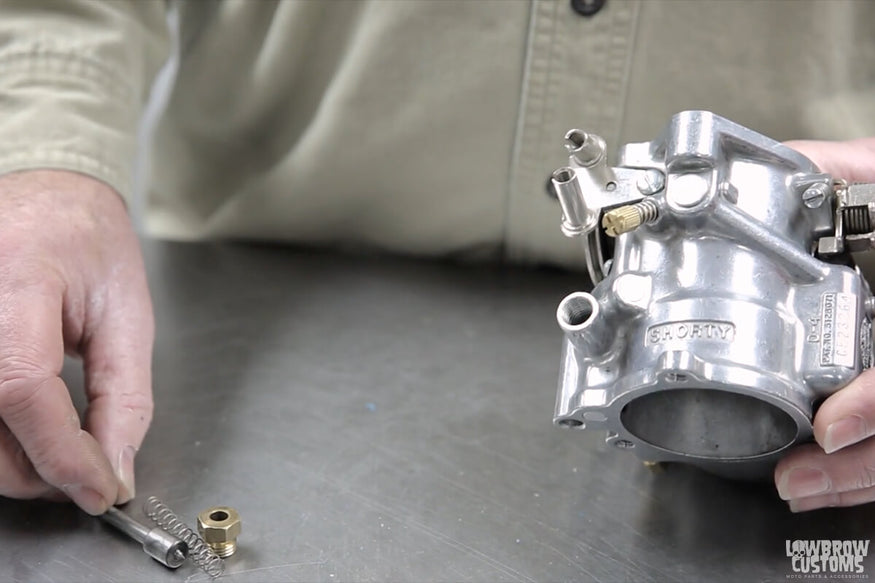 This is what the stock enricher knob looks like out of the carburetor.
See, there's the-- has a spring on it looks just like the stock part but it doesn't have the button for the lever. Now, the way this works is you're just going to pull it up and turn it and that opens up the enrichment circuit for starting purposes. Drop that baby in there, for a bit down, tighten it up, it’s all there’s to it, boom she’s on, off. Since we're going to be taking some more stuff apart I'll just pop that back off.
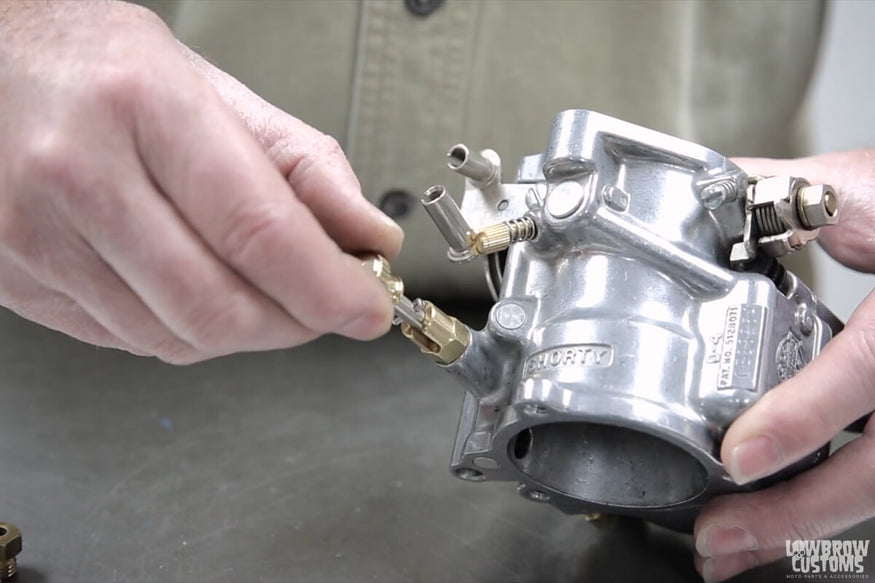 Todd showing how the Lowbrow Customs Enricher Knob works in place of the stock one.
Step 3: Removing The Float Bowl
Now, we'll go ahead and remove the float bowl, but before we do that, I'll show you how easy it is to change the main jet without removing the float ball. Basically, this is your float bowl drain plug, takes a 5/8 wrench and then you're going to pop that out.
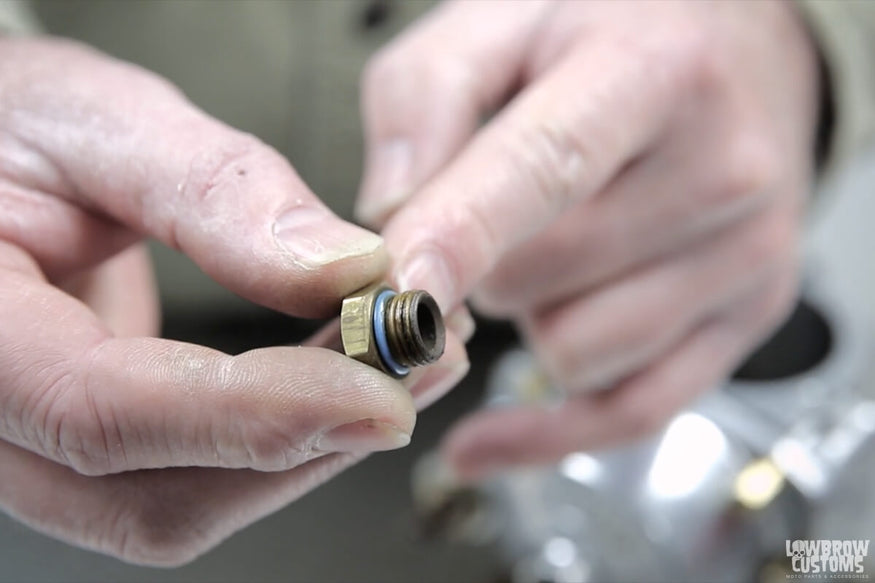 Note the O-ring and check if its in good condition.
Please note that it does have an O-ring on it that is required for it to seal. Then if you look inside the hole you're going to see the main jet looking at you. If you are just changing the main jet, you can just use a stubby screwdriver when it's mounted on the bike and unthread it. Still be a flat head screwdriver. There’s the main jet.
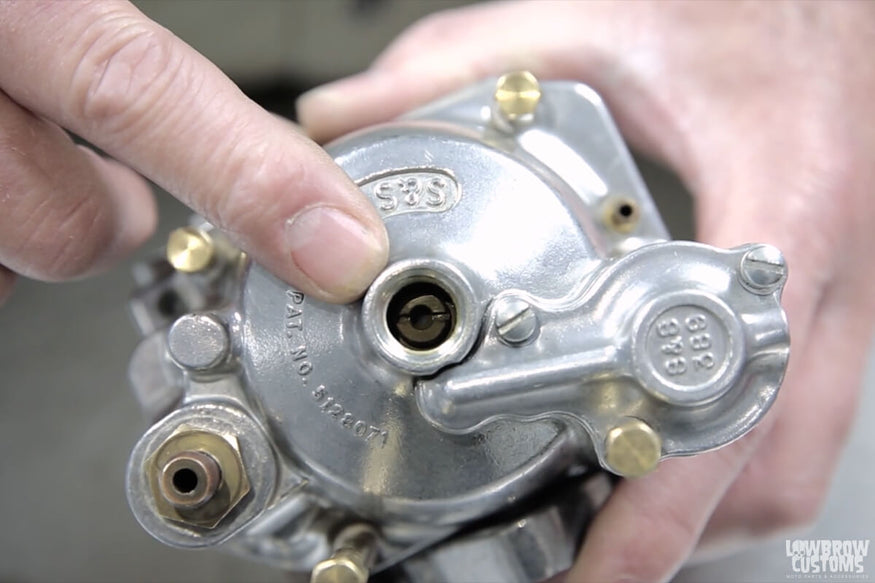 Main Jet location.
All main jets are marked on the side with what size they are. Okay, one other neat product we came up with here a lowbrow customs are these extended local screws normally they would just have a very short flat head screw in there.
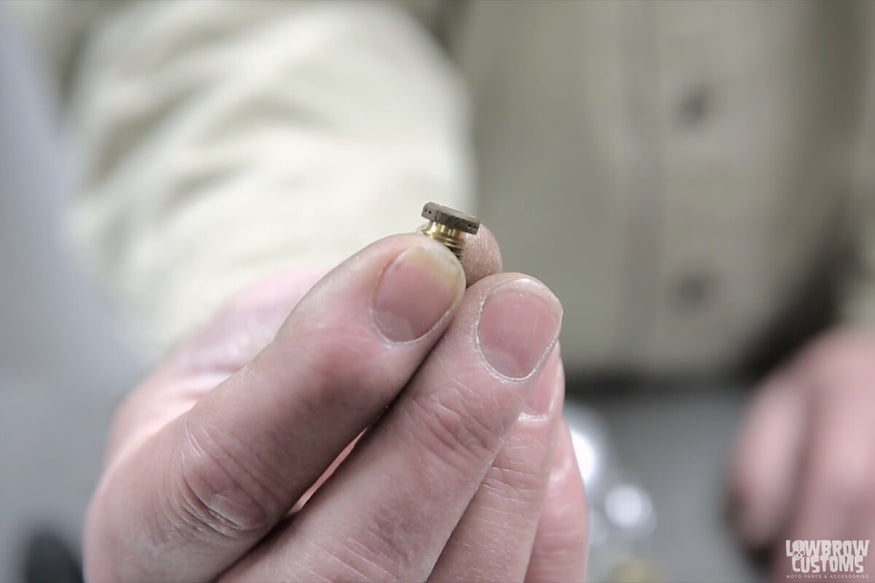 All Main Jets are marked by size.
When the carburetor is mounted on the engine, it can be very difficult to get to the back when you see it sticking down now it's going to be very easy to get to that with a wrench when the carb is mounted on the bike.
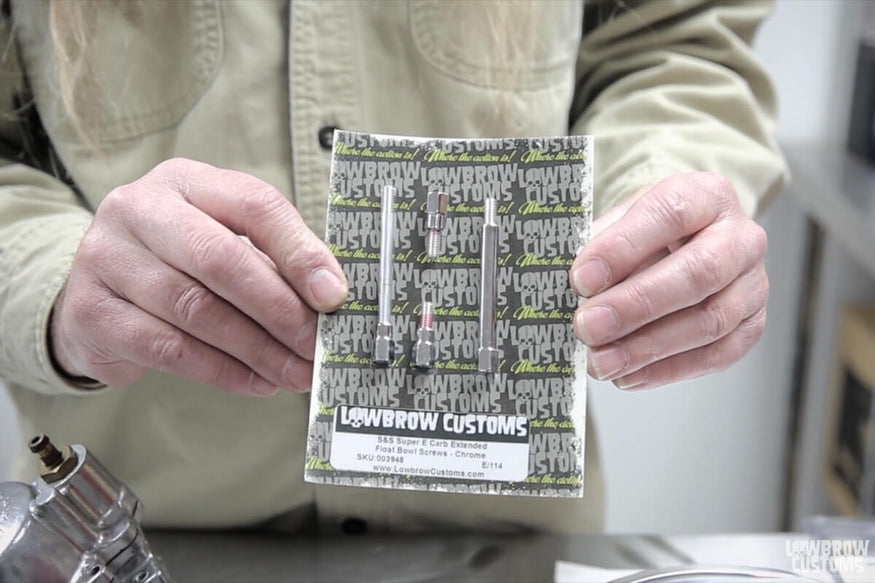 Lowbrow Customs Extended Float Bowl Screws save you time and frustration of trying to remove your float while the carburetor is on the bike.
If you're doing a jet change or checking your float level, it makes it much easier to remove the ball when it's installed. We do have those in brass and we also have them available in Chrome. Those are going to take 5/16, you can use a wrench or a socket, either way go ahead and take the ball off.
One other thing is your fuel inlet where you're going to connect your fuel line. We'll see what's happening inside here once we take this ball off, it will gain access to the other two jets that these carburetors have.
It will go ahead and pop football off. Okay, we will go ahead and concentrate on the ball for right now and then we'll switch back over to the carb body to show you the Jets.
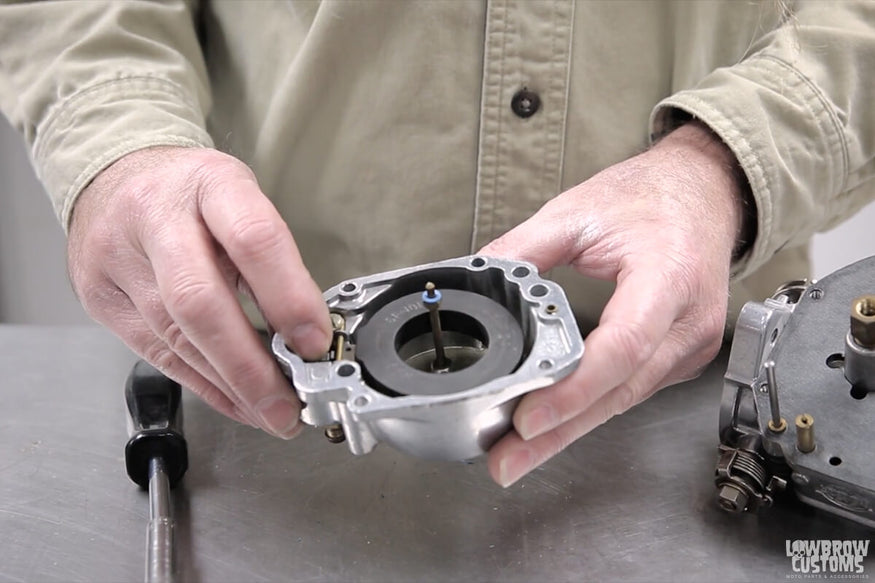 You can see the black circle is the float.
As you can see, here's our float, there's a screw that retains the pin for the float. It is very important that your float level is correctly set. There's also your float needle in there, which is connected to this tank. We'll go ahead and pop that off. Also notice this little O-ring here, very important that the O-ring is back on there and in good condition when you're putting your ball back on.
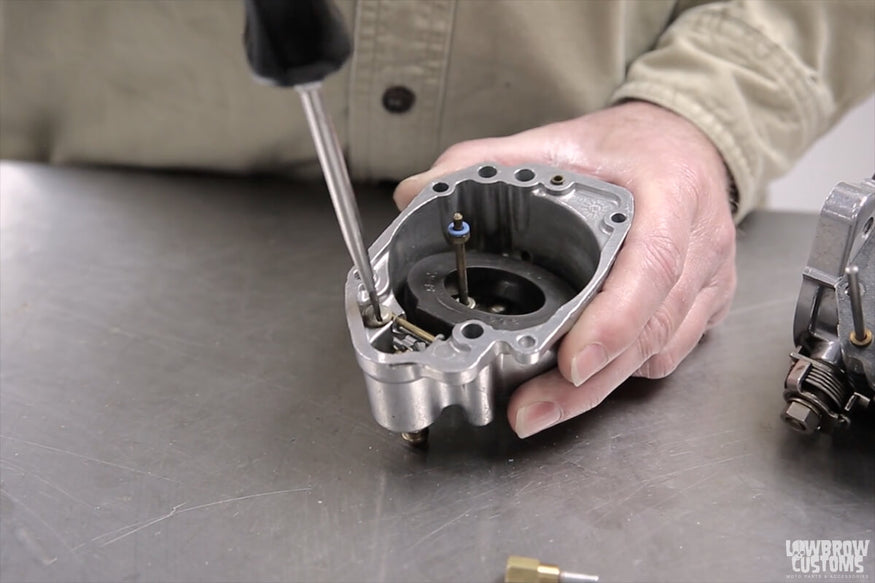 This screw retains the pin that holds the float in place.
Here's your float, your float needle which controls the flow of gasoline and now the ball attaches to that arm right there and it will cure this drops down. There's a seat on your inlet that just fits in there like that. As the ball raises and lowers as gas is being consumed by the engine, it just lets gas in or out of the ball.
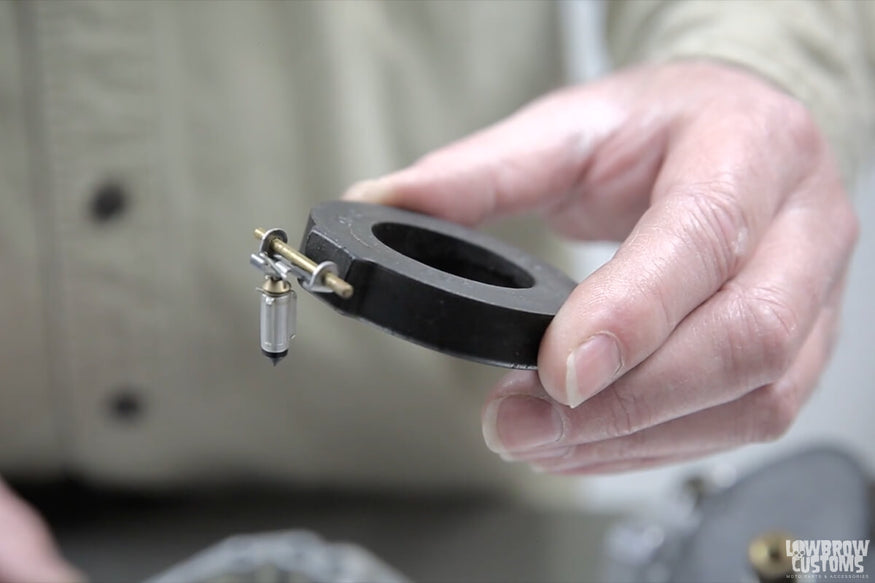 Here is the float needle which controls the amount of gas let into the bowl.
If your float isn't sucked correctly, you may find that you have a bunch of gas coming out of your overflow. That's a pretty good indication that your float is not sitting on here or there could possibly be just a small piece of dirt in there that came from your gas tank.
You'll notice there is no filter on this carburetor like some carburetors do have a filter that won't allow that, on this type carburetor it's probably is a good idea to have it inline filter either inside your gas tank at your valve or in the line going to the carburetor. Inline filter we have those available on the website if you need one of those.
This is your accelerator pump housing. One of the screws holds the ball to the body, there's only going to be two screws left once you have the ball off, go ahead remove these two screws and show you what we've got going on underneath here.
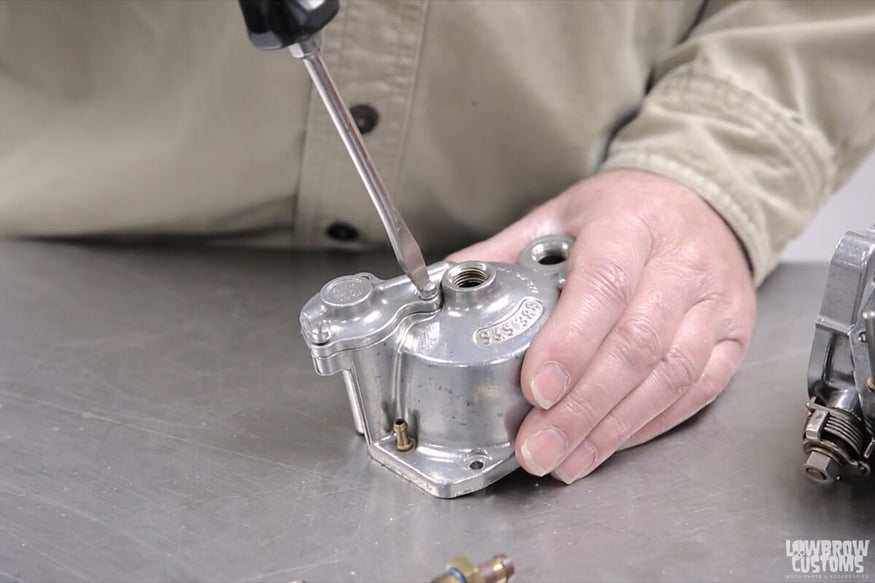 Two screws hold your accelerator pump housing.
Step 4: Checking Your Rubber Diaphragm
Okay there is a rubber diaphragm here that goes in conjunction with this lever. Basically when you're working your throttle, that's going down, when that pushes against this, it squirts some gas through these passageways and comes out inside the carburetor to add fuel. This needs to be in good condition, it is removed and it will come off of here.
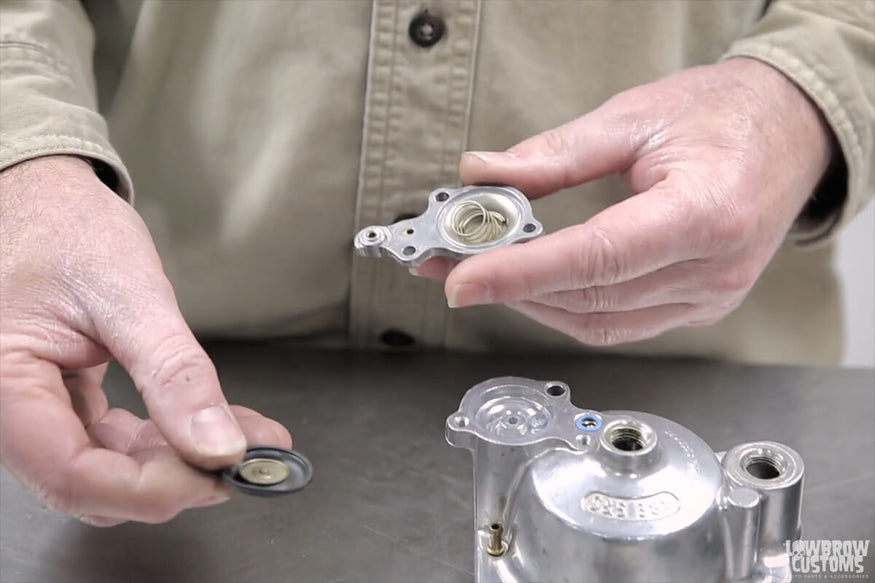 Rubber diaphragm comes out and inspect.
Notice there's a spring underneath it and there's a groove. It appears that when someone was working on this carburetor they slightly pinched the edge of that, probably wasn't causing any major difficulty but you can see that it now is deformed and not in the greatest of condition.
I have something to be aware of once servicing one of these carburetors or rebuilding it, it's a good idea to just go ahead and replace that when you're putting it back together you do want to be centered obviously you want to have the spring in there and then you want this to ride in that groove, when you put it together make sure everything's good and then you have a couple of O-rings here. It's imperative that those two O-rings are in those two locations and also in good condition.
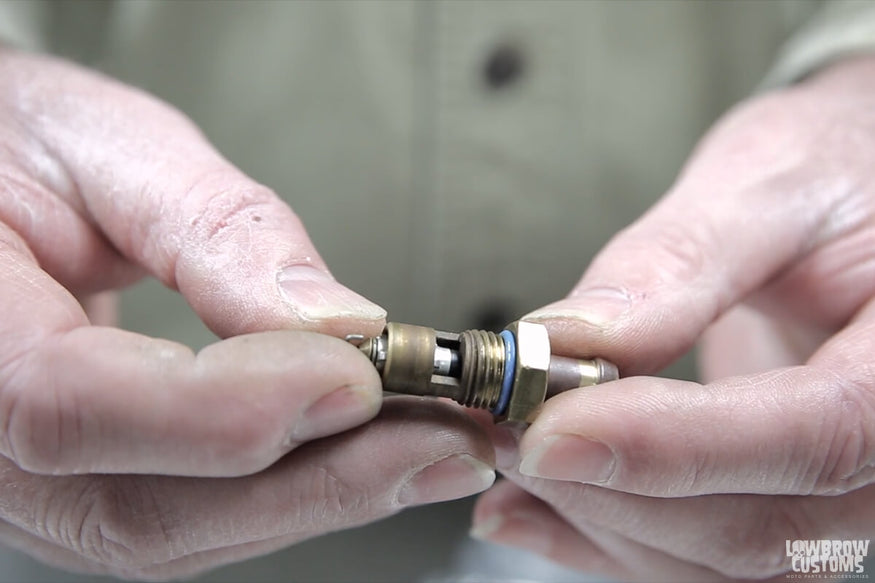 The fuel inlet, you can see how the needle works inside.
Again this is your fuel inlet, which also has an O-ring on it the same as the drain plug O-ring. Now that this is removed, we can show you how the needle sits in there like so. You can see that the needle is tapered, there's also a hole there that that tape rides on to seal it off once the ball is full.
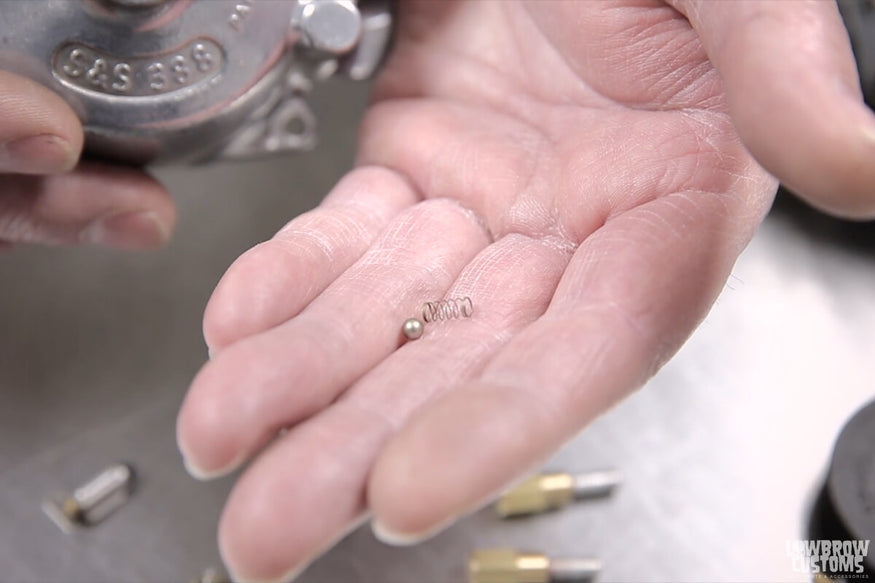 Part of the accelerator pump, this spring and check ball.
One other thing as my fine cameraman noticed while filming is he noticed that this tiny little spring and check ball came out of this hole when I took the ball off-- I'm sorry when I took the cover for the accelerator pump. That is going to go in this hole right here like so. Very important that those are in there, when you put the carburetor back together, basically it's a check ball system connected to the passageways on this.
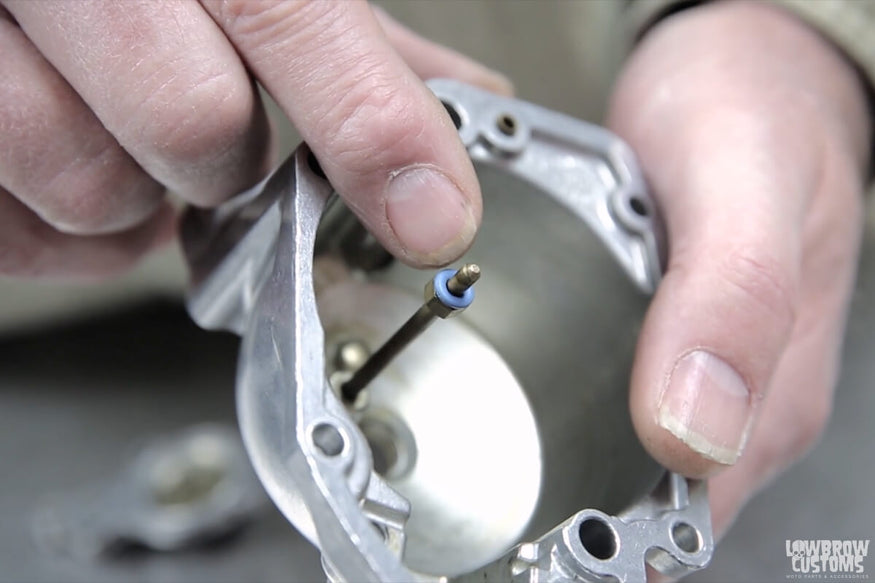 This is what sprays gas when you work your accelerator pump.
There it is again, we'll show you a close up of that. This nozzle with the O-ring on it is actually what sprays the gas, when you work the accelerator pump. See how it is connected to that passageway, comes up through here and sprays it into the engine.
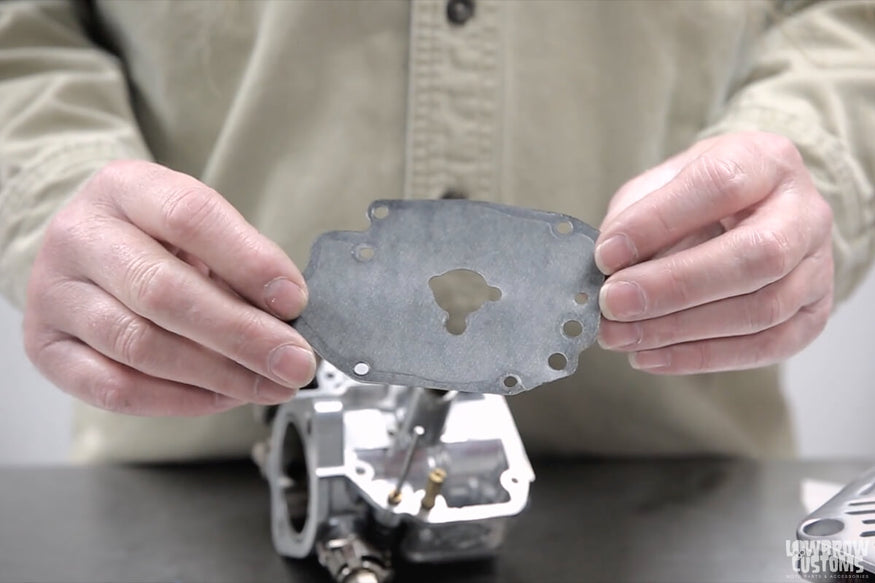 This gasket has seen better days.
Okay, it's also imperative that you have a good seal on your ball, if your gasket is old or distorted your paper gasket on the ball is not a bad idea to replace that. It's giving me a problem coming off, it was stuck on there, there's your old gasket.
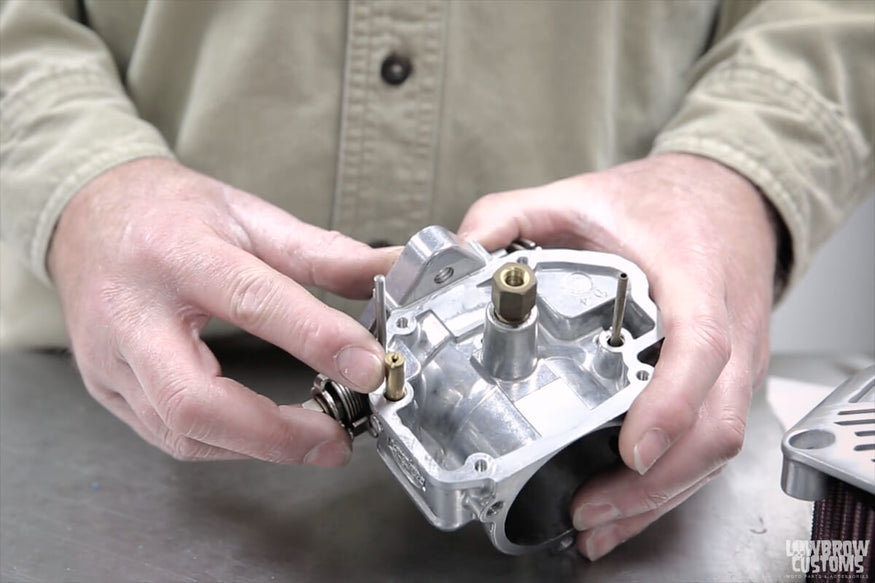 Intermediate jet location.
Then we have your intermediate jet which is right here, which is also removed with a flat head screwdriver. That wasn't very tight. Also has a size on it. This is a point .295, all have sizes but the only other thing I haven't taken out of here is the emulsion tube, which is just right here.
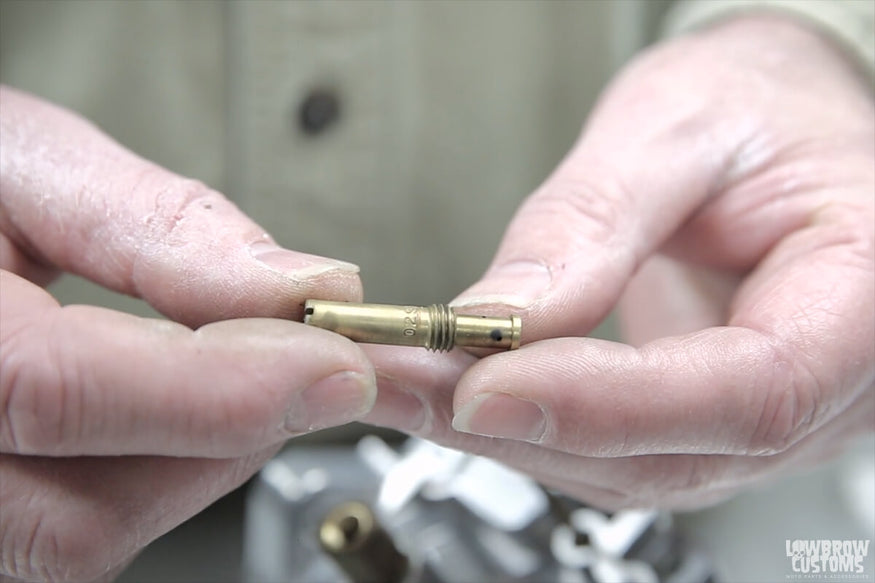 What the intermediate jet looks like, will have numbered labels on the side as well.
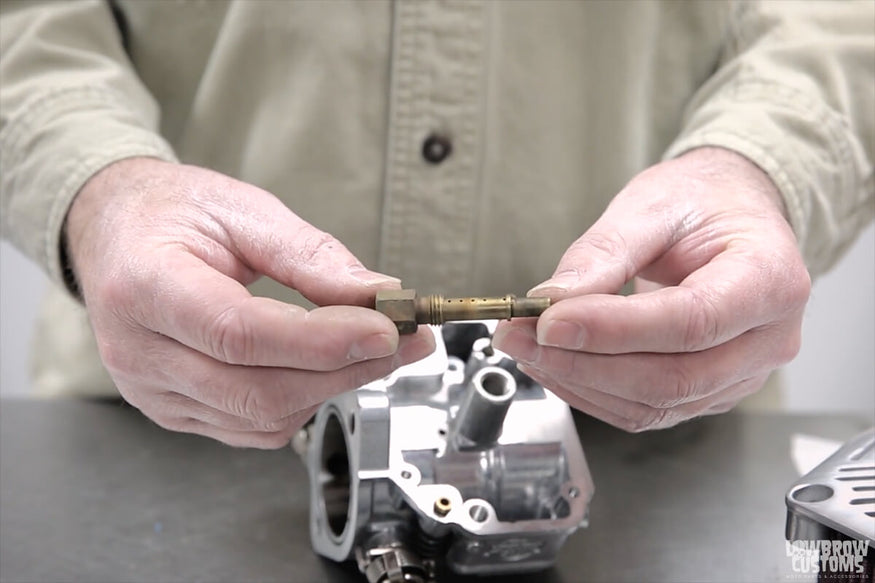 What the emulsion tube looks like when taken out.
Not a bad idea anytime you're cleaning the carburetor remove all the components to make sure there's no swarf dirt or anything stuck in there, if you are changing you can just remove the accelerator pump by pulling out the bottom, there is also a rubber little bellows thing that keeps dirt moisture out of there and you'll get those in a master rebuild kit.
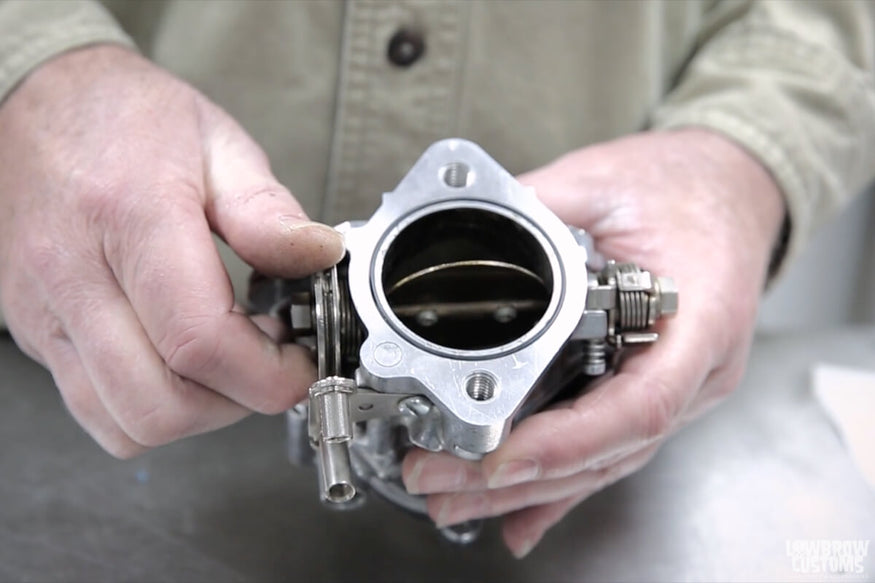 Butterfly, don't mess with it you don't have to.
Probably not a good idea to tamper with those two screws on this if there's no reason to remove this assembly here, a lot of these are pinned over on the back side and you will destroy things by taking those out, generally you can just open that up for cleaning purposes. This is a push pull type of throttle setup where you're going to have a two cable system on there, one opens the butterfly then one closes it.
Also a good thing to say that a stock Harley cable is not compatible with an S&S. Now if you are doing an S&S carb swap from a CV to an S&S on a modern Evo style motorcycle, you will need new cables. This is an O-ring that seals this to the manifold in conjunction with a gasket. Good idea to check that to make sure it's in good shape, it is very easy to change that out.
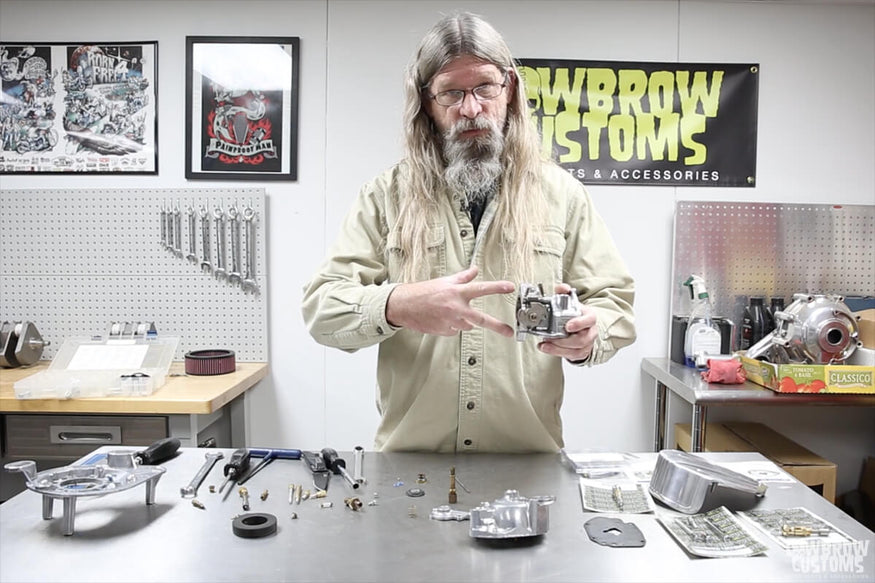 This is a flange style carburetor with two bolts that go into the manifold, you should use a carb support bracket.
We also have a master rebuild kit for these carburetors on our website that's going to come with all the fun parts we just talked about, this is a flange style mount where it's got two bolts going through the manifold and even though it is a flange mount where you're going to bolt this to if you are not using a stock backing plate if you are using an aftermarket air cleaner that doesn't affix the carb to the cylinder head sail like an EVO.
We also have this nice gas box parked here which is an S&S carb support bracket that will go from the bottom mounting hole on the manifold to the center ball on a big twin. It actually says it fits panhead shovelhead and EVO, most of the product works real well and you can run your hose through the center so it doesn't get on the hot cylinders.
 PEACE OUT MAN!
USING THE FAST EDDY CO. FLOAT BOWL DRAIN VALVE FOR S&S CARBURETORS
In this short tech tip, Chris Graves of Fast Eddy Co. walks you through how easy it is to drain your gas from your Super E / G / or B carburetor using his patent pending Float Bowl Drain Valve.
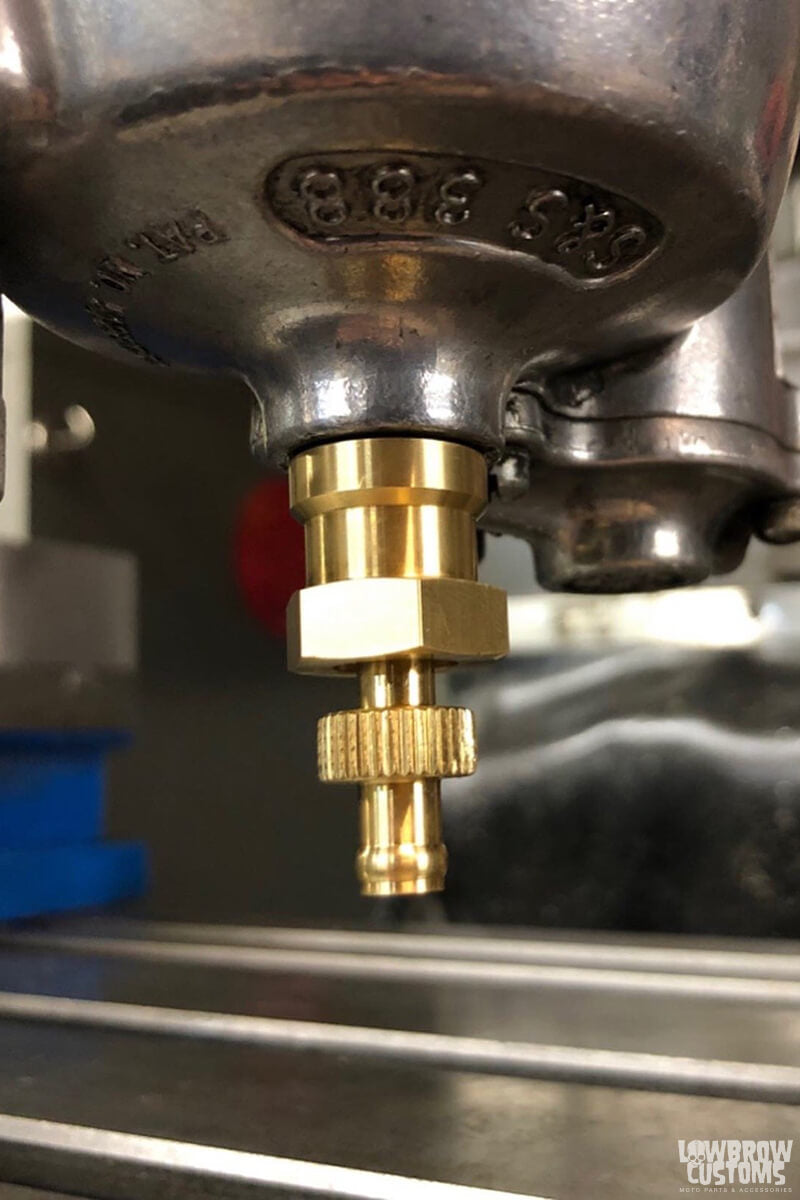
Fast Eddy Co.'s float bowl drain valve makes life easy and painless. You will never spill gas all over yourself and your motor again.
The new "patent pending" Float Bowl Drain Valve from Fast Eddy Co. makes winterizing your bike a breeze. It also makes it waaaay easier to service your carburetor.
If you've ever had to remove the bowl plug to drain your carb, you know how it's virtually impossible to catch all the fuel that comes rushing out once you pull the plug. You always end up getting gas down your arm and all over your motor's lifter blocks.
Not anymore - Just twist the valve open and catch it into a small container, all without spilling a drop. Then you can pull your float bowl, change jets, or complete whatever task you're trying to accomplish.
With ethanol content and other additives that are in fuel these days, most gasoline has a shelf life and requires the addition of a fuel stabilizer if you still want to be able to use it in a few months.
Additionally, this fuel can build up gummy deposits in many of the small passages that are in your carburetor (such as jets, accelerator pump nozzles, etc). Draining your carburetor is an effective way to prevent having problems in the spring when it's time to start your bike up again.
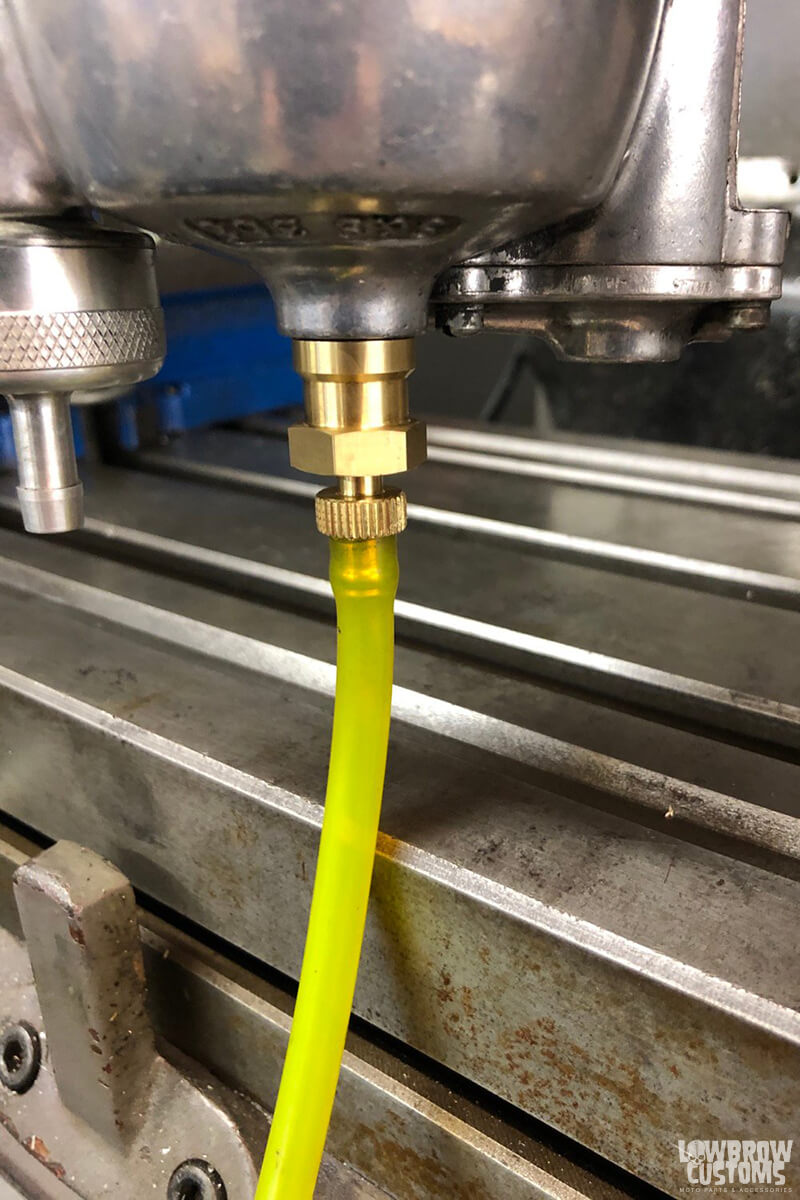
Adding a hose line to the bottom allows for easy drain into a container away from your motor.
WATCH VIDEO: FAST EDDY CO. FLOAT BOWL DRAIN VALVE OVERVIEW
Related Products


