WHAT TO LOOK FOR WHEN IT COMES TO CHOOSING A SPORTSTER GAS TANK
Changing the look of your bike drastically can be as easy as changing your gas tank or handlebars. Tyler gives you the knowledge on what to look for when it comes to choosing a Sportster tank (which are sometimes called a peanut gas tank) for yourself and what features to steer away.
In addition, Todd shows you how to use Lowbrow's gas tank adapter brackets, which allow a wide array of different style gas tanks bolt right up to your bike with no modifications needed!
In this article you will learn about the many options there are when it comes to customizing your 1986-2003 Harley-Davidson Sportster gas tank. Much of this info also applies to other year range Sportsters, though the parts used may not fit your year range if it is different than '86-'03.
WATCH VIDEO: SPORTSTER GAS TANK 101 - THE PARTS YOU NEED FOR A QUICK AND EASY TANK SWAP!
At Lowbrow Customs we offer a wide variety of Sportster gas tanks and we try to make it even easier for you to do change out on your bike with little to no modifications when utilizing our Gas Tank Adapter Brackets.
Tyler also covers just a few styles of gas caps we offer at Lowbrow Customs and the differences between them. In addition, he gives you the rundown about the differences between motorbike petcocks, pricing differences and even how to install NPT fittings correctly. Don't forget for a little extra reassurance while on the road, grab one of our Fuel Reserve bottles and Carriers because when you need it, you need it!
We've got a variety of tanks here and there's many more available at Lowbrow Customs that will fit your Sportster, but I wanted to go over a few in detail. Then also, we're going to talk about different style gas caps so you understand the difference between cam style, thread in et cetera and also different petcock sizes and thread in style so you need to know the parts you need to customize the Sportster that you've got in your garage.
TYPES OF SPORTSTER GAS TANKS
Stock Style 1986-2003 Gas Tank
This first tank is a Stock Style Harley Sportster Gas Tank 1986-2003, it's a bolt-on direct fit gas tank.
What's nice about this is it's a flat bottom, while a lot of tanks end up having a larger radius here, smoother looking at the bottom which is a more modern style. These are an excellent gas tank to replace your stock one.
It gives it a little bit more of a ic vintage style, or if your tank's damaged or you don't have one, whatever. You can see here, these are stock mounting points here, they will fit directly to your '86-2003 Sportster using all of the stock hardware.
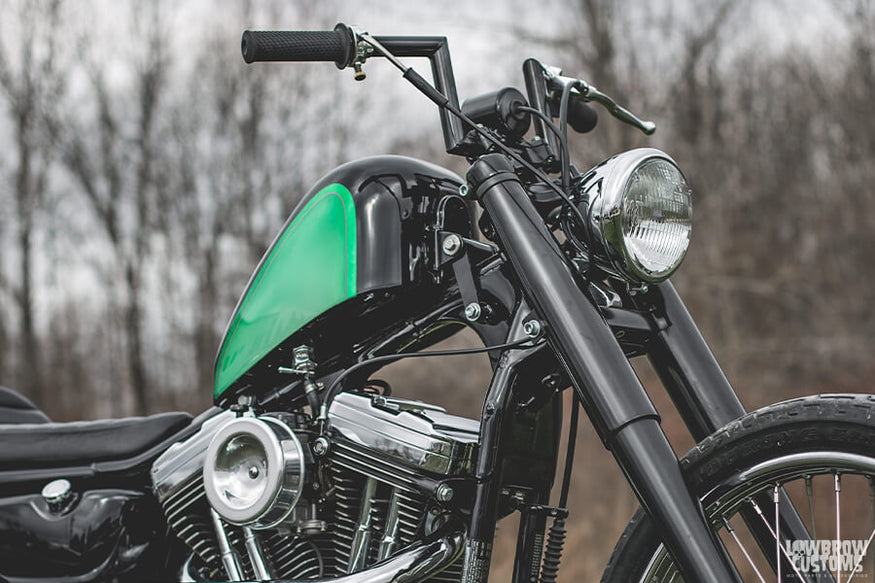
This gas tank actually comes with a full set of mounting hardware or you could reuse the hardware on your bike if you'd like. You can see the petcock bung here, that's what we call a 22-millimeter petcock bung which is a stock Harley-Davidson petcock. We can get more into that a little bit later. It also takes a very common thread in Harley style gas cap which would be '86 and up, though pretty much any aftermarket tank, they use the same filler.
That's your stock option. Excellent tank, looks great, easy to install. Something that we have exclusively at Lowbrow because it's our design, our gas tank adapter brackets. These fit the same year range, 1986-2003, and you can see the larger holes here for the rubber mount hardware. These come as you see them and you use your existing hardware to mount these to your motorcycle. What's interesting about these is the threaded holes.
Using these brackets, you can mount any of these three tanks and there's a variety of others at lowbrowcustoms.com. We will go deeper how to install these brackets in the section below.
Frisco Mount Sportster Gas Tanks
This is one of our most popular gas tanks. You can see it's actually using the same tooling as a shell of the stock gas tank but this is a Frisco mount. Frisco mount means that it's going to have a shallow tunnel and it's going to sit up higher on your backbone while a stock tank sits down low with the backbones deep into that tunnel. Something that I want to point out, these tanks, it's got Lowbrow Customs stamped right on the bottom.
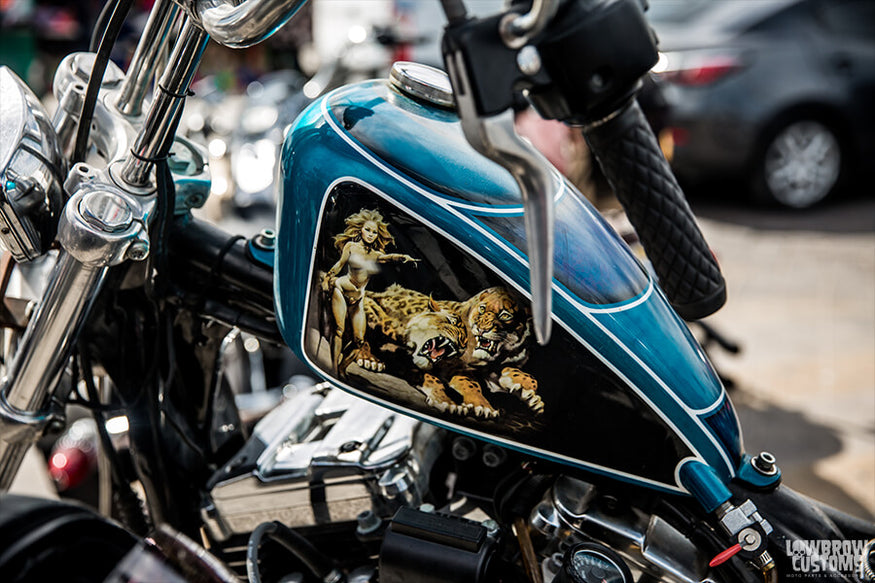 Here is an example of a Harley Sportster using the Lowbrow Customs Frisco Mount Sportster Gas Tank.
We don't just resell tanks, we spend a lot of money and a lot of time developing our own gas tank designs, so there's reasons that our gas tanks are different from any that you'll find from other people out there. For instance, on our Frisco mount gas tank, we've got the petcock bung, the 1/4" NPT petcock bung here at the back. Many other gas tanks, most that you'll see available, have the petcock bung in this area on either side.
The bad thing about that is when this is mounted on your frame and your petcock is way up here, that means all the gas in this rear section of the tank is unusable because the lowest point that gas is going to drain from is from up here. By putting this petcock bung way back here on a Frisco mount gas tank, it allows you to use all of your gas. We also on this tank move the filler from the center up to the far right.
That way when your bike is on its side stand, gas is going to leak out from the cap and again, with the tank mounted higher, it lets you fill up your tank further than if you have a standard center mount cap. Those are some of the details that we know because we build bikes, we chop bikes, we ride bikes that we know how to design a gas tank that actually works properly, that gives you the full capacity. This gas tank will bolt directly to a 1986-2003 Harley-Davidson Sportster using our gas tank adapter brackets.
This is the standard width tank, it gives you a little more capacity. We also have a narrowed one and then a super narrow.
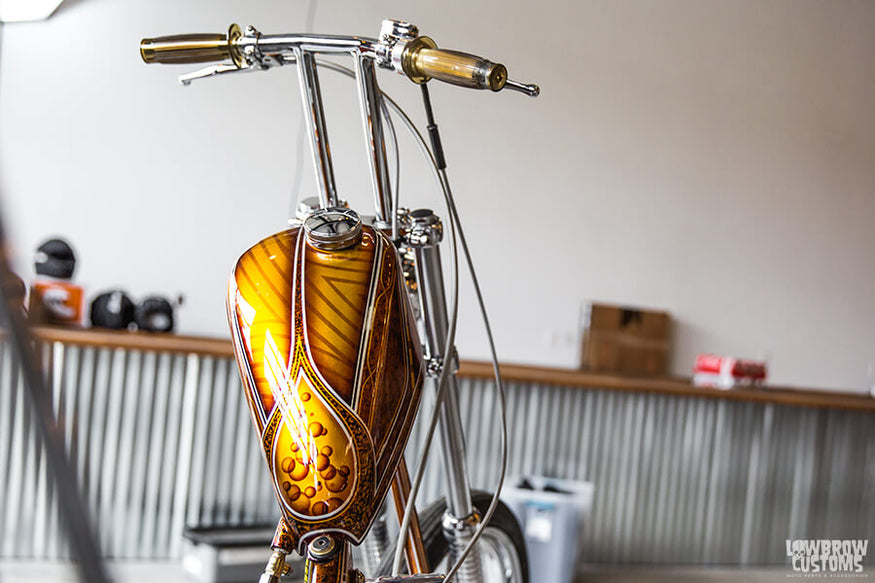 This Harley-Davidson Sportster is using a Lowbrow Customs Narrow Frisco Mount Sportster Gas Tank.
Depending on what profile you're looking for, we've got a variety of tanks that will bolt directly to your Sportster. If you are concerned more about these tanks, see our post how to install an ignition switch on Frisco Sportster Tank. Everything is step by step instructions.
Axed Gas Tank
Moving on, this is a traditional gas tank called an axed gas tank, or sometimes referred to as an alien head. You can see there with the filler are the eyes, they're on the alien if you didn't know that. This tank will also bolt directly to our '86-'03 gas sink adapter brackets.
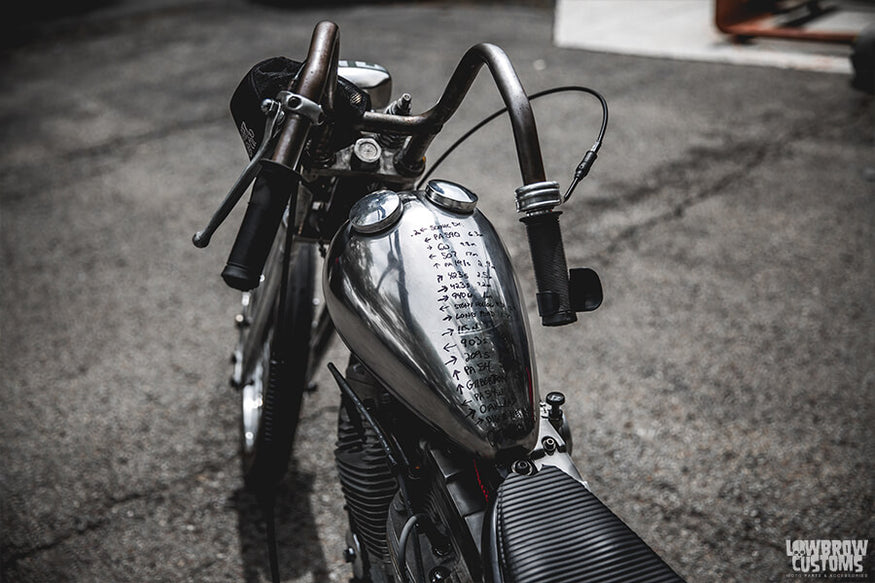 Axed Dual Cap Gas Tank on his Sportster chopper. (GPS Not included).
This one has a deeper tunnel and it's got two different petcock bungs, gives you an option. For left or right side, you've got a 3" NPT and 1/4" NPT whichever petcock, whichever side you decide to run it on, you would just plug the other side with a pipe thread plug which we have available at Lowbrow Customs or you can find it at a good hardware store.
King P-Nut Gas Tank
The fourth tank I'm showing you here, this is a Lowbrow Customs King P-Nut tank. We've got a line of P-Nut gas tanks we've been making since 2010 that are very popular. Excellent tanks, but they don't fit well on a late model Sportster. This tank has a wider tunnel and tabs at the proper dimension to work with our gas tank adapter brackets.
Again, because this is a Frisco mount tank and it sits high in the backbone, we have 1/4" NPT petcock bung here at the rear and the filler cap which is included with this tank is way upfront.
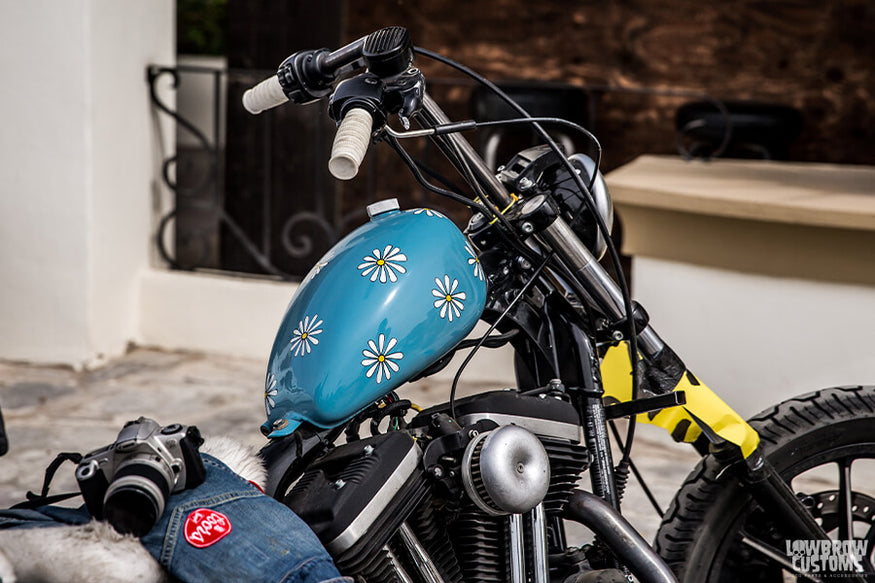 King P-nut Gas Tank to fuel injection using our Weld-in EFI plate for her 2017 Iron 883.
This gives you the most capacity you can get out of this size tank. That will again bolt directly to an '86-'03 Sportster with no modifications to your frame. You can always unbolt the tank, unbolt the adapter brackets, put your stock tank back on and put it right back to how it was.
SPORTSTER GAS TANK ACCESSORIES
GAS CAPS
That's a little overview of some of the styles of tanks that we have. I want to discuss quickly the different style motorcycle gas caps available. Many tanks are going to have a Harley-Davidson thread in style filler, and we have a few versions here of caps.
Black Chrome Cap
This is a black one, also available in chrome. These are inexpensive, common just like a stock OEM Harley-Davidson cap. These caps ratchet, you can tighten it down till it clicks, undo it, vented, they don't tend to leak, great all-around cap design.
Solid Brass Dome Cap
This is the same style of thread in but this one is a Lowbrow Customs USA made machine cap. This is a solid brass dome cap, same exact deal that- these don't ratchet but you just go ahead and snug it down. It's vented, it works perfectly on your Sportster. Also available in aluminum.
Investment Cast Aluminum Finned Cap
Here's another Lowbrow Customs cap. These are an investment cast aluminum finned cap and again, fits the same style bung. These ones ratchet and the ratcheting mechanism allows you to tighten it and then back it. If you're OCD and you want those fins to line up perfectly, you simply tighten it and then put it right back where it goes and you're good to go. Really neat looking cap, available in polish as well as black.
Cam Style Cap (Bayonet Cap)
That's it for the thread in caps, they're pretty straightforward. The alien head tank has what's known as a cam style cap, or uses a cam style cap also known as a bayonet cap. This is earlier Harley-Davidson styling. You can see the underside of the bayonet cap there and the difference in the bung and how it looks. This is a vented cap, really basic. Just push down, turn and that's it.
On these dual filler alien, it's also available in a single filler version, but the left side's a dummy meaning it looks like there's a filler there but you basically put the cap on and leave it on. That's when it's on the side saying gasoline is not pouring out of the filler. If you're looking at a gas tank and it says it takes a cam style or a bayonet style, that's the style cap you want.
Thread in, we've shown you very common and widely available. Then in the case of the King P-Nut, the cap is included. It's a 1 5/16-12 thread filler cap and we do have a variety of different style caps available that'll fit this tank that's the same size as a filler on Lowbrow Customs oil tanks and Mooneyes oil tanks.
PETCOCKS
There's interchangeable cap options available. Talking about motorcycle petcocks, petcock is simply a fuel valve. It's just on and off valve. It's when you're not running your motorcycle, it's how you keep gas from leaking into your carburetor. It's just a fuel valve. There's different options available. It's not that daunting, I'll go over them with you now.
22-millimeter Petcock
These petcocks work well. Generally, we don't have any problems with them. They can leak eventually. We have midpriced options and then you get to the high-end options like a Pingel or a Golan petcock, which are great and essentially are going to be trouble-free and last your whole life, but are over $100. It just depends on what you're looking for.
This petcock though, to show you this is- it's got a filter screen on here. There's a stand off tube because there's a reserve. If you're running your bike on reserve, what that means it'll start sputtering for running out of gas and you can go to on. It starts bringing gas in from the hole that's here and that gives you that extra half a dozen miles or what-have-you to get to a gas station before you run out.
This petcock fits this tank here, this stock style tank. You can see that style 22-millimeter petcock bung and it simply slides in there and tightens on with a wrench, very straightforward.
1/4" NPT Petcock
Now, if you are running a tank that says quarter NPT, that's National Pipe Thread, which is a tapered thread. If you look closely at this and it's also, 1/4" NPT is larger diameter than actual 1/4" but you can see there's a taper to it. NPT-threaded bungs tighten as you go in. You're not necessary trying to bottom those threads out, you just want it to get in there nice and snug and tight so it doesn't leak.
Some people run tough line tape on the threads. I like Hylomar or something specific like that which is a fuel resistant thread sealer, but you're going to tighten that petcock in there. You can carefully get a wrench onto a body like this but you definitely don't want to over tighten it or you'll snap your petcock off. Also, you want to be aware when you're tightening it up that you stop at a point where you want the handle or the outlet.
This is a 90-degree petcock and I would be running a straight out petcock on this tank, for example, but you don't ever want to tighten it up and then back it off because then you're going to get a leak. With a tapered thread like that, think while you're doing it, don't be looking over your shoulder BS-ing or drinking a beer or something, get it snug up right where you want it to ensure you don't get a leak. Then in cases of the axed tank, there's two different sizes.
3/8" NPT same exact idea as the 1/4" NPT, it's just a larger diameter. Same thing though it's a tapered thread. You don't want to over tighten and have to back it off, nor do you want to over tighten it to the point that you fricking rip your tank in half or snap the petcock off. Just something to keep in mind. That pretty much covers all the basics.
If you're looking to change the look and style of your '86 to '03 Harley Sportster, this will give you all the basic knowledge to get you started and know what you need when you're purchasing a gas tank. What features to look for, what features to avoid, what petcock you need, what gas cap you need. Another thing I wanted to mention, it's not a gas tank but somewhat related. We've been making fuel reserve bottles for many years.
FUEL RESERVE BOTTLES
Fuel Reserve Bottles and Carriers are very handy on any motorcycle honestly because when you need it, you need it but you can have some extra fuel in hair here. It saves me all the time. I know many other people, same thing it saves you from walking or hitching a ride. We also have our fuel reserve bottle 2.0 carrier, super simple, cinch top, molle webbing on the front here, nylon strapping. You can mount that to a shock. You can mount that to a fork tube.
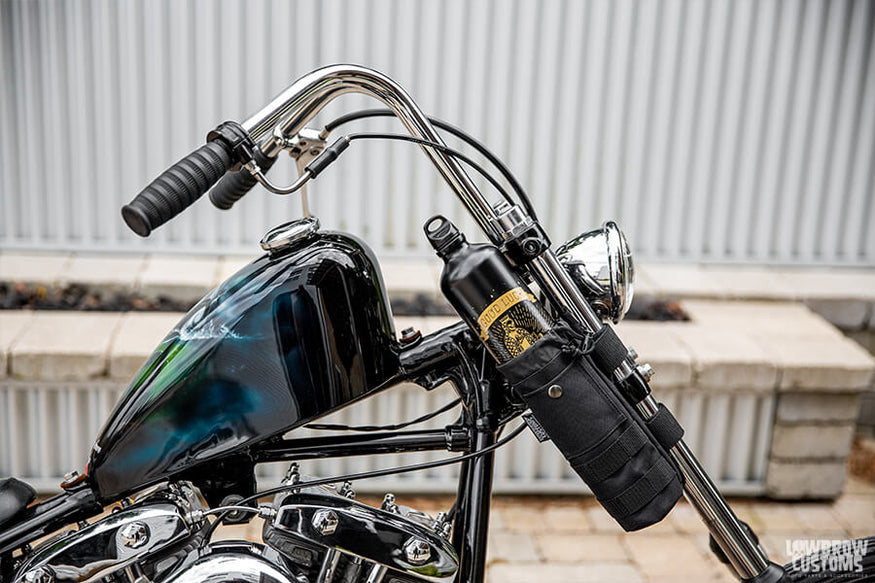 Lowbrow Customs Good Luck Fuel Bottle and Carrier 2.0 combo will give you a peace of mind and will save you on the road from having to push your bike to the next gas station.
You can put a carabiner on it and throw it on your bag. Extremely easy fast convenient to stow and it's very cheap insurance. Like I said, when you need it, you need it.
WATCH VIDEO: HOW TO INSTALL SPORTSTER GAS TANK ADAPTER BRACKETS
Gas Tank Adapter Brackets from Lowbrow Customs allow you to mount a custom Sportster Gas Tank (or universal chopper mount gas tank) on your 1986-2003 Harley-Davidson Sportster with ease. Everything just bolts in place, no welding or fabrication required!This way you could change your motorbike gas tank or go back to your stock gas tank with ease. This is an exclusive Lowbrow Customs design, made in the USA. If you just start customizing your gas tank, see our post how we narrow the gas tank with ease. Everything is step by step instructions.
This is how to use our gas tank adaptor kit for modern Sportsters. These will fit '86 to '03 Sportsters and enable you to put a custom style gas tank on your Sportster without any drilling or welding to your existing frame which is nice, you don't have to repaint or do anything like that.
Step 1: Remove the Gas Line from the Fuel Valve
First thing we want to do is remove the gas line from the fuel valve. I like to use a nut driver instead of a screw driver, got a quarter inch nut driver here for the hose clamp. It's also a good idea to make sure that your gas is shut off if you don't have a vacuum fuel valve. I also like to use these little pliers here to pull the line off, that way I don't get gas on myself.
Step 2: Remove the Bolts
And there we go. I've got a quarter inch allen wrench, half inch drive socket, stock fasteners we'll have the quarter inch hex fastener. The front one on this has half inch on both sides, the fastener has been replaced. This particular gas tank that's mounted on the bike right now has our gas box tank lift kit installed. And your stock hardware from your motorcycle will work with these after brackets.
If you do have a vacuum type fuel valve you'll need to remove the vacuum line from the backside of the fuel valve. Majority of the tanks we stock will accept a 22 millimeter or a quarter inch NPT, and the majority of the valves we have in our store are going to be the non vacuum type. The vacuum line is not needed if you're going to put a different valve on as long as you're using a vented gas cap. We've got the two bolts removed, just going to pop this tank off of here.
Step 3: Install Adapter Brackets
These are pretty easily identifiable; the rear one will have two different mounting locations to allow you to put different tanks on there, and the front one just has one hole, these are 3/8 16 fasteners, this one's going to go on like so, with the larger portion facing rear. For the gas tank we have a alien center fill gas tank that we have available on our website store, and this one is going to work perfectly as long as we put the bracket with the long side facing towards the rear.
- You can remove the rubber grommet and the washers from your stock tank, and
- Then you'll just push the rubber grommet into the new bracket, slide the washer that's got a step on it onto the adapter brackets and
- You're going to reuse those parts off your bike.
- I'm going to go ahead and pop those on there like so. Put your stock bolts back in.
Step 4: Double Check to Get Fasteners for the Brackets
Go ahead and put your stock fasteners back on there, we'll go ahead and snug those up. Helps if you have the right end of the wrench. We'll just try, I'll fit the tank one time real quick to make sure we have this in the right place. Notice how the new adapter brackets line up with the tabs on the gas tank.
After looking at the way the adapter brackets are bolted onto the frame I think it might not be a bad idea if you grab yourself a sharpie and roll these to where you can just visibly see the hole where the threads are, because you only have so much amount of room on the tab for the head of your bolt you could always use a socket head bolt, you don't have to use a hex head.
- Basically put yourself a mark front and rear on those tabs.
- Then you're going to want to take the tank off. We had a center to center measurement on the threaded holes of 16 and half inches.
- Then you could go over to your tank and mark the bottom at 16 and a half inches.
- Then double check your marks so that you're to be sure that you're going to have room to get your fasteners into the front and rear of the tank for the brackets.
Anytime you're drilling a hole on something like this it's always a good idea to use the center punch that way the drill bit doesn't wander when you start to drill it. It's also a good idea to start with a smaller drill bit, it's easier to drill a small hole that'll get you nice and centered where your center punch was, and then move up to a larger size up to your 3/8 hole for mounting the tank. I did mention that these tank at 3/8 16 fastener it's probably a good idea to figure out what length you're going to need.
I personally myself like to put some type of cushioning anytime it's a metal to metal situation even though we do have some rubber mount there. I don't think it would be a problem to mount it directly to there, we do offer some leather washers in our store that I generally will use on a metal to metal situation.
Depending on if you're going to put some cushioning under the tabs in between the new brackets, you're probably going to need a bolt that's approximately half inch, maybe three quarters of an inch long, you don't want the bolts running into the frame then you won't be able to tighten them down correctly.
That's about all there is to it, thanks for reading. If you'd like to read more blogs about motorcycles, see our motorcycle how-to guide blog collection.
Related Products


