TABLE OF CONTENTS
- THE SATURDAY SPORTSTER SEASON 2
- WHAT PARTS WERE USED TO BUILD THE SATURDAY SPORTSTER IN SEASON 2?
- TIPS FOR BUYING A USED HARLEY SPORTSTER
- Saturday Sportster Season 2 Episodes
- WATCH EPISODE 1
- WATCH EPISODE 2
- WATCH EPISODE 3
- WATCH EPISODE 4
- WATCH EPISODE 5
- WATCH EPISODE 6
- WATCH EPISODE 7
- WATCH EPISODE 8
- WATCH EPISODE 9
- WATCH EPISODE 10
- WATCH EPISODE 11
- WATCH EPISODE 12
- WATCH EPISODE 13
- WATCH EPISODE 14
- WATCH EPISODE 15
- WATCH EPISODE 16
- WATCH EPISODE 17 - SEASON FINALE!
THE SATURDAY SPORTSTER SEASON 2
In Saturday Sportster Season 2, follow along with Tim Fiorucci as he turns a 1969 Harley-Davidson Sportster XLCH into a ground-up custom chopper!
The first episode premiered on Saturday, March 25th, 2023, with a new episode following every-other Saturday.
You can view the YouTube Playlist for Saturday Sportster Season 2 right here for easy viewing. Be sure to subscribe to the Lowbrow Customs channel so you know each time a new episode drops!
Also, like our videos, leave a comment and let us know what you thought of the episode, every bit of interaction helps us get our videos out there more!
WHAT IS THE SATURDAY SPORTSTER VIDEO SERIES?
The Saturday Sportster video series was born of our desire to share the knowledge we have about building bikes with the rest of the world. Taking a stock motorcycle and turning it into the custom bike of your dreams, using your own hands, skills and knowledge, is a wonderful feeling that sticks with you, potentially life-long.
The Saturday Sportster Season 1 with Todd Muller was a big hit. In season 1, Todd built a hopped-up, 1250cc scrambler out of a stock 2003 Harley-Davidson Sportster 883.
We are super excited to release Season 2, and we are already about to start filming Season 3!
WHAT PARTS WERE USED TO BUILD THE SATURDAY SPORTSTER IN SEASON 2?
Interested in how to build a custom Ironhead Sportster, and what parts to use on your build? Well, you made it to the EXACT right place :)
Watch the Saturday Sportster Season 2 and follow along! You can find all the parts used when building the Saturday Sportster in this season right here.
TIPS FOR BUYING A USED HARLEY SPORTSTER
For Saturday Sportster Season 1, we picked up a 2003 Harley-Davidson Anniversary Edition 883 Sportster for relatively cheap.
For Season 2, we started with a frame and engine, and gathered up some stock wheels and other parts we needed for the build.
Whether it is a complete, rideable bike, or a pile of parts, we are no strangers to buying used motorcycles. In this Video: Guide for Buying a Used Harley Sportster, Todd walks you through the entire process he personally uses when evaluating a used bike he is interested in buying.
Saturday Sportster Season 2 Episodes
WATCH EPISODE 1
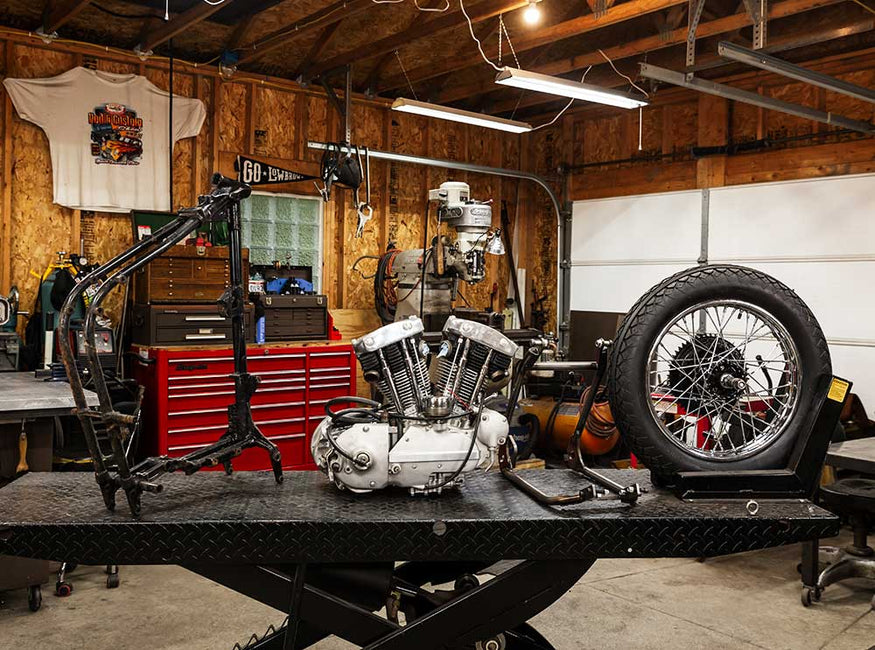
Whoa! It's another season of Saturday Sportster, and this time it is a hardtailed Ironhead Sportster edition! Tim Fiorucci of Fiorucci Fabrications hosts our latest build series, walking you through how to build a 1969 Harley-Davidson Ironhead custom chopper from start to finish. It is absolutely jam-packed with great info, how-to, and good times.
Starting off with just a motor and frame, Tim utilizes a ton of Sportster chopper parts from Lowbrow Customs to show you how to build a killer chopper all by yourself, and for yourself, on a series of Saturdays. This series does step up the fabrication a notch, but never fear Tim walks you through exactly what to do.
So break out those tools, grab your favorite beverage and let’s get after it! It’s Saturday Sportster Season 2 - Lets Go!
WATCH EPISODE 2
Roller status here we come! It's only the second episode and this Ironhead is already a hartailed roller! In this episode Tim walks you through how to assemble the front end, including some really trick Fork Co. narrow handlebars and risers. They not only look great, they also allow him to push the bike around the shop easily!
Tim also fights an old chain breaker tool as he walks you through how to cut and install a 530 drive chain so it is just the right length and fits perfectly. Now what to do about the oil tank? Oh Gasbox makes a horseshoe oil tank that bolts directly on, with ease. Tim shows you just how easy it is to install.
Saturday Sportster Season 2.... Lets Go!
WATCH EPISODE 3
Awwww yeah, break out those welders because it's time to get some fabrication goin on this build!
Luckily for you, Tim has countless builds under his belt. He shares his knowledge, tips and tricks on how to make that fender sit perfectly and secure over the rear wheel.
Tim walks you through step by step on how to mount a rear fender utilizing a Lowbrow Customs Manta Ray 4-3/4" fender, fender tabs, bungs, and a Gasbox DIY Chopper Sissy bar.
Saturday Sportster Season 2.... Lets Go!
WATCH EPISODE 4
There are many different ways to mount a gas tank, and in this episode Tim Fiorucci will show you his methods on how to mount the perfect gas tank.
Walking you through step-by-step, this in depth tutorial will teach you the right (and wrong) ways to mount a custom chopper style gas tank utilizing some of Lowbrow's threaded steel tophat bungs and a Cycle Standard Narrowed Axed Gas tank.
There is also a bonus tip at the end to show you how easy it is to quickly and securely mount your battery using Gasbox Universal Battery Box and a set of Ironhead battery box adapter mounts made specifically for Lowbrow's Ironhead Bolt-On Hardtails!
Saturday Sportster Season 2.... Lets Go!
WATCH EPISODE 5
Seats... the options for setting your booty on that chopper are endless. But making sure your ass stays on the seat and not riding on the frame rails is key!
Tim walks you through how to install a sprung solo seat... but not any old sprung seat! This is a River Seat Company 'Dayten Cobra' seat.
Most people do not mount this style seat correctly, as a rigid mount and springs do not go together (at least not long-term). Tim shows you helpful tips and tricks on how to mount this seat properly, a method that also works on other styles of seats, including custom motorcycle solo seats.
So, break out them tools, your notebooks, and welders and let's get rolling on the next episode of Saturday Sportster.
Saturday Sportster Season 2.... Lets Go!
WATCH EPISODE 6
It's exhaust time! First Tim shows you how easy it is to install a Gasbox XLR drag pipe system on the project with just a few clamps and some hand tools. If you don't know how to weld or don't have the time or money to hire someone to make you a custom exhaust there are lots of cool Harley Sportster exhaust options.
Taking it a step further, Tim decides to use some exhaust fabrication tubing to make a custom set of upswept pipes. This takes a bit of time so the exhaust is broken into two episodes (episode 6 and the upcoming episode 7).
In this episode, in addition to the XLR drag pipe install, you will learn how to look for the radius and take precise measurements. Tim also shows you how to mark and cut your pipes accurately so they will go together with ease and look incredible once welded!
Let's get it going, its Saturday Sportster Season 2. AWWW YEAH!
WATCH EPISODE 7
In the last episode, we left you hanging as Tim started to make a custom exhaust from scratch using DIY exhaust tubing bends and straights sections.
In this new episode Tim finishes the fabrication for a killer upswept exhaust system for our Saturday Sportster project!
Tim shares tons of tips and tricks on how to cut the tubing at just the right angles so that your pipes look flawless when smoothed out and chromed.
The sky is the limit! With the right tools, Tim's knowledge to guide you, and your own creativity, you too can create an incredible set of custom exhaust pipes for your motorcycle!
WATCH EPISODE 8
Break those tools out and get ready for a jam packed episode of Saturday Sportster! This one's a doozie...
In this episode Tim shows you the final steps to wrapping up your custom handmade exhaust with weld-on universal exhaust mounting slides that he designed. With the exhaust full mounted properly, Tim decides on the length of the pipes and shows you a neat trick on how to cut it evenly by using a shop towel.
After the exhaust is all tacked up, Tim moves onto the rear section of the motorcycle and shows you how easy it is to mount a license plate mount and a custom motorcycle tail light to the sissy bar. Using a ruler, a laser eye, some pistol style clamps and a welder, he gets that together in a jiffy.
Bonus Tips: Tim shows how easy it is to mount a headlight on the stock front end utilizing a Gasbox 35mm headlight mount. He also talks about the plan for the brake light switch, and where the wires will go through your fender both top and bottom. It’s those little details that make all the difference when it comes to final assembly...
Let's get it going, its Saturday Sportster Season 2. AWWW YEAH!
WATCH EPISODE 9
Welders, grinders, drills, oh my! Come party with Tim as he finish welds up the mocked up Saturday Sportster in all the places he can reach before disassembly.
Everything that he can't reach will get pulled off the bike and finished on the workbench. Tim shares his techniques on welding and tips on how to make everything look like a professional as we take an extensive look on this process.
The motor gets pulled out of the frame and we are back to square one. Tim also shows you his way of preparing the frame and rear fender for some pretty tricked out ways to hide the wiring.
So, break out those welders, and all of your tools and lets tare this bike down and get it ready to send to Joe Koenigsmark at Angel Dust Cycle Paint!
WATCH EPISODE 10
With the hardtail motorcycle frame and tins back from Angel Dust Cycle Paint you get a first look at the killer paint job Joe Koenigsmark laid out for this season's Saturday Sportster. Tim also shows you safe and effective ways to remove paint in areas that will need to bolt together. For instance, motor mounts, fender bungs, and axle plate slides. Having clean bolt-on surfaces are key to having a bike stay together permanently all while keeping you safe!
Tim also shows off some off the finishes we chose for the bike and how it looks when it starts to all come together. This jam-packed episode is full of helpful tips and tricks on keeping that paint fresh (and not dinged up). It should get you pumped... this project is even closer to being on the open road.
LET'S GO!
WATCH EPISODE 11
Take a ride with Tim as he shows you the last step in mounting the motor. Remember those hokey stacks of washers he used in mock up? Well no more of that nonsense, Tim shows you how to measure the correct size spacers needed for the top motor mount and then shows how it's made on the lathe.
After the motor is fully secure, Tim jumps a head and bolts on a few parts you have seen in previous videos. Remember the loctite!
Next, Tim shows you how to make a custom brake rod for the project. Why do we have to make that you ask? Well the bolt-on hardtail is a longer than stock and the stock brake rod just wont work. Using the his lathe as a fixture, Tim shows you an easy way to cut threads and figure out how long you need to make your brake rod.
You will also learn in this video how to properly set up your rear drum brake. Don't skip these steps. Especially if you are only running that one brake like we are...
Because... Choppers.
Saturday Sportster Season 2 - Episode 11, Let's Go!
WATCH EPISODE 12
Oh man, episode 12 is here and it's a fun one... Oil lines! Ok yeah, oil lines doesn't seem that fun, but it is a vital part of building a motorcycle and making sure you don't blow up your engine!
Tim walks you through some really important info on how to run your oil lines and do it in a clean and professional manner. It's extremely important to understand what lines hook up to what fittings on the motor and oil tank. The last thing you want is to cross a line and starve your motor of oil. Wasting a fresh motor build and blowing it to smithereens.
So break out that plumbers tape, cutters, safety wire and pliers, and check out our Old STF Cycle Shovelhead Rocker Box Split Oil Lines for a clean and professional solution, and let's get to it!
Saturday Sportster Season 2 - Episode 12, Let's Go!
WATCH EPISODE 13
OH, Man! It's almost time to get this bad mama jama wired up. But first there are a few things that need buttoned up, like the generator, regulator and finding a cool place to mount some circuit breakers. All these things need hooked up and on the bike before the wiring madness can begin.
In this episode Tim shows you how to clean your generator's armature and how to install a Cycle Electric CE-500L Regulator to it. He then show you how easy it is to install on the bike. Make sure to be careful around that fancy new paint though!
Tim then also walks you through how to make a custom circuit breaker mount using the backing plate from The Gasbox Horseshoe Bolt-On Oil Tank for Ironhead Sportsters. He shows you his methods of measuring to complete and beautiful accuracy when it comes to laying out any kind of project like this. There's more than one way to skin a cat, but this way seems pretty bulletproof.
WATCH EPISODE 14
Oh man, everyone's favorite... wiring a motorcycle! Why are those stock wiring diagrams so freakin' hard to understand!?
Well never fear, we will show you a few solutions on how to make it easier. Once you understand the basics of what parts go where, the rest comes easy.
In this episode Tim shows you how to make clean ring terminal connections. He also runs wires through the frame and shows some neat tricks on how to do it frustration-free.
Tim also shows you how to wire in the headlight and why you should ground it directly to the frame, and not the front end. A bit of an oversight when mocking up the bike on our end, but he shows you a clean way to drill into your brand new painted frame and not mess it up.
After the headlight is wired up, Tim walks you through the Lowbrow Customs Weatherproof Starter Ignition Switch and all the functions it has. Then he wires up what he needs to the ignition switch. Once the ignition switch is installed, he tackles mounting the coil and wiring that up as well.
Break out your wiring tools, solder guns, crimpers, and heat guns and lets get into this wiring. No rats nests, ya hear, just clean and classy!
WATCH EPISODE 15
Here is the 2nd part of wiring this 1969 Harley Ironhead chopper (check out Episode 14 for Wiring Part 1), getting close to hitting the road!
Tim shows you how to sort out your tail light, which wiring is running light and brake light, and how to wire it through the fender. There's also a neat little trick on how to discreetly secure the tail light wires to your license plate bracket using safety wire.
After the rear wheel goes back on, Tim starts working on the battery connections using 12 gauge wire and a 30 amp breaker. Loop the tail light and brake light switch in with cloth covered 16 gauge wire, and then on to hooking up the generator.
Tim then shares his tips on how to secure the tail light lightbulb and stop from busting filaments on the road using some Shoe Goo... What!? You'll see.
After the Goo settles, there's just a few last connections to button up. Then Tim does an overall review of the wiring, and wiring diagram.
Lastly Tim tests out the lights...
Do you think we got it down OR do we gotta start over!? HA! Let's Go!
WATCH EPISODE 16
Holy hell! We are getting really close now, boys and girls. In this episode Tim walks you through hooking up the distributor and timing it correctly. He then not only installs the S&S Super E Carburetor but even walks you through the recommended jetting for this particular motorcycle.
After the carb is installed, he tops it off with a Gasbox Dogdish Air Cleaner. Tim then hangs the exhaust on, hooks up the clutch, the throttle cable, and finally installs the battery. All that's left to do now is to fill the oil tank, put in some fork oil, primary oil, and put gas in her and she will be ready to fire up... But you got to wait till the next episode to hear her roar!
Tim does talk a lot about S&S Super E Carburetors in this episode and mentions a really nice tuning guide to set up your carb if its the first time ever being installed on a bike. This easy to follow guide will help you get the bike started and then fine tune the carburetor and really get it dialed.
WATCH EPISODE 17 - SEASON FINALE!
It's the SEASON FINALE! It's what you've all been waiting for... Firing the Saturday Sportster up for the first time & ripping around Cleveland!
Tim walks you through putting oil in the forks, oil tank and primary. He shows you how to adjust the valves properly. Tim also resets a S&S Super E carb to factory settings to help for the first time starting the bike. You can click here for the free S&S Super E Tuning Guide PDF!
Will the bike fire up the first few kicks? Or will there be cursing, huffing and puffing involved? Tim also gives tips on what to look for once your bike does start.
After a couple tweaks to the carb, Tim pull the bike outside and takes it for a rip and then takes it down some of his favorite roads in downtown Cleveland. This is an action-packed episode so grab the popcorn for one last time and lets party!
Wow... that's all folks... what a ride it's been! We want to thank everyone who has watched this from start to finish. We hope that you have found this video series helpful and inspiring. The sky is the limit to what you guys can build and we can't wait to see what your Saturday Sportster will look like!
Thanks again everybody, till next time. Thats a Wrap on Saturday Sportster 2! Wooooooooo!!!!
PHOTOS OF THE FINAL SATURDAY SPORTSTER 2 BUILD
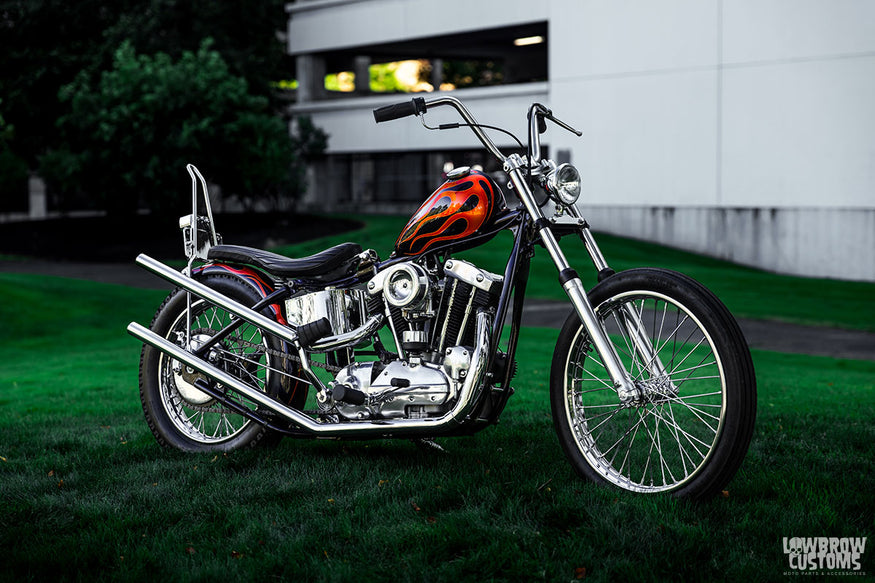 1969 Harley-Davidson XLCH Sportster Ironhead 900cc
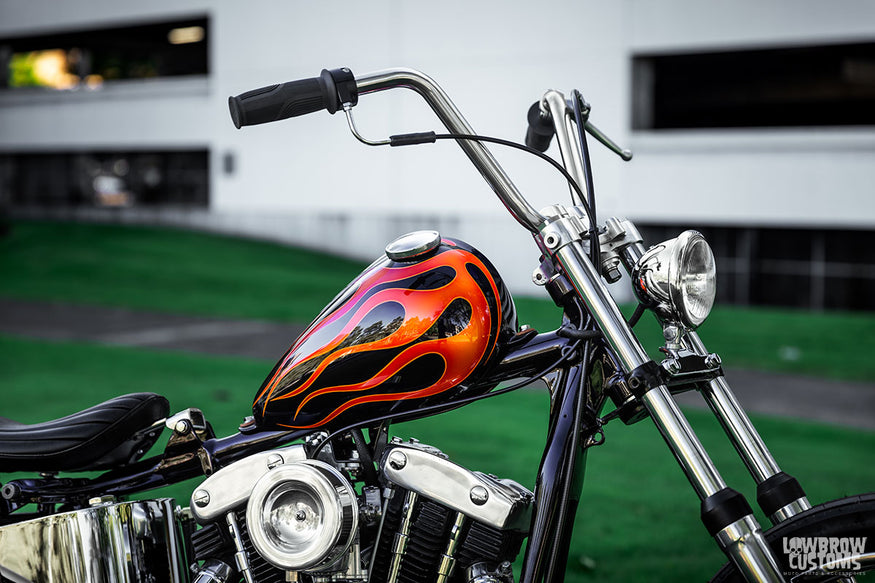 Axed Alien tank, Gasbox Dogdish Air cleaner, Fork Co handlebars and risers, 4 1/2" headlight, 35mm frontend
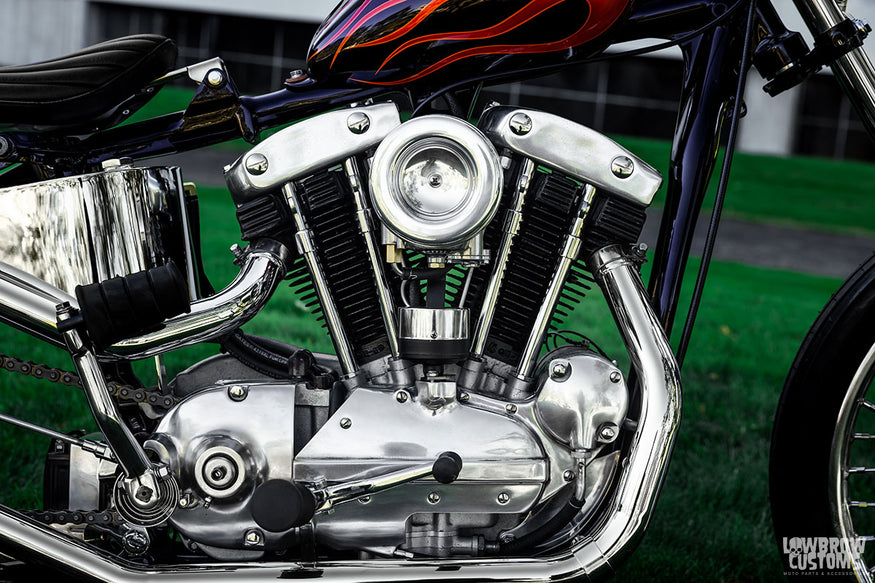 900cc Ironhead motor, S&S Super E Carb, Gasbox Dogdish Air cleaner.
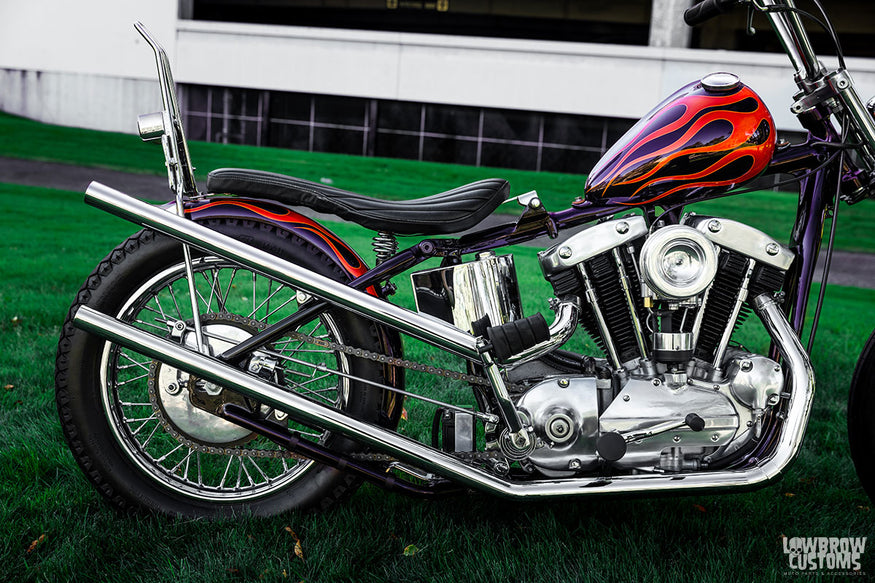 Fully custom made exhaust pipes, River Seat Co seat, Gasbox DIY Sissybar kit.
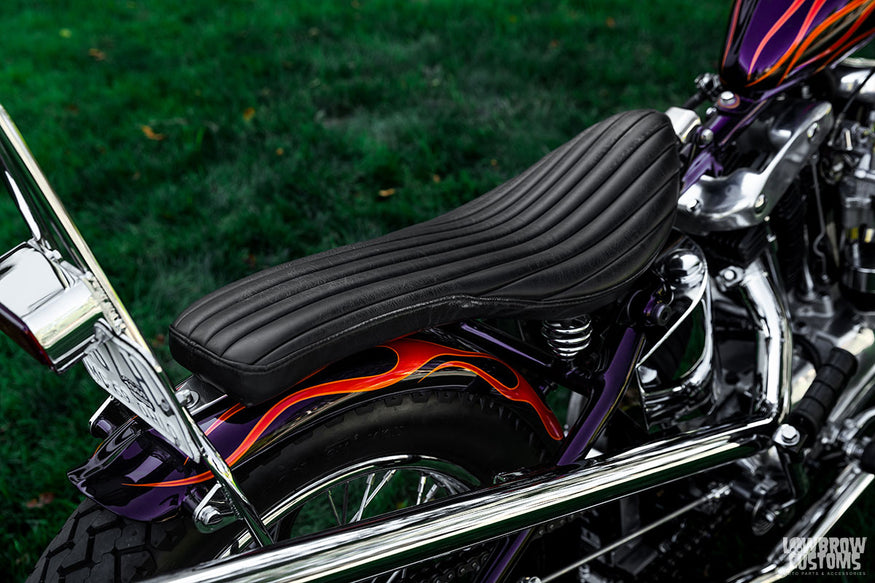 River Seat Co. seat
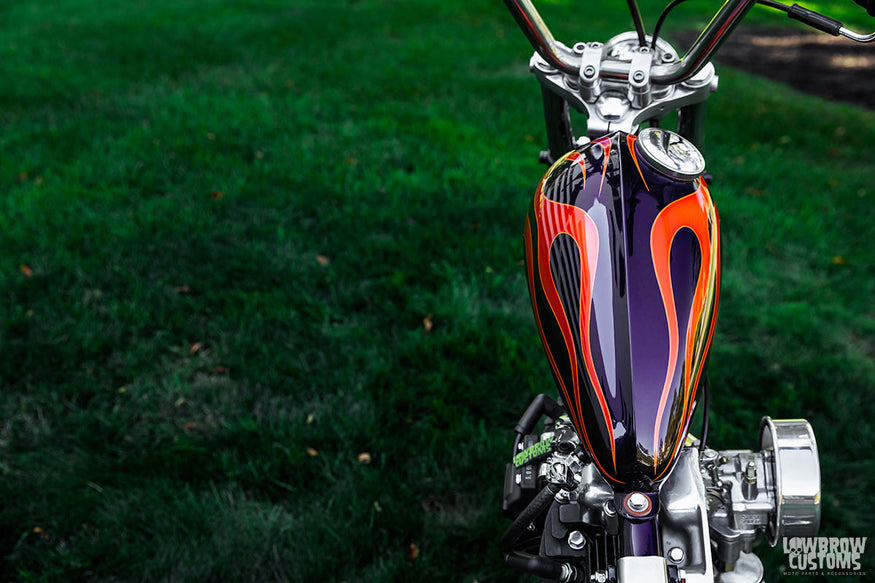 Axed tank with molding and paint done by Angel Dust Cycle Paint Joe Koenigsmark.
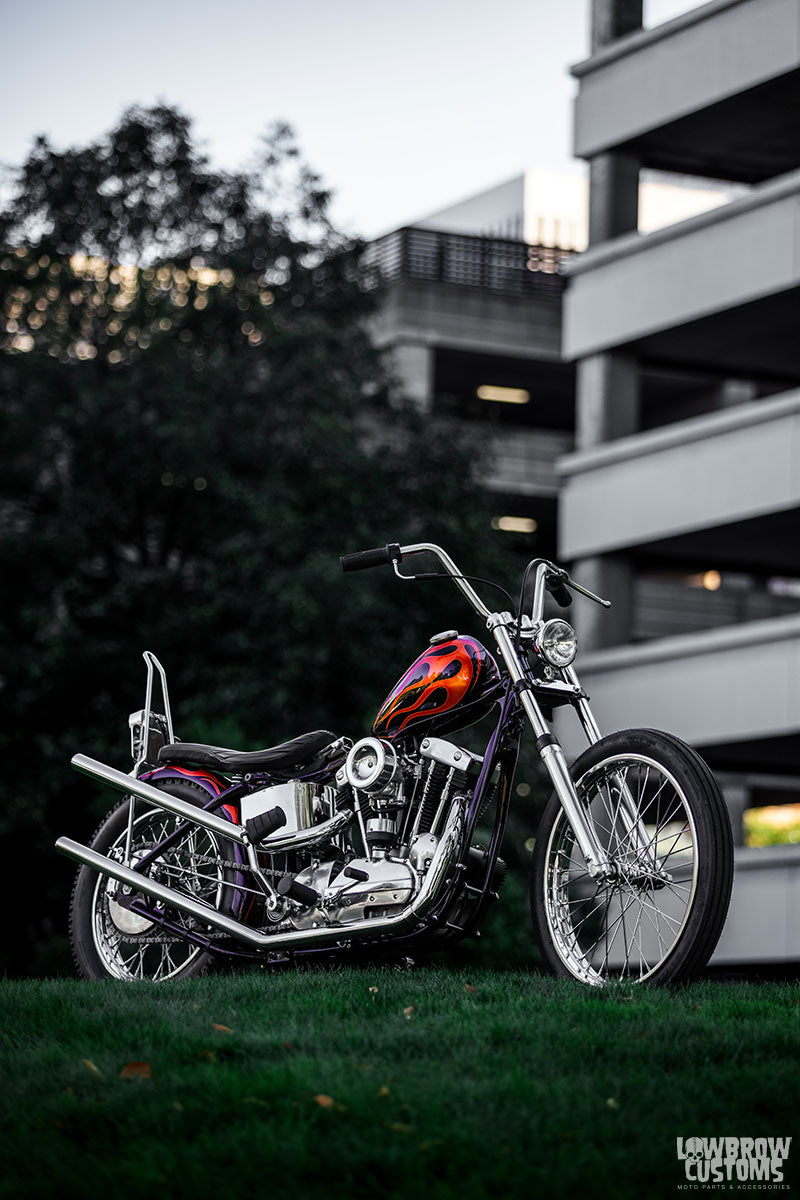 Saturday Sportster Saturday Sportster 2
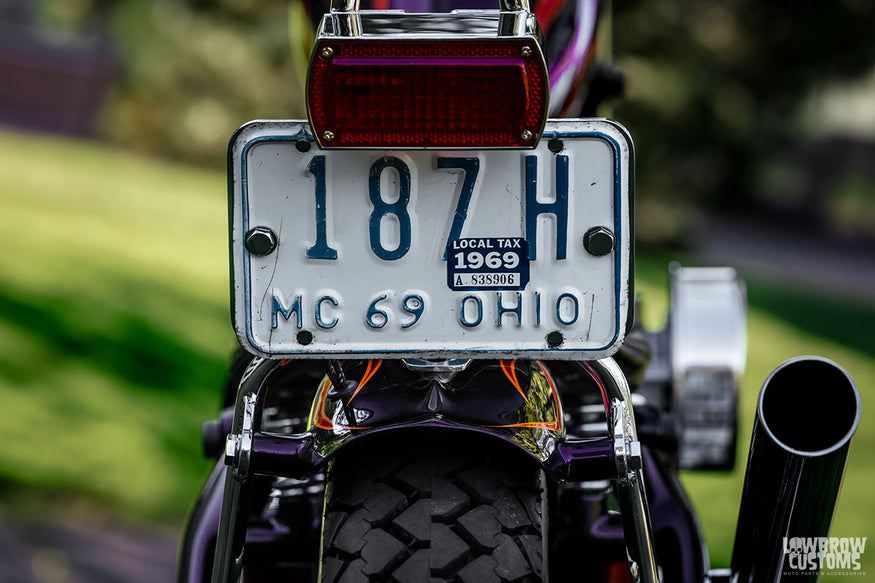 Vintage 1969 license plate
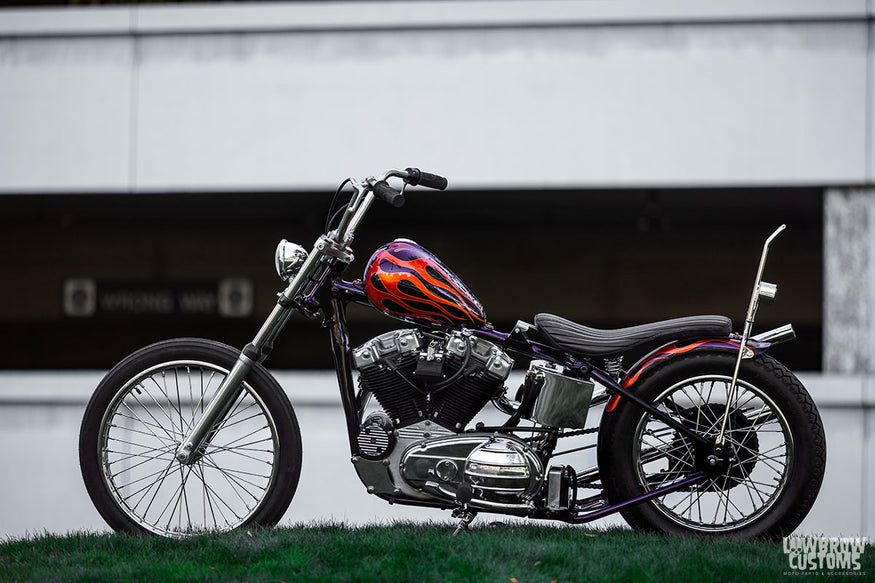 B-side of the 1969 Sportster
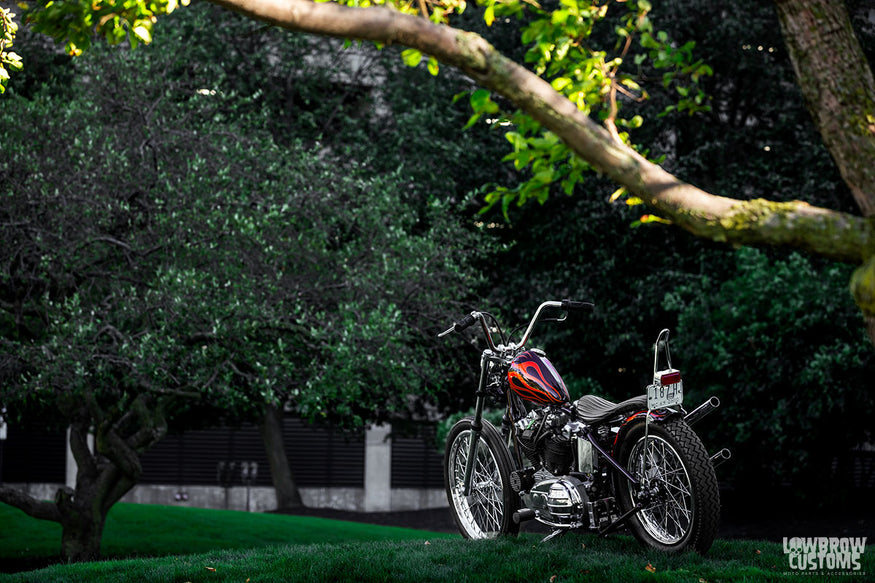 Looks good from all angles.
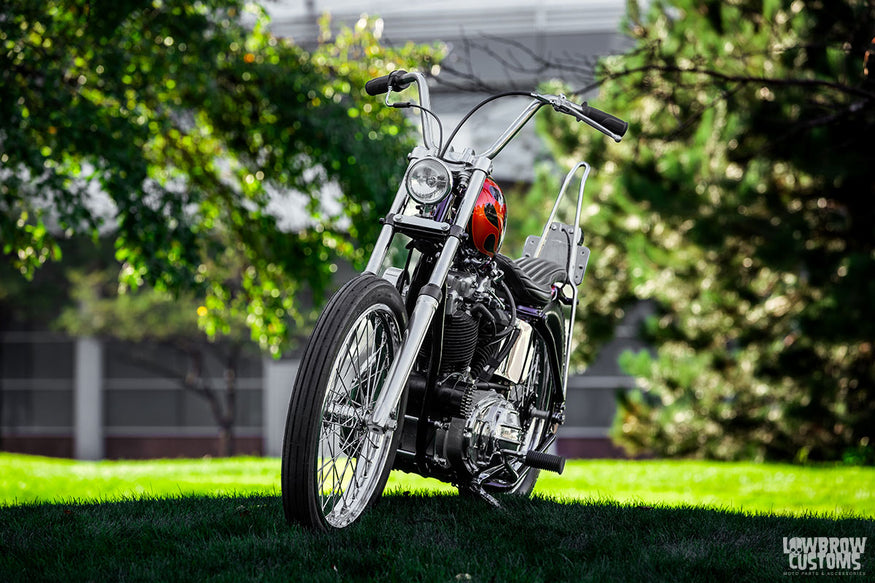 Skinny lane splitter
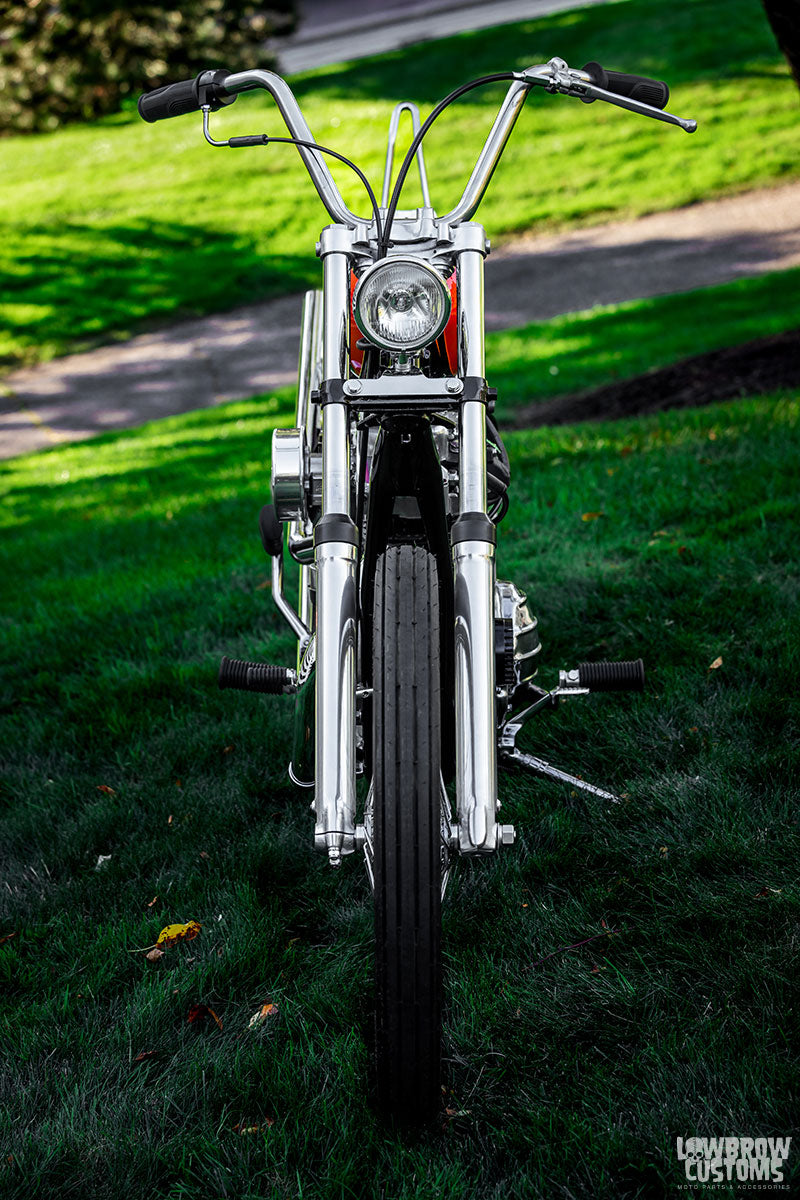 35mm front end 21" wheel, perfect.
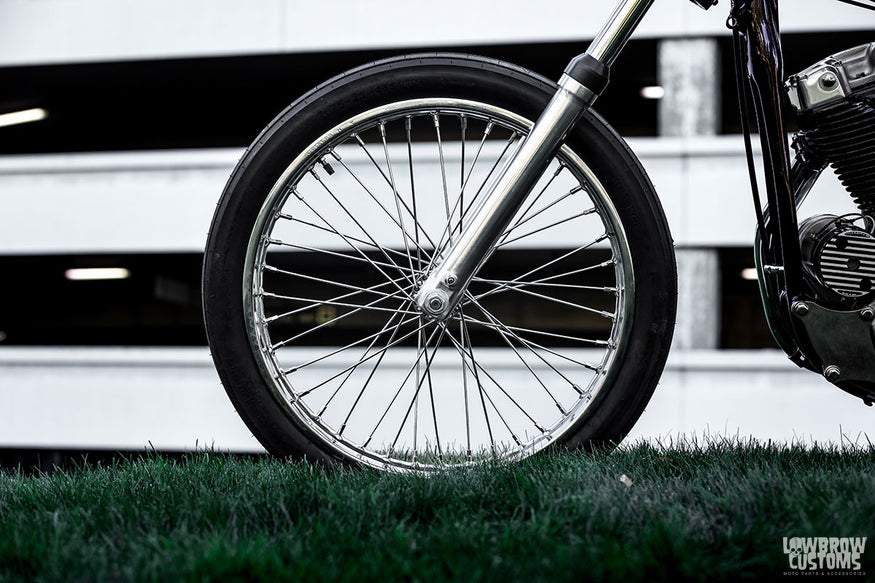 21" Front Lowbrow Customs Wheel with Firestone 21" Board Tracker Tire.
 Lowbrow Customs weather proof ignition switch on a Gasbox top motor mount with coil relocation
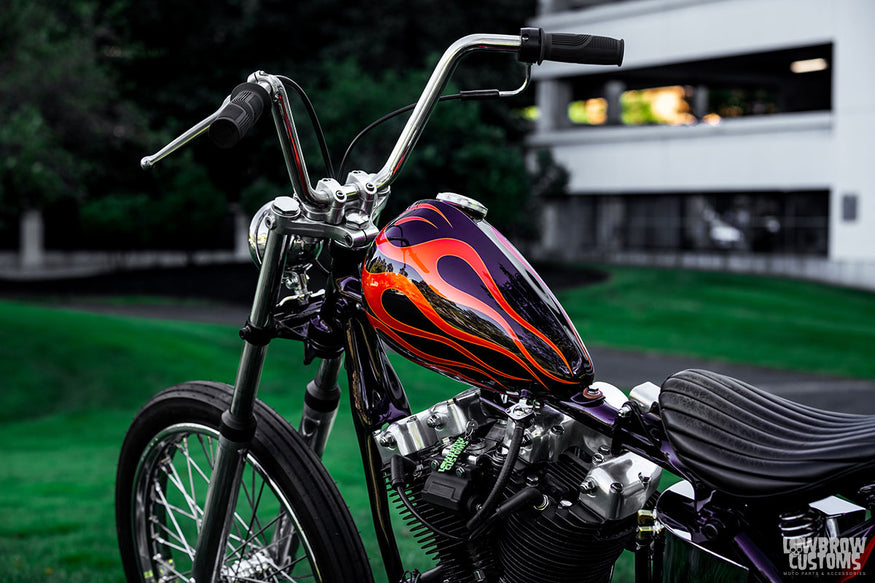 A nice angle to get an idea how skinny those Fork Co handlebars really are. You can check here for two versions of Fork Co handlebars: Sixties Narrow or British Wide & Narrow
 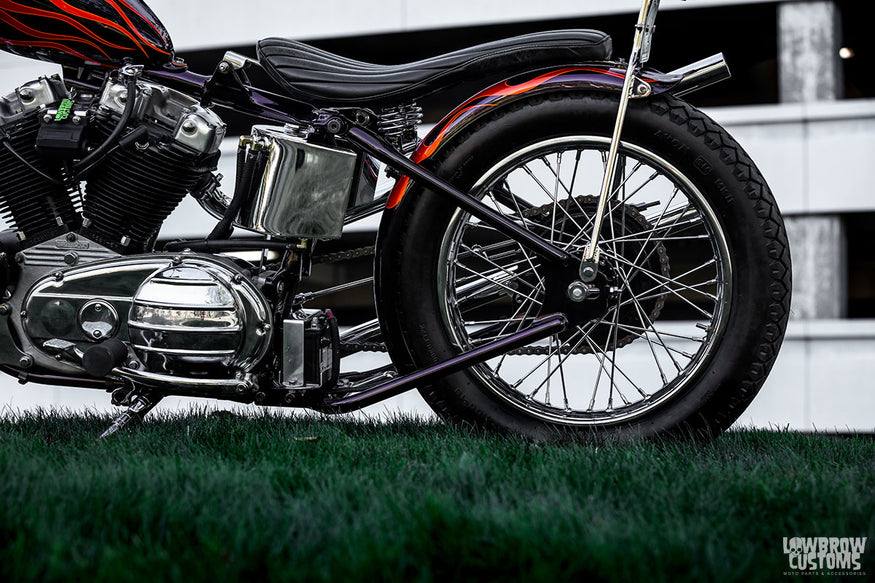 Avon Mark II Safety tire 18" on 18" wheel. Hub rear brake.
 Cycle Electric Generator and Regulator
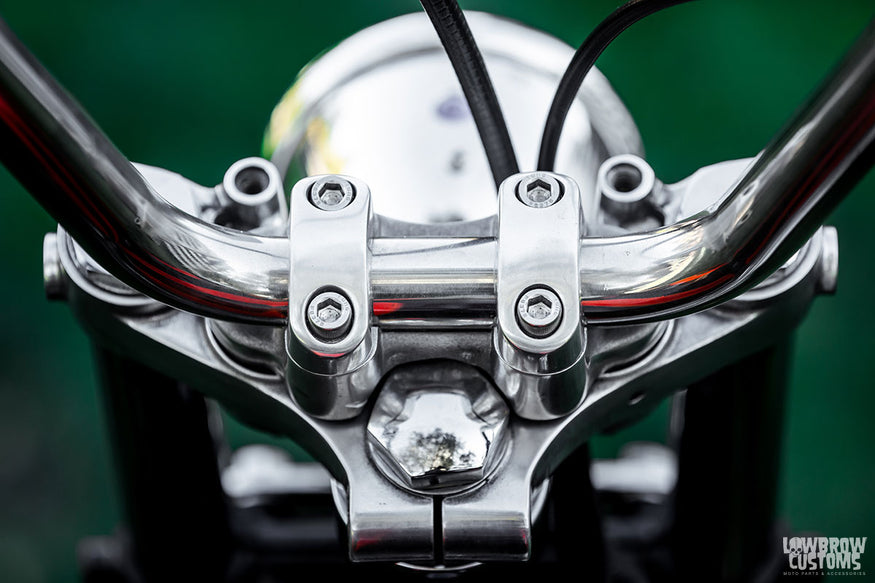 Fork Co risers work perfect with their Sixties Narrow bars.
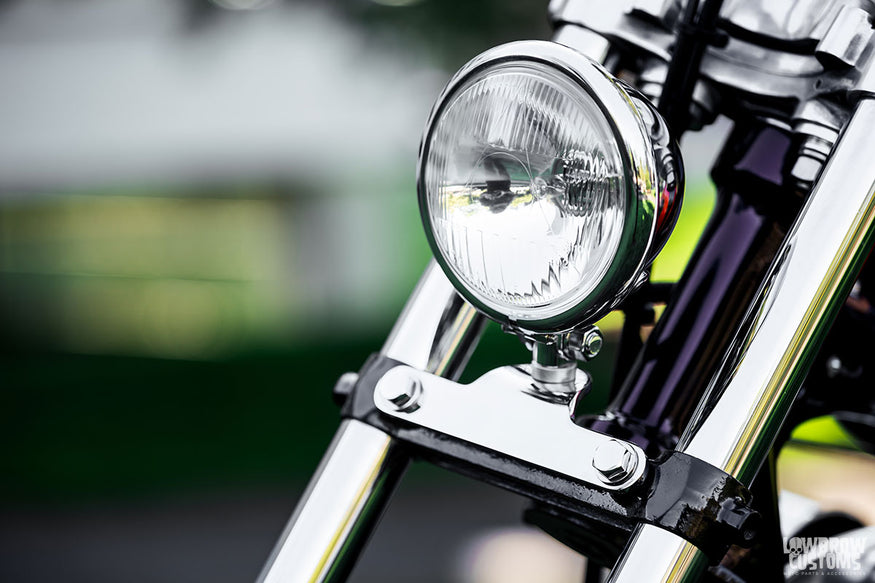 Gasbox Bottom Headlight mounting bracket works with pinch bolts on the 35mm front end.
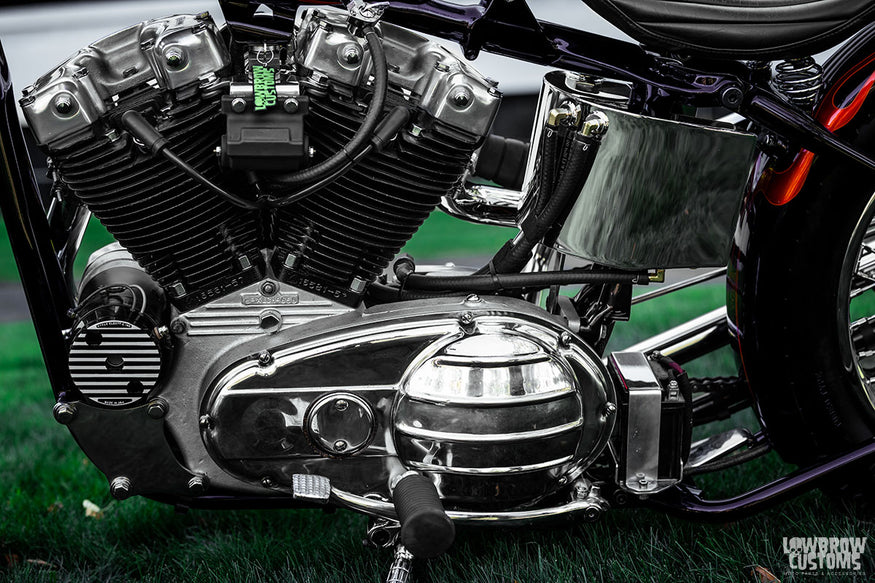 Chromed a Gasbox Horshoe boltp-on oil tank to pop off yet blend into the frame.
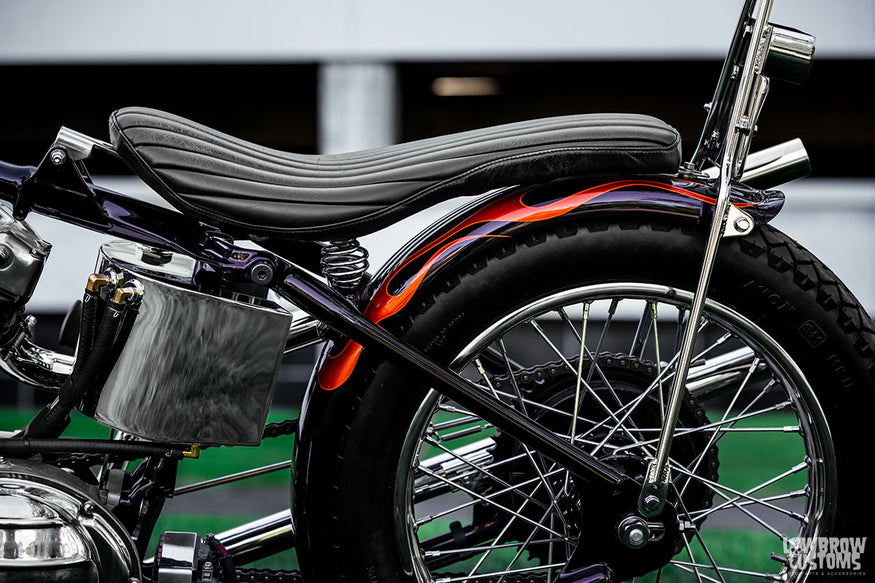 Manta Ray 4 3/4" fender with 18" wheel.
 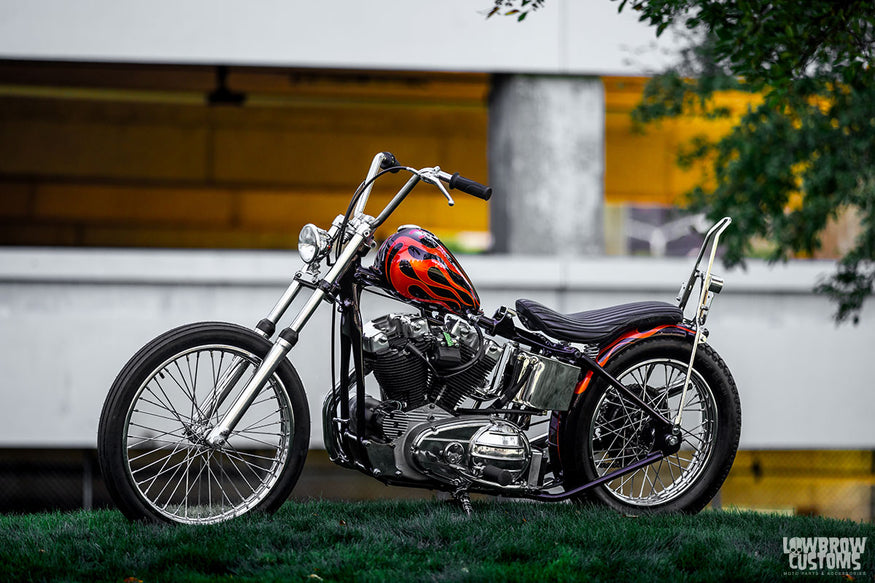 Bolt-on hardtail for Ironheads.
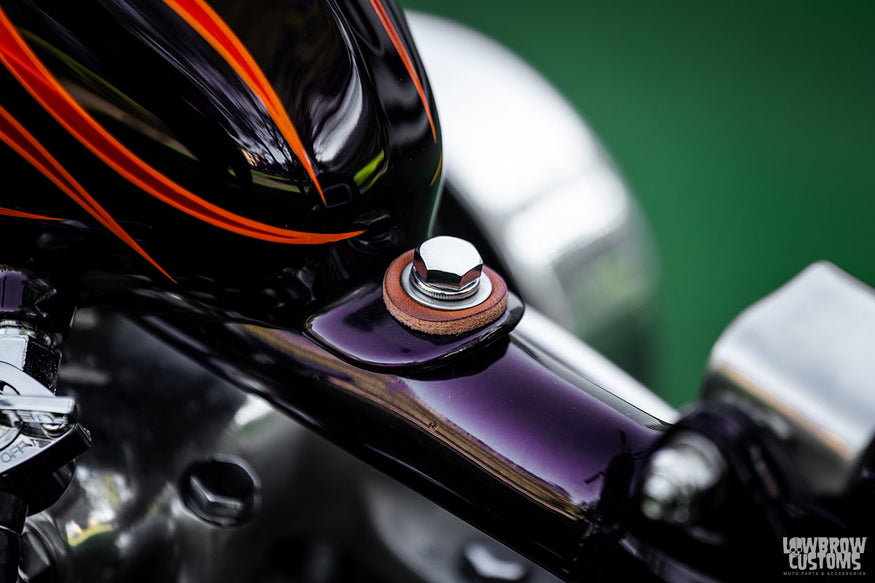 Always a good idea to use leather washers on your gas tank mounts.
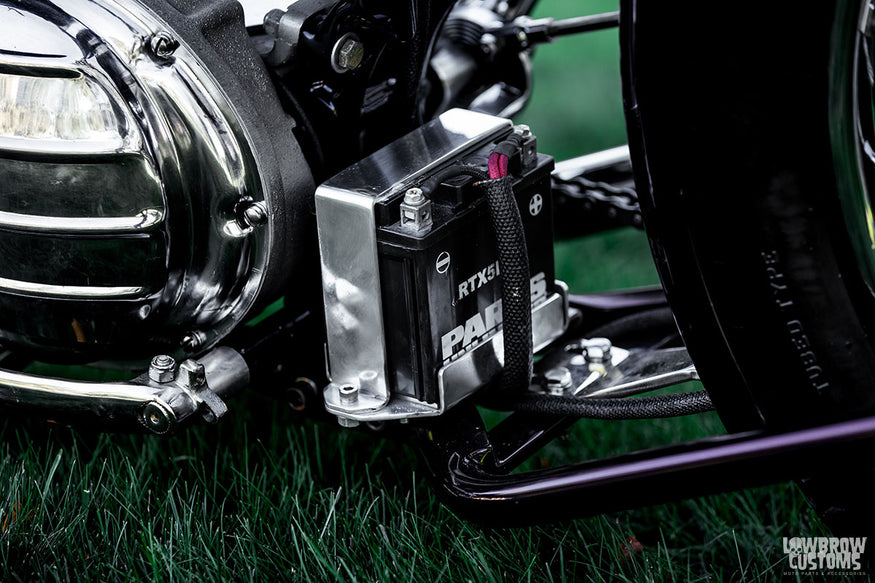 RTX5L-BS battery for kick only bikes in a Gasbox Battery box.
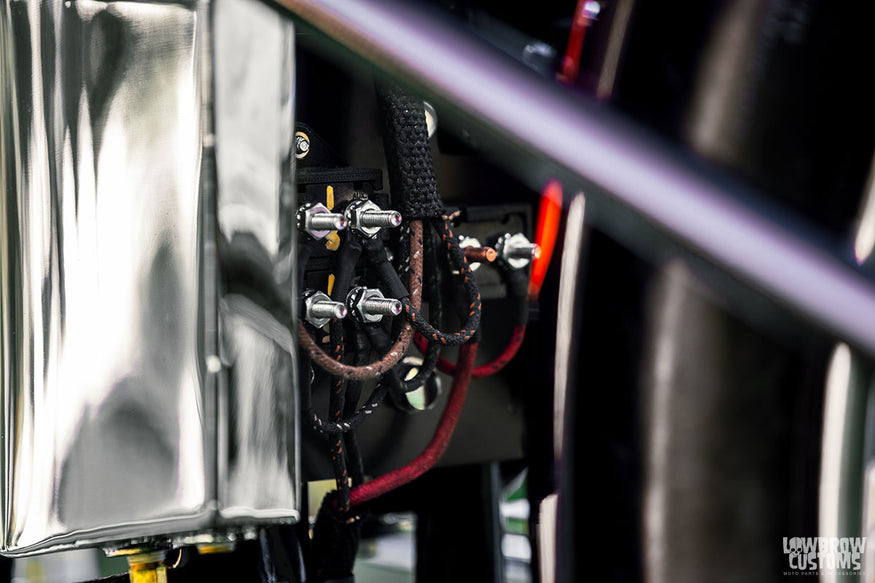 Custom made circuit breaker board mounted on the rear plate of the horseshoe oil tank. Hidden, sleek, organized and functional.
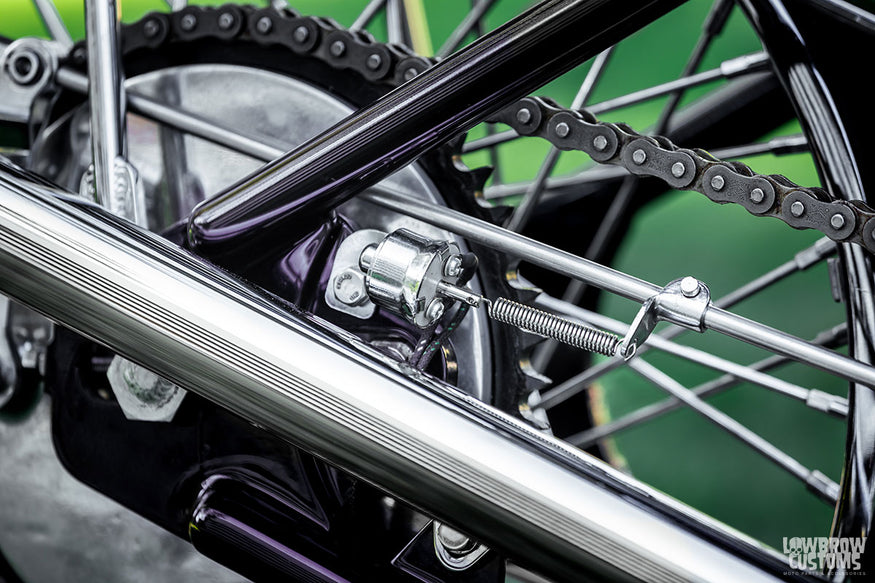 Brake light switch mounted to a custom made brake rod.
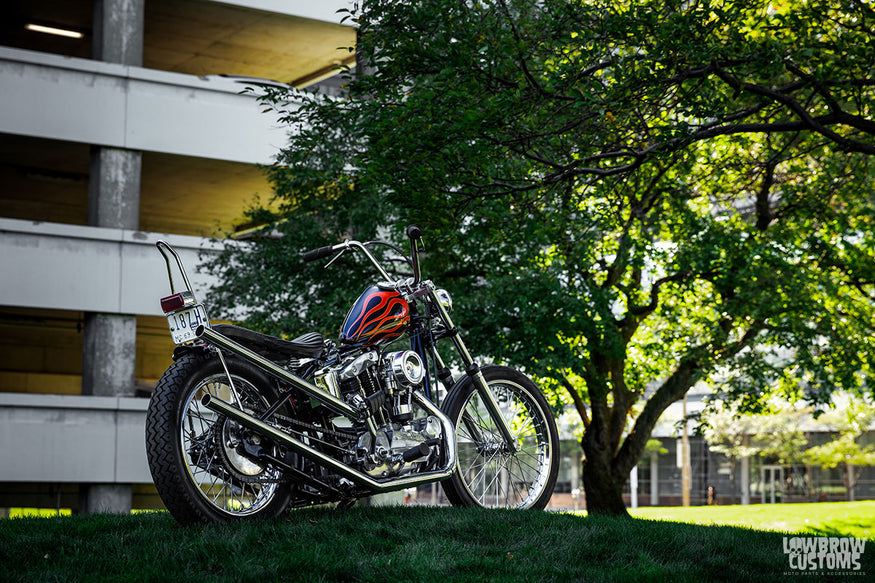 The Saturday Sportster 2 by Tim Fiorucci.
Photos and videos by: Mikey Revolt
Related Products


