


TABLE OF CONTENTS
- INSTALLING WX TANKS ON EVO SOFTAIL USING MOUNTING KIT IN 6 EASY STEPS
- STEP 1: REMOVE STOCK GAS TANK AND CUT DASH TAB OFF BACK BONE
- STEP 2: INSTALL THE MOUNTING KIT ONTO EACH MOUNTING POINT
- STEP 3: INSTALLING THE RIGHT SIDE TANK ONTO THE MOUNTING TABS
- STEP 4: INSTALLING THE LEFT SIDE TANK ONTO THE MOUNTING TABS
- STEP 5: LINE IT UP AND TORQUE IT DOWN
- STEP 6: BUT YOUR SEAT BACK ON AND CHECK IT OUT YOUR DONE.
We have been making WX Gas Tanks for just over a decade now and they were originally designed to fit 1936-1984 Big Twin frames. The Big Twin Softail Evo's frankly were never really on our radar, until now! With Softails on the brain, we developed a way to mount our beloved WX Gas tanks to 1985-1999 Softail Evo frames utilizing a new Mounting Kit and one small modification made to the frame.
WATCH VIDEO HOW TO INSTALL MOUNTING KIT FOR WX GAS TANKS ON EVO SOFTAIL FRAME
In this video, Tim Fiorucci walks you through how easy it is to install WX gas tanks on a 1994 Harley-Davidson Softail utilizing our new Mounting Kit. There is no modifications needed to be made to the gas tanks them selves and only one small modification needed to be done to the frame. Everything else bolts right onto the existing frame and will make lining these slim and beautiful gas tanks up perfectly. Giving your Softail a whole new look and personality.
*NOTE: Always pressure test any gas tank new or old before getting them painted.
INSTALLING WX TANKS ON EVO SOFTAIL USING MOUNTING KIT IN 6 EASY STEPS
 We are going to install these WX Gas Tanks on this 1994 Harley-Davidson Softail.
STEP 1: REMOVE STOCK GAS TANK AND CUT DASH TAB OFF BACK BONE
First thing you will want to do is remove your stock gas tank or split tanks off your softail. After those are removed grab a cutting wheel and cut off the lower dash mount on the back bone of your frame. You can do in a way that you can re weld it back on if you ever wanted to revert back to stock tanks. Put the cut off tab in a safe place.
 On the left you can see the location of the dash mount that needs to be cut. On the right you can see where timmy left some room to re-weld the tab back if he wanted to revert back to stock tanks.
STEP 2: INSTALL THE MOUNTING KIT ONTO EACH MOUNTING POINT
You will find 3 brackets and corresponding hardware that come in the kit for each bracket.
 The first bracket you will install is the long bracket with slotted tabs. This will go on the back bone in the rear tank mount location in the two stock backbone holes.
 There are 2 bolts that go in the long bracket they are the only fine thread bolts in the kit, they do not accept a washer. You will use the 5/16"-24 to install on the backbone of the frame.
 On the end of the long bracket will take one of the shorter 5/16"-18 bolts with a washer. This bolt will secure the rear tabs on the right and left gas tanks.
Using Blue Loctite on the 2 x 5/16-24 bolts loosely install the long bracket to the rear mounting location on the backbone. Don't tighten down fully, leave some wiggle room for the bracket to move back and forth. Make sure the hole to secure the rear tabs is facing towards the seat.
 Blue Loctite on the 5/16"-24 bolts and install long bracket on the backbone.
Next, install the front top bracket, You will use the second longest 5/16"-18 with no spacer and two of shortest 5/16"-18 bolts with spacers with this mount.
 Top mount looks like this and will mount with this way on the top mounting location.
 The second longest 5/16"-18 bolt goes in the top with no spacer and then two of the shortest 5/16" bolts with a spacer go on each side of the mounting bracket.
Again using Blue Loctite loosely install the top front bracket with the second longest 5/16"-18 bolt should be facing towards the front of the motorcycle.
 Blue Loctite and loosely install top front mounting bracket using the second longest 5/16"-18 bolt, it should face the front of the motorcycle.
Now you can in stall the last mounting bracket located on the frame rails in the front.
 The taper of this mount faces down and will mount to the two holes on the stock tab just below the mid frame rail.
 This mount will take two of the shortest 5/16"-18 bolts with the smallest diameter washers so that they can sit flush next to each other when mounted to the frame. This bracket will also take the longest 5/16"-18 bolt with a washer on each side of the mounting tab and a nylock nut.
Install the lower tab with the taper facing down utilizing the stock tab on the frame with the two holes, just below the middle frame rail. You will be using 2 of the shortest 5/16"-18 bolts with two washers that have the smallest diameter. Be sure to use Blue Loctite and torque down. You will use the longest 5/16"-18 bolt, two washers and nylock nut to secure the lower gas tank tabs when mounting them.
 You can see on the right how after the bolts are installed with the smallest diameter spacers how it sits flush and doesn't overlap. You will notice right away if you use the wrong washer size.
STEP 3: INSTALLING THE RIGHT SIDE TANK ONTO THE MOUNTING TABS
Always start with the right side tank first because the rear mounting tab fits right up against the rear mounting bracket on the backbone of the frame.
 Slide the right side tank with the rear tab farthest over it can go on the rear bracket.
 Loosely tighten the front tab on the gas tank to the top front mounting tab with shortest 5/16"-18 and washer, then loosely tighten the bottom gas tank tab to the lower mount using the longest 5/16"-18 bolt, washer and nylock nut.
 Fully tighten the rear tab on the gas tank to the rear mounting bracket using the shortest 5/16"-18 bolt with a washer. You will see the mounting bracket move towards the tab. This will indicate the brackets final place to be locked down.
There could be small variances through the years of frames and or gas tanks, so the rear mounting bracket has some slots in it for wiggle room to compensate. When you lock down the rear tab to the rear mounting bracket this sets the proper location for that rear mounting bracket.
 Torque down the rear bracket
STEP 4: INSTALLING THE LEFT SIDE TANK ONTO THE MOUNTING TABS
Now it is time to install the left side tank, first you must remove the rear bolt out of the mounting bracket / right side rear tank tab. You also have to remove the bolt on the front bottom mounting bracket / right side tank lower tab.
 Remove the bolt out of the rear mounting bracket / rear right gas tank tab. The rear mounting bracket is now torqued down and will not move.
  Installing the left side tank onto the frame you again will start with the rear tank tab and slide it over the right side rear tank tab.
 Once you have slid the left rear tank tab over the right rear tank tab secure the top loosely to the top tank mounting bracket with one of the shortest 5/16"-18 bolts and washer.
 Use your hands to carefully line the rear hole of the mounting bracket with each of the rear gas tank tabs.
 Loosely install the shortest 5/16"-18 bolt and washer into the rear mounting bracket / rear gas tank tabs.
  Loosely install the longest 5/16"-18 bolt with a washer on each side of the mounting tab and the nylock nut onto the bottom mount / gas tank tabs.
STEP 5: LINE IT UP AND TORQUE IT DOWN
Now it's time to line up your center seam line. The goal is to make the top of the gap seam match the bottom of the gap seam. You can start by torquing the front top mount and tabs. Then you can move to the bottom and spread or squeeze together where you need to and then torque it down. Lastly torque down the bottom mount / gastank tabs.
 First torque down the top right and left bolts into the top mount evenly with each other.
 Then you will torque down the top mounting bracket bolt and make sure that its perpendicular and not leaning left or right. Theres not a lot of room for this to go, but you want to make sure its straight.
 Next you will move gently the left and right side tanks at the bottom tab location. Look at the top of the tank seam line and try to match it at the bottom. Then torque the rear bolt down.
 Torque down that nylock nut on the bottom and you're good to go.
STEP 6: BUT YOUR SEAT BACK ON AND CHECK IT OUT YOUR DONE.
All that's left to do is put your seat back on and your done. Woooohooo! Before you go running this thing or getting some sick ass paint job, make sure to pressure test them.
 Boom, Check it out!
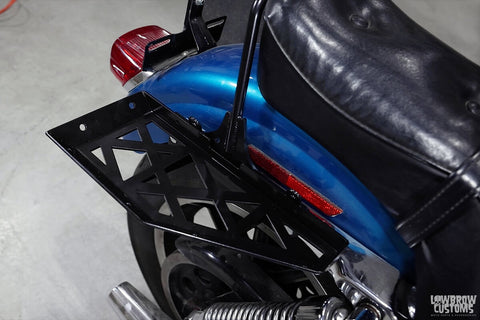
PHOTOS OF WX GAS TANKS ON THE 1994 SOFTAIL
Here's a handful of photos of the mocked up 1994 softail.
 Dang!
Dang! Wx tanks on a softail... would ya look at that!
 That seam doh!
 Yeah this bike looks tuff!
 Slim, sleak, and really nice lines.
 Who knew Softails could be so nice!?

Related Products


