TABLE OF CONTENTS
- How Lowbrow Customs by Kerker 2-into-1 Exhausts Made
- Why we choose SuperTrapp Industries
- First Idea for the Kerker 2-into-1 Exhausts
- How it's made
-
How To Install Lowbrow Customs 2 into 1 SuperMeg Exhaust
- Step 1: Remove exhaust system from your bike
- Step 2: Remove Retaining Rings & Flanges
- Step 3: Install the O2 sensors
- Step 4: Install the Mounting Bracket
- Step 5: Loosely Install the 2 Into 1 Header Pipe
- Step 6: Insert the Two T-Bolts
- Step 7: Tighten Down the Muffler
- Step 8: Tighten Down the 4 Nuts
- Step 9: Re-plug in your O2 sensors
Introduction for 2-into-1 exhausts for Harley-Davidson motorcycles

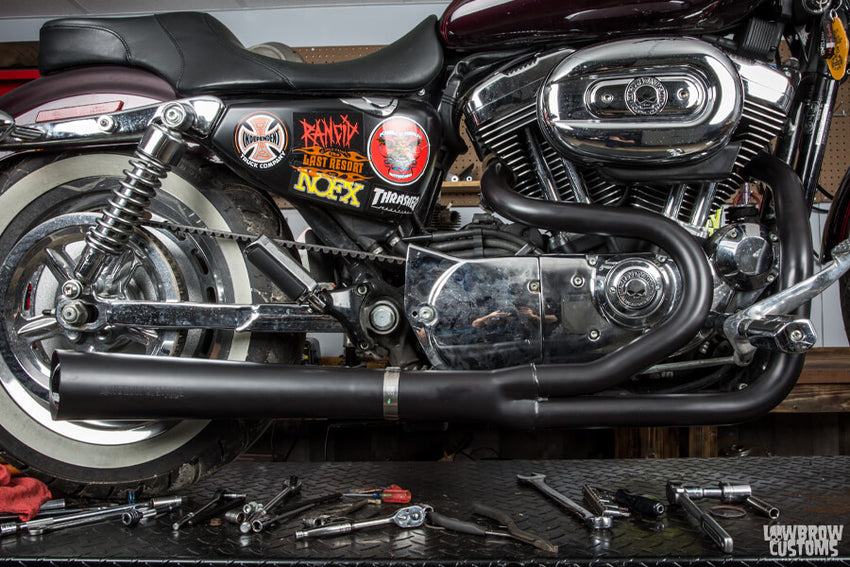
Lowbrow Customs has partnered with SuperTrapp Industries, parent company of Kerker Exhausts, to make affordable, USA-made, performance 2-into-1 exhausts for Harley-Davidson motorcycles.
Our goal was to create an exhaust system we would want to run on our bikes, stripped of all the superfluous covers and branding.
Currently available for H-D Sportsters and newer big twins like Dynas, FXRs and Softails, these exhaust systems have proven popular to those looking for a no-nonsense, performance exhaust for their Harley at a great price.
Lowbrow Customs 2 into 1 Exhaust Systems for:
- 1991 - 2005 Harley-Davidson FXD Dyna Glides
- 2004 - 2013 Harley-Davidson XL Sportsters
- 2006 - 2011 Harley-Davidson FXD Dyan Glides
- 2014 - 2018 Harley-Davidson XL Sportsters
- 2012 - 2017 Harley-Davidson FXD Dyna Glides
- 1984 - 2011 Harley-Davidson FXS/FLS Softails
- 1984 - 1994 Harley-Davidson FXRs
How Lowbrow Customs by Kerker 2-into-1 Exhausts Made
Why we choose SuperTrapp Industries
Today, I'm at SuperTrapp Industries in Cleveland, Ohio with Jeff Wells. SuperTrapp is also the manufacturer for Kerker Exhaust products and being Cleveland-based, just like them, we had reached out to them about manufacturing some exhaust for us. Today, Jeff is going to walk us through the process of how they make the Lowbrow by Kerker Exhaust Systems right here in their factory.
Hey. Thanks, Tyler. Jeff Wells here with SuperTrapp industries. As Tyler said, we also manufacture all the Kerker brand products here. When we teamed up with this product, we decided we want to team up with somebody local, and Lowbrow customs is the absolute greatest people to work with for us. They have a great reputation in the industry.
First Idea for the Kerker 2-into-1 Exhausts
What we came up with was a two into one system for all the popular Harley Davidson models. It's a two into one system, incorporates a flow true collector system into a perforated baffle core system, sounds great, performs incredibly. Again, these are all made in America, US-made steel, manufactured all in-house here at SuperTrapp industries.
How it's made
Three-step belting process muffler bodies
Here, we're finger expanding the inlet of the mufflers to set the right inlet diameters. You'll see it expands the inlet of the muffler there. These are then test checked in a go/no-go gauge.
In this step, we're piercing the inlet slots. This is so the mufflers are able to slide on and clamp down properly.
All of our muffler bodies go through a three-step belting process. This is to ensure that the mufflers are perfectly round and the material is straight
This step is actually an art process. Most of our employees have been doing this for 15 to 25 years.
Again, all muffler bodies go through a three-step process. You'll see this will achieve a perfectly smooth finish on the muffler, whether it's going for paint or chrome. In this case, these mufflers are all painted, but we want a perfectly mirror finish on them.
Polish by hand
Here, we put a little rouge on the polish wheel. All of this is done by hand. We feel that it achieves a better finish. Again, this is an art form. A lot of the stuff you can do on a robot, but it doesn't quite achieve the perfect finish that we like.
Here, we finish with a powder brush to check the finish
There you go, beautiful, mirror-finished, polished, ready to weld the brackets on.
Hand TIG welded muffler brackets
In this step, the muffler body is placed into a jig, set the brackets in place.
All the muffler brackets are all hand TIG welded. This ensures a secure mounting point.
In this step, we're applying a part number. Everything we make is part numbered and date coded.
Perfect measured tubing
Then, we go onto the logoing, Lowbrow Customs by Kerker. Everything we do is then checked to assure proper fitment on everything, logo placement, brackets, everything. Now, onto the head pipe. Here, the tubing is all checked for cleanliness, make sure there's no burrs inside. Every piece of tubing is set and measured to a specific length.
The tubing is then greased. This ensures that all the mandrel components don't stick inside the tubing and you get a smooth clean bend. In this step, the tubing is slid onto the mandrel bender, fitment is checked.
Head pipes are all bent Siamese where we bend the front and the rear head pipe out of one piece of material. This is more efficient and ensures that we don't waste any material.
It may not look like it, but there's a Sportster head pipe in there
MIG welded O2 ports for oxygen sensors
The material is now set into a jig. This ensures that the two head pipes are cut in the proper positions.
Again, jigs are used at every step of the way. This ensures proper fitment.
Now, each head pipe is then polished before welding. This is to remove any clamp marks that were left by the bender.
Again, we go through a two-step belting process at this phase. This is to make sure there's no mandrel bend marks left in the material.
This phase, we're getting ready to cut holes and weld into the O2 ports for oxygen sensors. Again, everything is set into a fixture to assure that every component comes out exactly the same. Not all Lowbrow by Kerker Systems include O2 ports. Be sure to check your fitment on the Lowbrow Customs website.
Here, we're getting ready to weld in the O2 sensors. The head pipes are all MIG welded at this point. Again, everything we do is checked and set into a jig to assure proper tolerance and achieve a consistent product.
At this point, the two head pipes are fit into a jig.
Test-fit the collector onto the two head pipes
You can see in this jig, the ease of its ability to move around and rotate. We're able to weld on the different components easily. We test-fit the collector onto the two head pipes, make sure everything lines up properly in the jig. The two head pipes are tacked together at this point.
Now that the collector has been test fitted, it's removed and the two head pipes are welded together.
Now, the collector is slid back onto the two head pipes and set back into the jig. We'll make a divot on the end of the collector to assure proper interface between the head pipes and the collector and he'll weld that up, too.
We'll divot the other side of the collector now. Again, this ensures proper fitment between the collector and the head pipes. You see, throughout this process, the head pipe is never removed from the fixture. Again, this ensures proper fitment.
Ensures a deep, low-tone, burly-sounding muffler
The head pipe is then removed from the jig and now, the head pipe and the muffler body are off for paint. In this step, the cores are being wrapped with fiberglass. This ensures a deep, low-tone, burly-sounding muffler. Masking tape is used to retain the packing in the muffler. The masking tape burns right off within the first few minutes. The end cap is slid onto the core and then slid into the muffler body. The core is then tapped and a retaining screw installed.
Last quality control check
There you go, the finished muffler, the Lowbrow Customs by Kerker. One last clean and wipe down of the muffler body to ensure there's no fingerprints left on it, which is also a good idea after you install it, make sure you clean and wipe all the fingerprints off so that they don't burn into the paint when you start it up.
The Muffler is bagged, the boxes are made.
At this phase of packaging, one last quality control check is done. Instructions and hardware kits are placed in the box. All of these Lowbrow Customs by Kerker Systems are foam-packaged. This ensures that they arrive at your door in perfect condition. The expanding foam is laid into the box. The head pipe is placed into it. The expanding foam will actually shape itself around the product.
Here, the muffler body is placed in and then another layer of the expanding foam packaging.
You see, he holds the box halfway shut so the foam shapes itself around the product and the box.
The box is then stapled, taped, and sealed up. They're loaded on a skid and shipped out the door to Lowbrow Customs.
Here are some examples of These pipes on an assortment of different motorcycles:
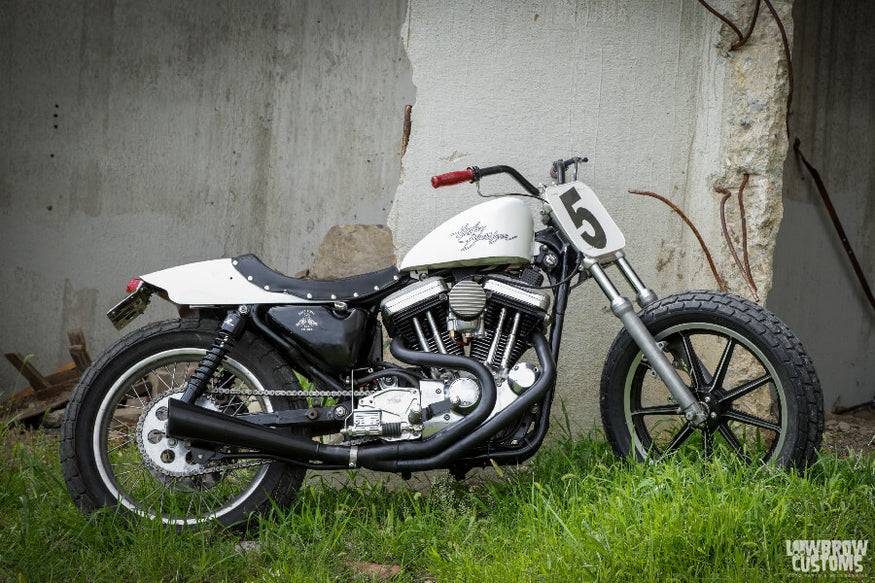 Lowbrow Customs 2 into 1 Hooligan Exhaust by Kerker for 1986-03 Harley-Davidson Sportsters.
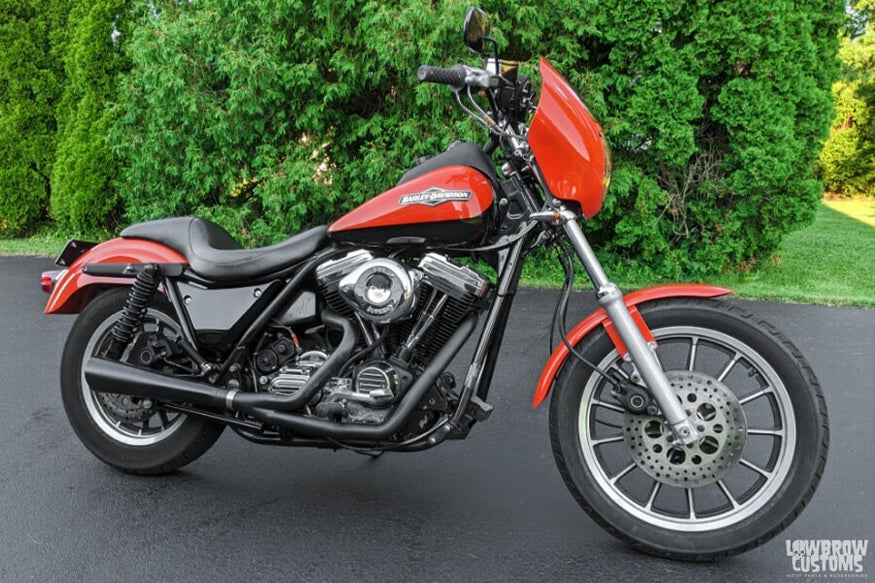 Tim Statt's FXR with our Lowbrow Customs 2 into 1 SuperMeg Exhaust by Kerker for 1984-94 FXRS.
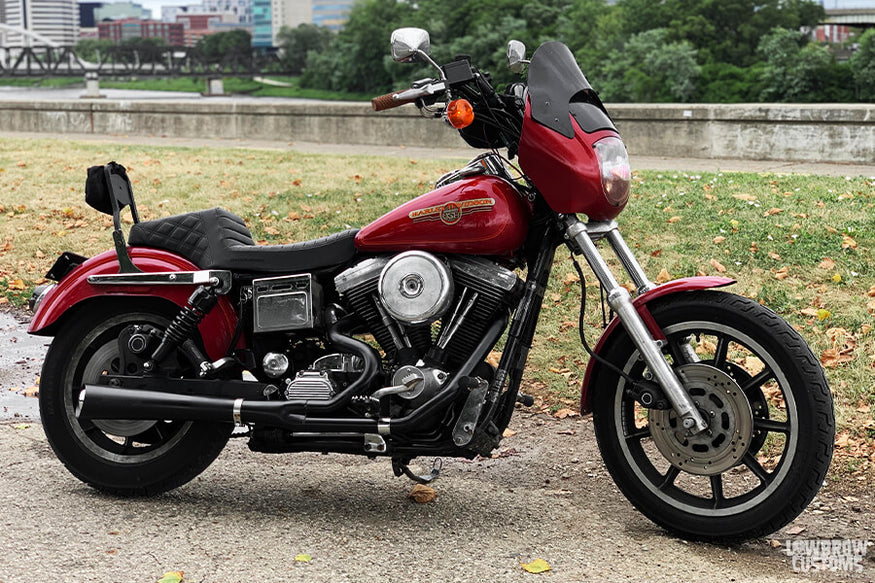 Kyle Waltz's 1993 Harley-Davidson FXDL Dyna with the Lowbrow Customs 2 into 1 SuperMeg Exhaust by Kerker for 1991-2005 FXDs.
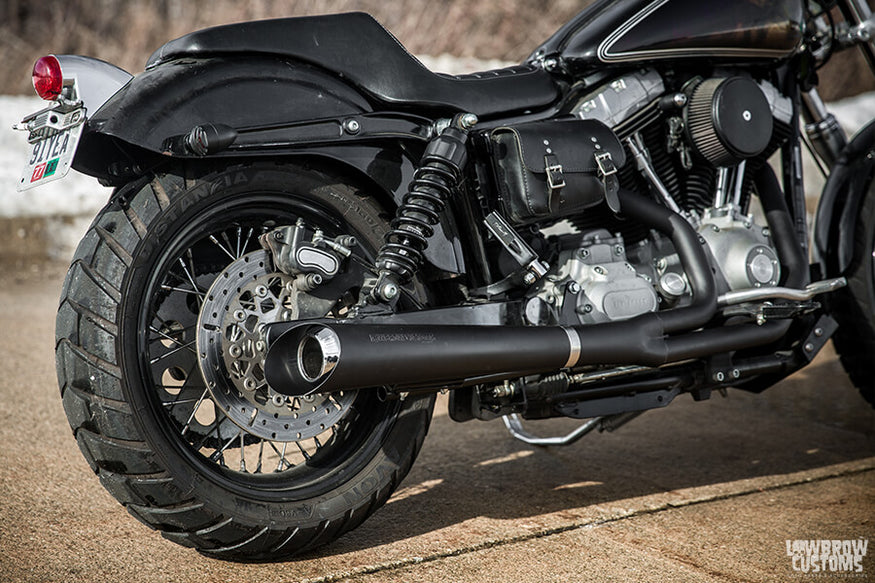 Kyle's Dyna with a littler closer shot of the muffler.
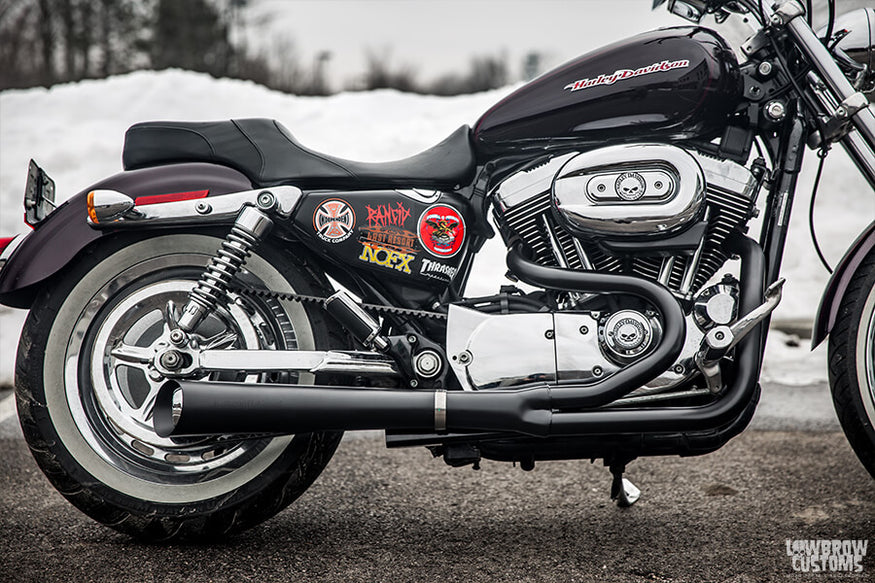 Lowbrow Customs 2 into 1 Kerker SuperMeg Exhaust for 2004-2013 XL Sportsters .
How To Install Lowbrow Customs 2 into 1 SuperMeg Exhaust
Though install is super easy on these and should only take a couple hours to get back on the road we thought it would be a good idea to have Todd walk you through 9 quick steps on getting this motorcycle exhaust system installed onto your bike with ease.
Tools Needed For This Job:
- Flat head screw driver
- 5/16 socket with 1/4 nut driver
- External lock ring pliers
- 2 - 1/2 wrenches
- 3/8 drive ratchet
- 1/2 socket
- Long socket extension
- 5/16 allen socket
- 1/4 allen socket
- 3/16 allen socket

Step 1: Remove exhaust system from your bike
- Remove heat shields: using 1/4 drive 5/16 socket on your nut driver which we find easier than a flat head, but if that's all you have, get at it.
- Unplug your 02 sensors if you have them.
- Remove nuts from exhaust flanges located on the cylinder heads with 1/2 inch socket (front & rear). We suggest to spray some penetrating oil or WD40 on each of the studs and let them sit for a few minutes before trying to remove them. The last thing you want to do is break off a stud in your cylinder head.
- Remove bolts attaching the mufflers to the support bracket.
- You now can cCarefully remove the entire exhaust system in one whole piece.
- Remove the O2 sensors if you have them.
- Remove the mounting bracket from the bike.
Step 2: Remove Retaining Rings & Flanges
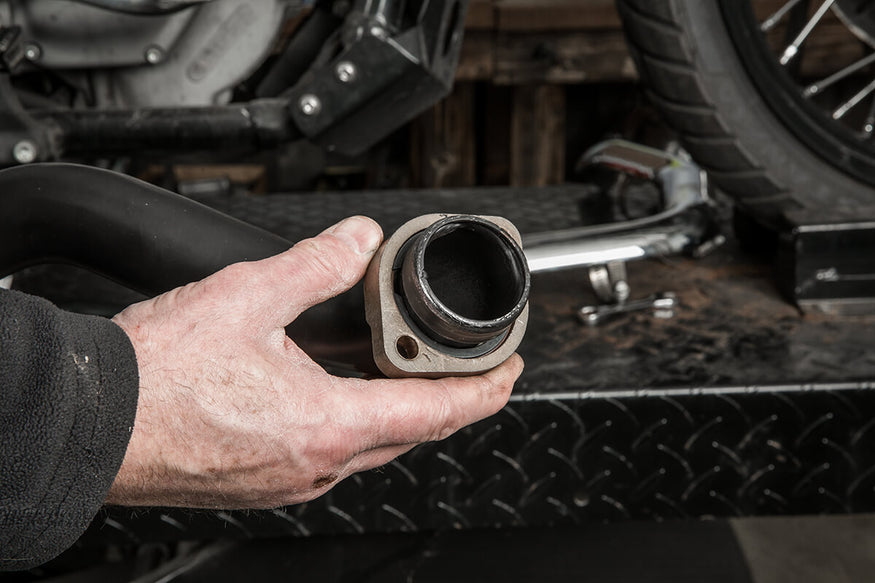
Remove retaining rings & flanges from stock exhaust using external lock ring pliers. If the rings are extremely corroded or warped we suggest to use a new set. Re-install the rings and flanges on to the new exhaust.
*Note: Make sure the flange goes on first before ring and with the lipped indention facing out.
Step 3: Install the O2 sensors
Install the O2 sensors into the new pipes and or O2 sensor plugs depending on your set up. We supply some anti-seize that you can put on the threads of the O2 sensors but be sure not to get any on the actual sensor or you may run into some issues.
Note* These pipes have threaded bungs designed for 18MM sensors, if your bike has 12MM you will need to purchase some adapters.

Step 4: Install the Mounting Bracket
Using the correct fasteners from the supplied hardware kit, install the mounting bracket to the left side of the transmission case after removing the stock bolts. Make sure to use the spacers between the trans case and bracket.

Step 5: Loosely Install the 2 Into 1 Header Pipe
Loosely install the 2 into 1 header pipe onto the cylinder heads.

Step 6: Insert the Two T-Bolts
Insert the two T-bolts into the channel of the muffler. Slide the clamp over the muffler and Install the muffler on to the 2 into 1 pipes lining up the to T-bolts to the exhaust mounting bracket.

Step 7: Tighten Down the Muffler
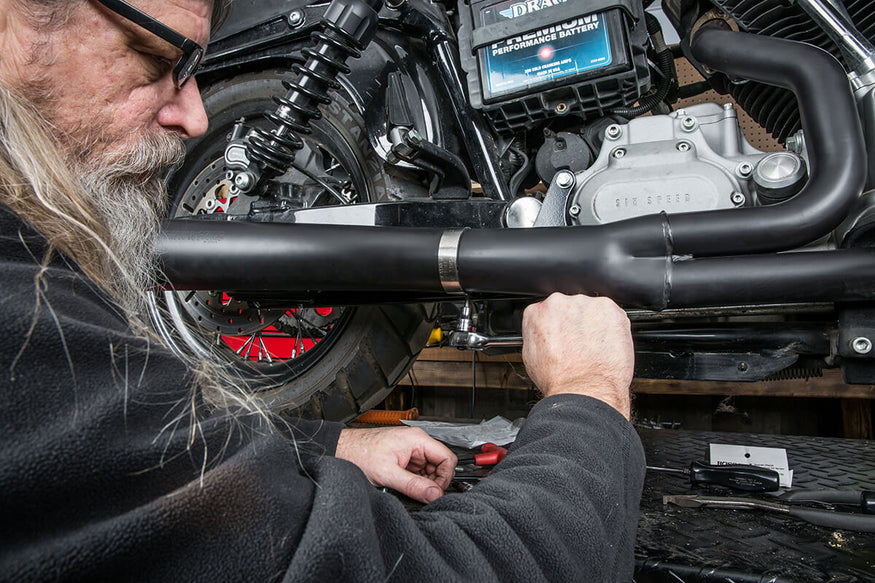
Tighten down the muffler to the mounting bracket using 1/2 wrench. Tighten down using down the muffler clamp using a 3/16 allen socket.
Step 8: Tighten Down the 4 Nuts
Once the muffler is secure onto the 2 into 1 pipe and the exhaust mounting bracket, tighten down the 4 nuts on the cylinder head. Tighten these evenly and do not over do them again the last thing you want is to break a stud off on your cylinder head.

Step 9: Re-plug in your O2 sensors
Re-plug in your O2 sensors if you have them. Tune your bike accordingly and go for a ride!
Note* If you are in need of a tuner check out - Dyno Jet Power Commander V Tuner for 2006 - 2011 Harley Davidson Dyna.
Related Products


