The Birth of The Saturday Sportster Video Series
We thought, "What if we had Todd show the world how easy it is to turn an ugly, neglected Sportster into something really cool? It could be done with basic tools and almost no fabrication, using a bunch of parts we make and carry."
With the knowledge we could share, and all of the custom Sportster parts we carry, we knew many people could build the bike of their dreams over a series of weekends, and on a budget. Right at that moment the idea for the Saturday Sportster series was born.
Buying a Used Harley Sportster
We picked up a 2003 Harley-Davidson Anniversary Edition 883 Sportster for relatively cheap and started to film Lowbrow Customs' newest series, Saturday Sportster.
We are no strangers to buying used motorcycles. In this Video: Guide for Buying a Used Harley Sportster, Todd walks you through the entire process he personally uses when evaluating a used bike he is interested in buying.
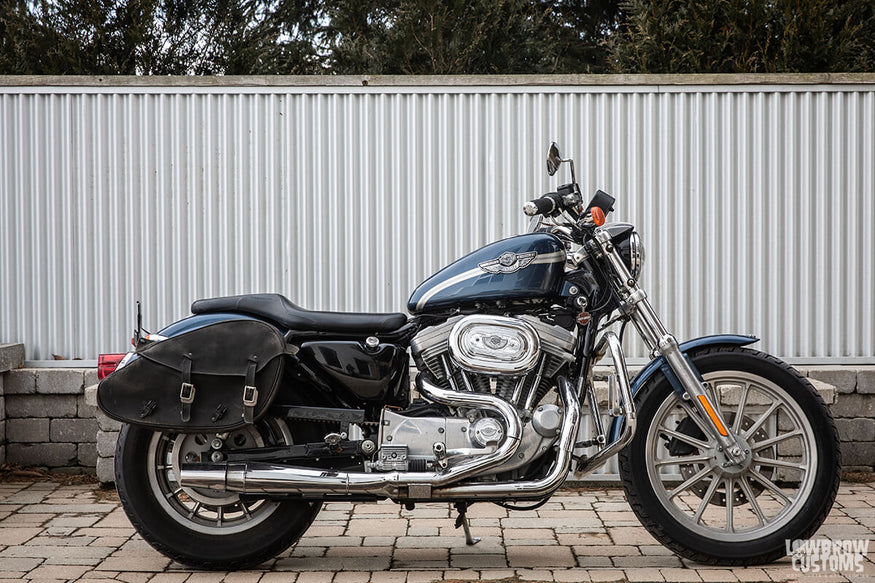
Here is the 2003 Harley-Davidson Sportster that we bought for the basis of the Saturday Sportster project and video series.
Finding a used Harley-Davidson Sportster for cheap isn't a problem if you keep looking for a good deal. Facebook Marketplace and Craigslist are two great spots to do so. Often, a Sportster is purchased as a starter motorcycle, and many times one can be found with low miles, and in almost-new condition, for a fraction of the price of a new one.
Sportsters are reliable, easy to work on, and with the wide array of custom Sportster parts available, they make an excellent base for a custom motorcycle build.
![]()
The Saturday Sportster mid-build, taken off the lift and rolled outside to get a good look at it before final decisions on paint and coatings were made.
With some Saturdays, general hand tools, and the helpful guidance of Todd, you too can build a cool, high-performance custom Sportster! We made this series an in-depth, easy-to-follow tutorial. We didn't gloss over the details. Our goal is to give everyone the confidence to get started on that bike project that they've been thinking about.
Whether you are an experienced mechanic, or it's your first time using a wrench, this series is for you. It will give you the confidence and knowledge to build a custom bike all on your own... with a little help from your friends here at Lowbrow Customs!
Want to learn how to increase the horsepower of your 883 or 1200 Harley Sportster engine?
No problem! Follow along with us in this 4-part S&S 1200 Hooligan Conversion Kit Install Video series. S&S makes Hooligan Conversion Kits to take 883cc bikes to 1200, and stock 1200cc bikes to 1250.
More than just a big bore kit, the included bolt-in cams and premium tappets make the most of the added displacement. All while using stock heads, pushrods, and fuel system!
This kit, backed up with dyno data, increases the horsepower of a stock 883 Sportster up to 85% along with a performance air cleaner and custom motorcycle exhaust!
What Parts Were Used To Build The Saturday Sportster?
Interested in how to build a custom Sportster, and what parts to use on your build? Well, you made it to the EXACT right place :)
Watch the Saturday Sportster and follow along! You can find all the parts used when building the Saturday Sportster here.
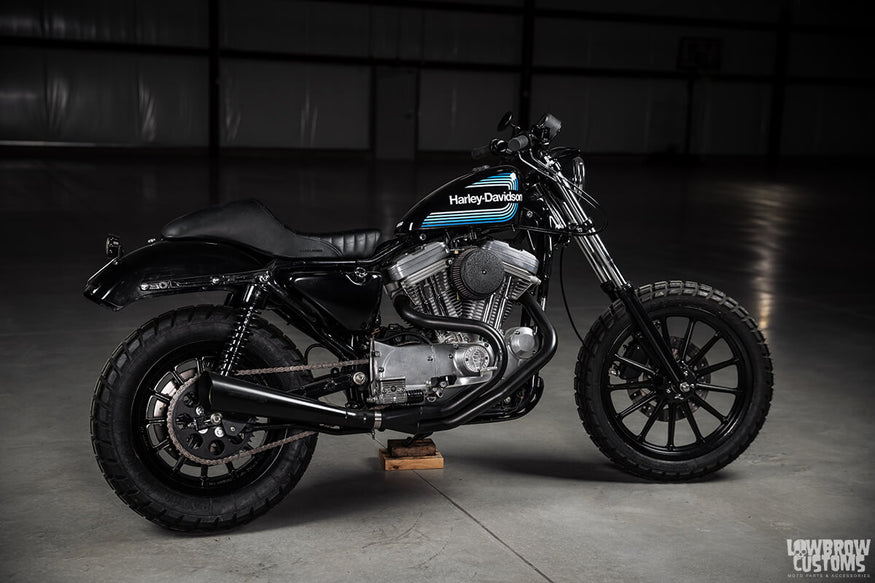
The final result of the Saturday Sportster build. A much more powerful and nimble machine, with loads of style to boot. Follow the entire build step-by-step. No fabrication necessary!
Playing Games With Todd Muller From Lowbrow

What's almost as fun as working on a bike with Todd in your garage on a Saturday? Playing a fun game and learning from Todd at the same time!
Every time you hear Todd let loose with one of his trademark "Whooooo!", and you see Todd's face sticker pop on the bottom right part of your screen, take a drink (adult beverage, seltzer water, chai tea, hey, you do you)! Play along with friends for added fun.
Saturday Sportster Season 1: All 13 Episodes
WATCH EPISODE 1
In this episode, Todd shows you the neglected 2003 Harley-Davidson Sportster we picked up and gives you a run down of the ideas we have for the build. Follow along during the disassembly and removal of a lot of the stock and Harley aftermarket parts that we discovered were on this motorcycle.
Full of surprises like crud, dirt, and corrosion, the bike was far from in perfect condition. But hey, that's half the fun of working on and building motorcycles!
Todd also gives you a sneak preview at some of the parts we will be using on the build and walks you through the plan of attack. So grab an adult beverage or a seltzer water, some tools, a couple shop rags and let's get cracking!
WATCH EPISODE 2
In this episode follow along with Todd as he takes off some more crusty, rusty and corroded parts from the 2003 Harley-Davidson Sportster project in preparation to get them powder coated black. Todd also finds some disintegrated parts desperately in need of replacing that weren't visible to the naked eye.
From handlebars and the speedometer, to the front wheel and taking apart the fork tubes, Todd walks you through it all. Who knows what kind of messes lurk ahead? One thing is for certain, this front end really needed some love, upgrades and care. Let's go!
WATCH EPISODE 3
In this episode Todd continues on the the journey of the messy front end disassembly with a new shirt and a new smile. Watch as he walks you through the removal of the triple tress, the crustiest of bearings and races. Find out one way to get a race out easily and find out the other how hard it can be with just a punch. Todd shows you how easy to install new races into the frame when you have the right tool for the job.
Todd gets tired of all that wiring hanging on the front of the bike, so he shows you how easy it is to relocate the ignition switch and coil housing using a Gasbox Top Motor Mount bracket. Lastly he removes the rear wheel, rear rotor, and rear pulley in preparation for the wheels to get powder coated.
There's more corrosion, more fun, more Toddisms, and even a small field trip to Colony Machine. So, let's get them tools out, crack a cold one, and get to work. It's Saturday Sportster baby...
WATCH EPISODE 4
You guys didn't think we were going to leave you hanging did you!? In this episode Todd walks you through rebuilding your forks step-by-step with a new 39mm fork seal kit, Til Death Cycles 39mm extended damper tubes, freshly powder coated lowers, and some Speed Merchant fork caps. He also shows you how to reinstall the triple trees back onto the bike and install the fork tubes onto the trees properly.
With lots of tips, tricks and Todd's guidance we are confident this video is going to make your Harley 39mm narrowglide front end rebuild easy-peasy. So break out those tools and let's get cracking! PS - you also may need one specialty tool for this job, a 39mm Fork Seal Driver.
WATCH EPISODE 5
With the wheels powder coated black and the Bates Baja tires mounted, it's finally time to start making this project look more like a motorcycle again.
Follow along with Todd as he shows you how to get your disc brakes, main drive pulley installed back on to the wheels along with mounting them to the motorcycle.
Oh shoot, you can't mount a rear wheel with out a kick ass suspension installed! Don't worry... Todd walks you through how to do that as well. Our friends over at Progressive shocks hooked us up with a killer set of their Heavy Duty 15" 413 series shocks to give us the stance and style we were after.
Time to break out those tools! Let's get going!
WATCH EPISODE 6
Follow along with Todd and all of his "Toddisms" as he shows you how to install some new handlebars, a new clutch cable, left side grip, clutch lever, and left side peg. Though some of these jobs might be easy, there is still a lot of information and things to note when doing these jobs. The devil is in the details, and Todd has got all the details covered!
A "chinga dinga" here, a "chinga dinga" there, in Todd we trust to get this Sportster project one step closer to getting on the open road. So break out those tools and lets get goin!
WATCH EPISODE 7
Here comes another jam-packed episode for your viewing pleasure! Watch as Todd shows you the remaining steps on converting a stock belt drive to a chain drive using the Lowbrow Customs Sportster Chain Drive Conversion.
If you remember back in Saturday Sportster Episode 5, Todd replaced the rear drive pulley with the new sprocket. Now it's time to replace the front pulley with the new sprocket from the kit and securing it with a Cycle Standard Mega Nut.
Todd will also give you tips and tricks on how to cut your chain and center align your axle / tire. Let's get them tools out and get goin' here!
WATCH EPISODE 8
Todd snagged a brand new CV carburetor for the Saturday Sportster. BUT he can't just slap it on the bike and call it a day!
This bike has larger cams and Todd will be installing a larger air cleaner and high flow exhaust system to take advantage of the S&S Hooligan Kit. So he wants to make sure the carburetor has the right jetting to run properly. On a stock CV carb access is blocked to the air/fuel mixture screw. Todd shows you a hack to get your CV carb dialed in properly.
Learn the inner workings of the CV carb and how to change out your main and intermediate jets. You will also learn how to install throttle cables to the carb and the choke knob. Todd then shows you how to properly install the carb, throttle housing and choke onto the motorcycle.
BONUS FOOTAGE: Todd also installs a killer skid plate from W&W Cycles... It's Saturday Sportster baby, let's get going!
WATCH EPISODE 9
In this episode of The Saturday Sportster, follow along as Todd installs the super-popular, USA-made Lowbrow Customs 2-into-1 Hooligan Exhaust. He shows you that sometimes things need a little bit of thought and ingenuity. With this build using the Progressive 413 Series 15" shocks the chain wasn't clearing the rear exhaust mount. That's the custom life, eh?
With a little bit of problem solving Todd walks you through his method on getting this exhaust to fit and clear the rear bracket properly. You will also learn tips and tricks on installing any kind of exhaust. So break out those tools and let's yell out a big "Wooo" together as we get one step closer to finishing the Saturday Sportster!
WATCH EPISODE 10
Woooo! It's wiring time! BUT before Todd gets started on greatly simplifying the stock wiring and switch housings, let's back up a bit and show how the damn thing is gonna start!
Installing a Cycle Standard Solenoid Starter Button can really help simplify the wiring, and keep starting your motorcycle super easy. Turn the key on, push the button, and go! While seeing how easy it is to install this part, you will also learn how the starter works on your motorcycle.
Next, it's time to get rid of the switch housings. Watch Todd figure out what wires go where, and how to connect certain ones together to dial in this custom Sportster build.
Todd also shows you a nifty way to make a high-low beam switch using your Sportster eyebrow, and also sets up the trick new LED headlight.
We are getting ever closer to starting this bad boy up and taking her for a ride. Awe yeah, it's Saturday Sportster!
WATCH EPISODE 11
Todd's back with another fun and helpful episode of Saturday Sportster. Learn how to determine what gas tank you need for your bike. This includes the proper fitment as well as ensuring the right gas tank capacity needed for the use of the bike.
With all this in mind, Todd mounts a King Sportster gas tank and shows the benefits of using this larger tank and how it fits this project so well.
With the Saddlemen Americano Tuck and Roll 2-up seat finally in, Todd finally has the opportunity to mount the universal Sportster bobbed rear fender properly with a little help from fellow Lowbrow employee Clayton. After the fender gets mounted, learn a really easy way to mount the seat to the fender using only a drill, making it a seamless fit for any sportster 2 up seat setup.
With zero welding on this entire project, Saturday Sportster is getting ever closer to hitting the road! WOOOOO!
WATCH EPISODE 12
Oh boy, this is the second to last episode! With some more crazy "Toddisms", watch and learn as Todd installs the custom rear tail light, discusses how he likes to manage a custom build project, and installs a custom Harley air cleaner.
This tail light has an integrated license plate mount so we are killing two birds with one stone. This Cycle Standard Comet Tail Light has a clear lens but is powered by a red LED so it only turns red when the bike is on. Sleek style and bright as hell.
Todd then shows you how he likes to manage a custom build like this by using a checklist and mark things off when he's done. Not only does it feel good to check something off the list but you can physically see that you accomplished something. A trip of a 1,000 miles starts with a single step! Or something like that...
Lastly learn how to install an Arlen Ness Big Sucker air cleaner on your CV carb. Todd really has a love for this air cleaner because it's an all-in-one kit that performs well. You don't need to buy anything else to install it and it allows for ample air flow to the motor.
Break out those tools and lets get to work! It's Saturday Sportster baby!!!
WATCH EPISODE 13
This is it, what you've all been waiting for! The grand reveal and the sweet sweet sounds of that Hooligan Exhaust in the wind... (record scratch)
Doh! OK, let's wire the bike up first.
Todd shows you how to wire up your tail light properly and gives lots of tips and tricks on how to test your connections and light to make sure you are installing it correctly. He also shows you a good way of tidying up the main wiring harness by the back bone before putting on the gas tank for the last time.
After the seat gets installed t's time to stop and stare at all that we have accomplished together. Todd walks you through the bike from front to back and gives an overview of all the things we added to the bike to make it the way you see it now.
Watch as Todd takes off on the bike for the first time. He gives it a little hell as he rips around our neighborhood. "B'da, B'da, B'da... That's all Folks!"
We really do hope you found these free tutorial videos super helpful and inspiring. One of our main goals with this project was to show all of you how to build a really awesome bike, step-by-step, without doing any kind of welding or major fabrication work.
We feel this bike is a great example of just that. So break out those tools, grab a beverage, and get in that garage! We are excited to see your rendition of the Saturday Sportster.
Till next time... we will see ya in Saturday Sportster Season 2, which is already in the works!
Photos Of The Final Saturday Sportster Build
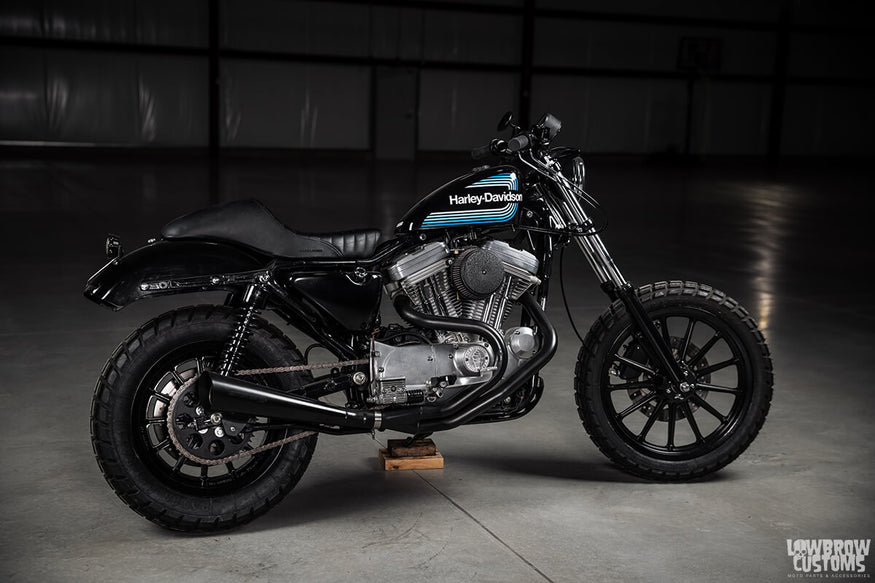 There she is in all her glory, The Saturday Sportster a 2003 Anniversary edition turned into a bitchen Tracker.
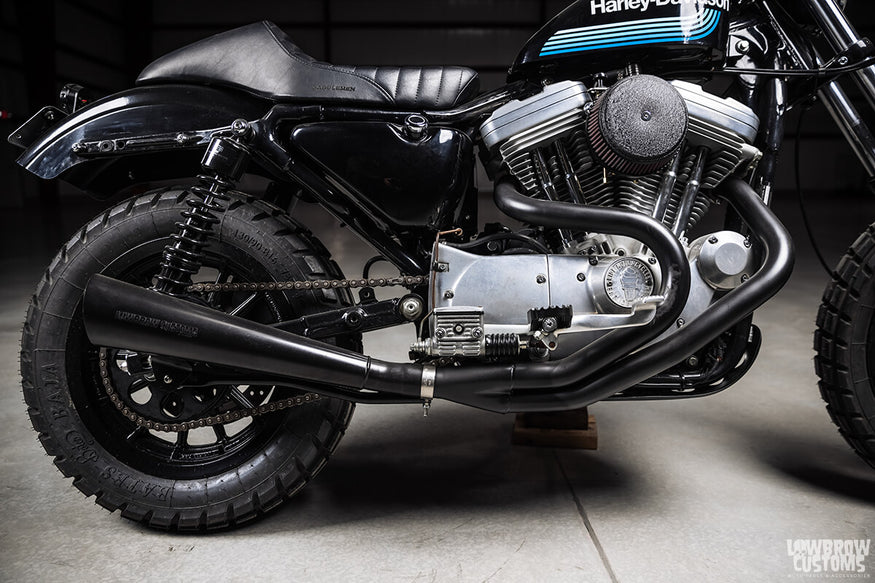 Check out that Lowbrow Customs By Kerker Hooligan Exhaust!
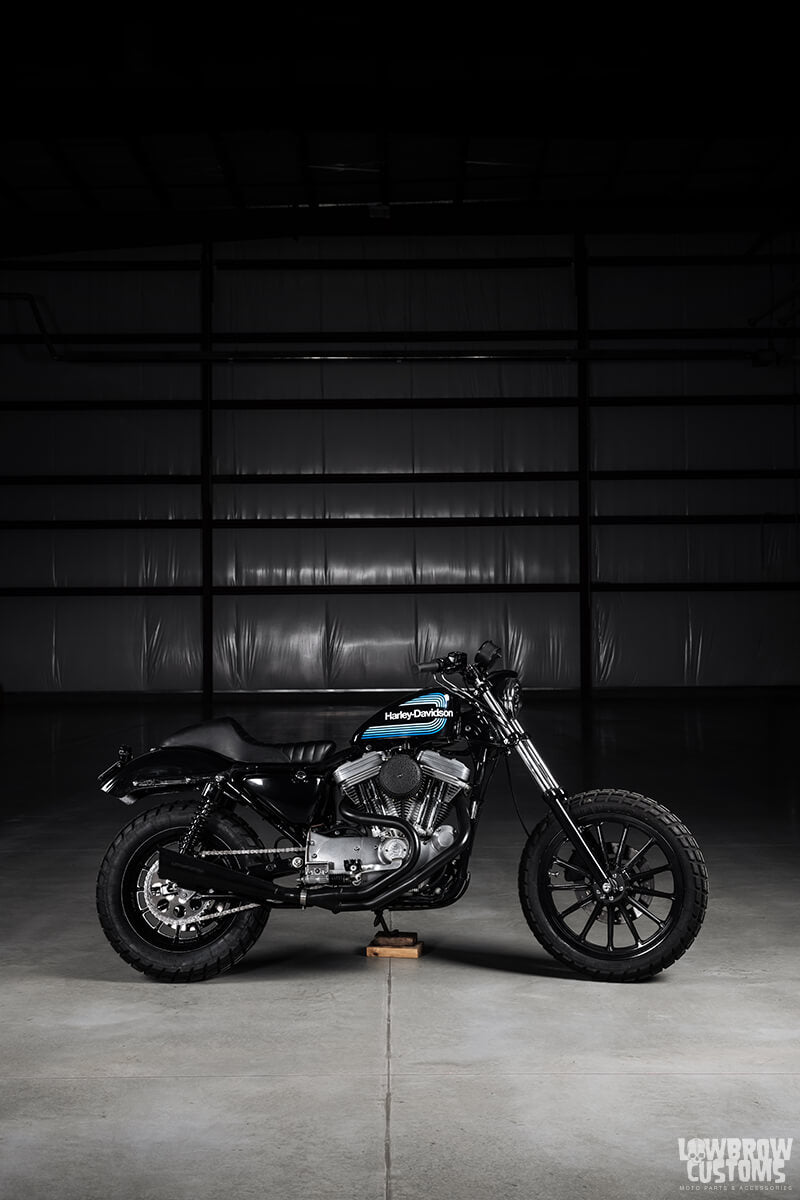 "She's a beaut Clark"
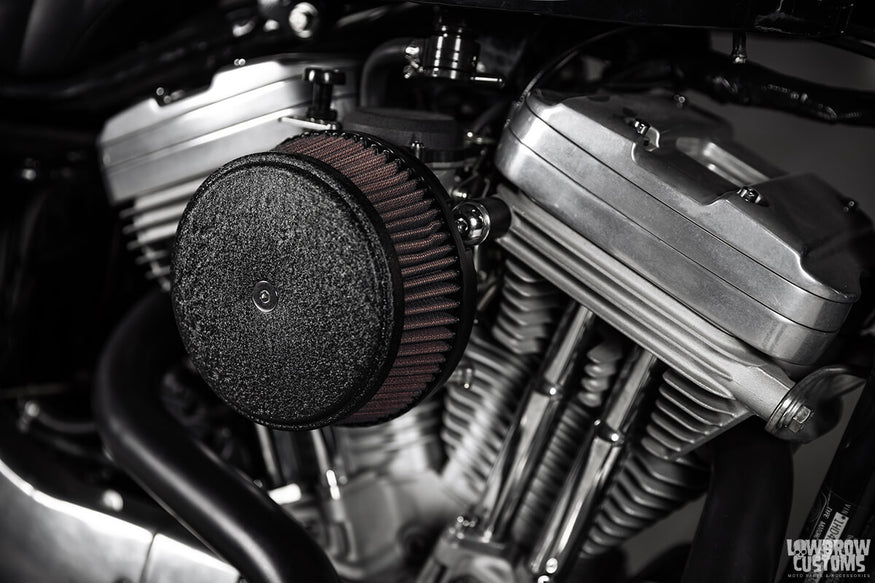 You know that Arlen Ness Big Sucker is gonna help that 1200 Hooligan Kit breath real nice.
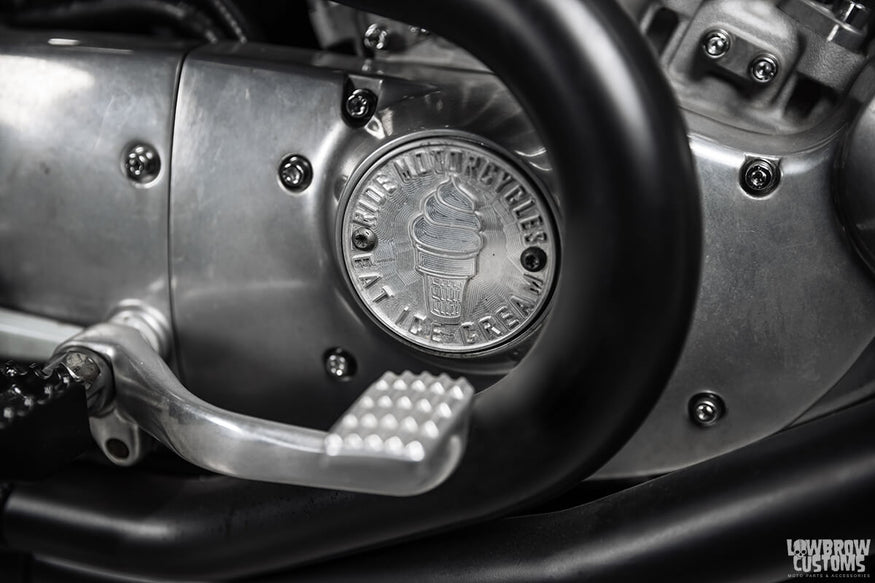 Ride Motorcycles Eat Ice Cream - Americana Speedshop
 Cycle Standard Bobbed un-drilled rear fender.
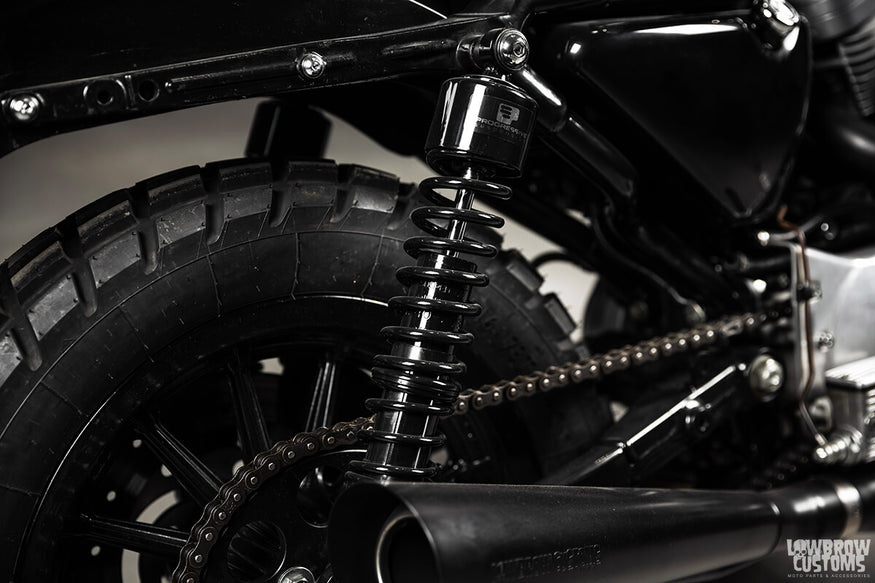 15" Progressive suspension rear shocks.
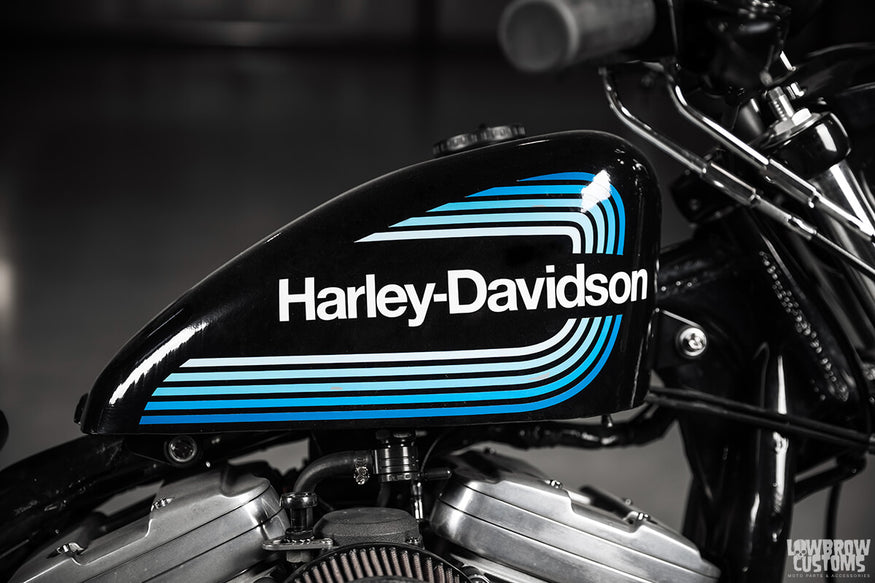 The King Sportster tank. The AMF reproduction decals by Rust Is Gold Co.
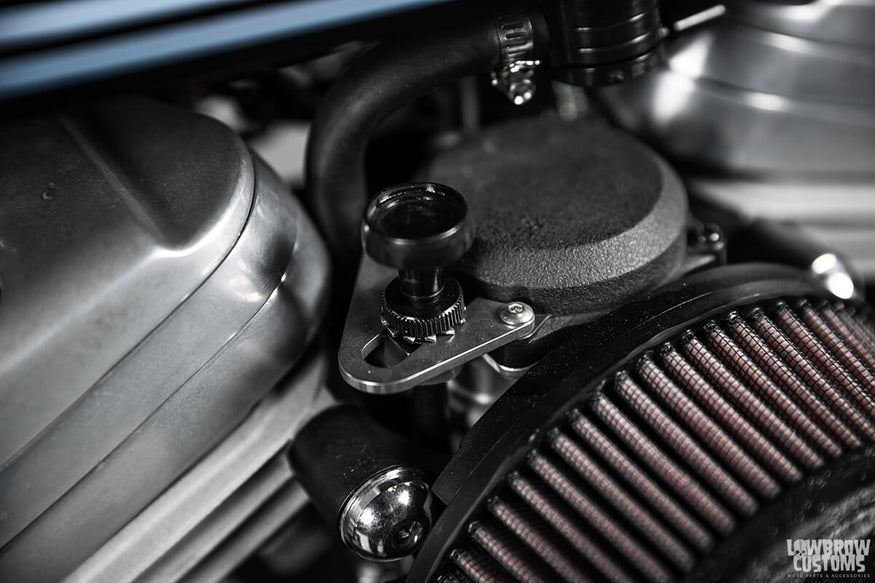 The Gasbox choke knob relocation bracket.
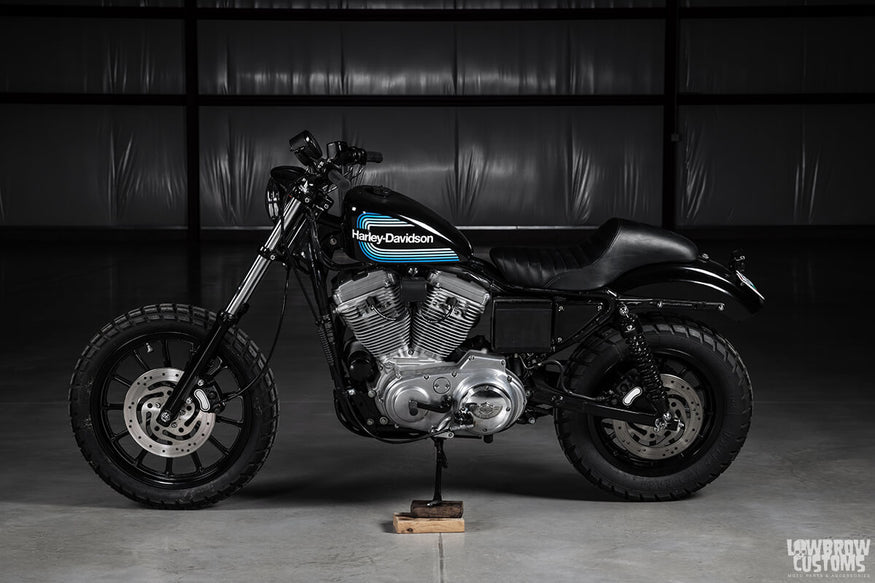 B-side is just as nice.
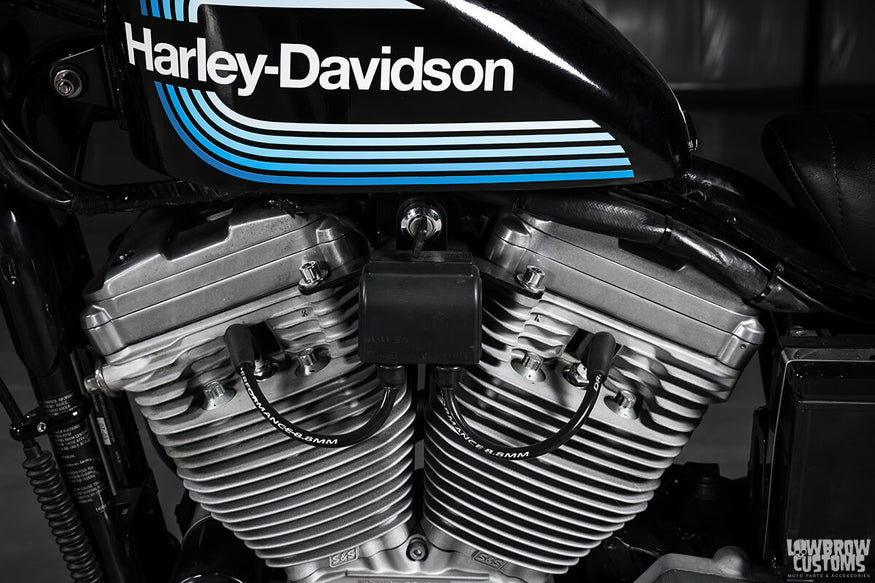 The Gasbox coil and key relocation motor mount bracket.
 Todd's little reminder to turn the gas off.
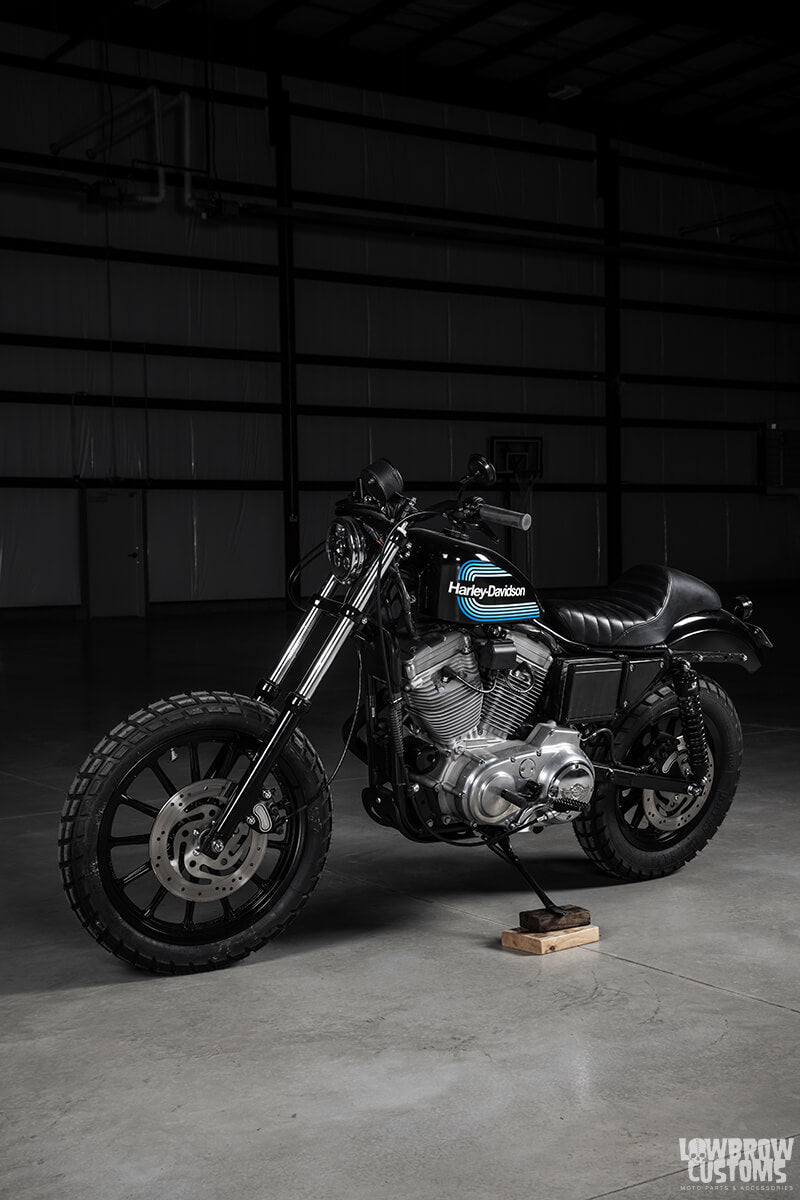 Those Tracker Die longer damper tubes really give this bike a great stance.
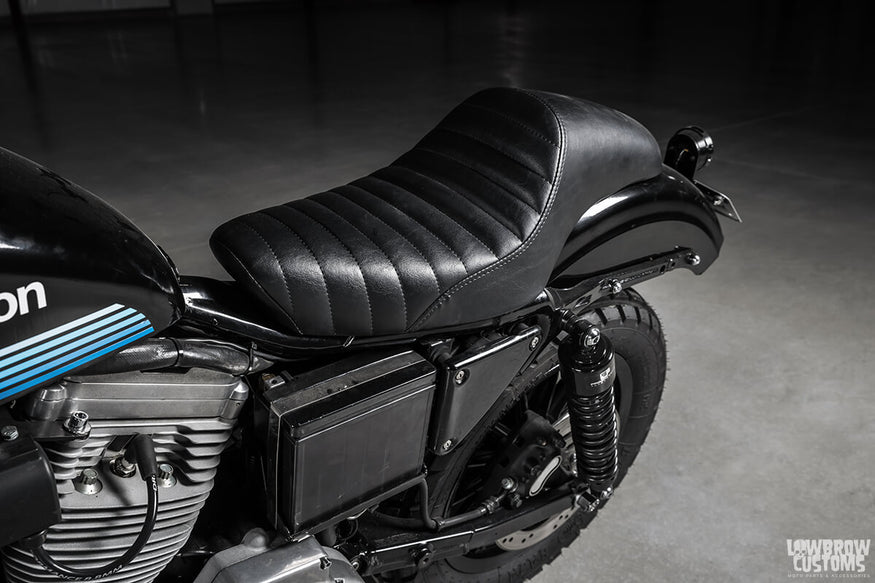 Saddlemen's 2 up Americano Seat - Tuck and Roll baby.
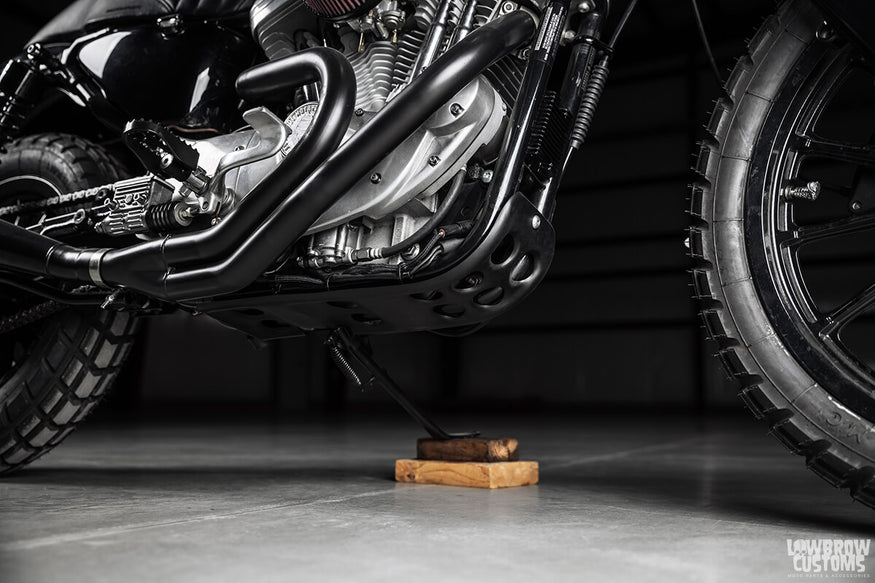 W&W Bates Skid plate.
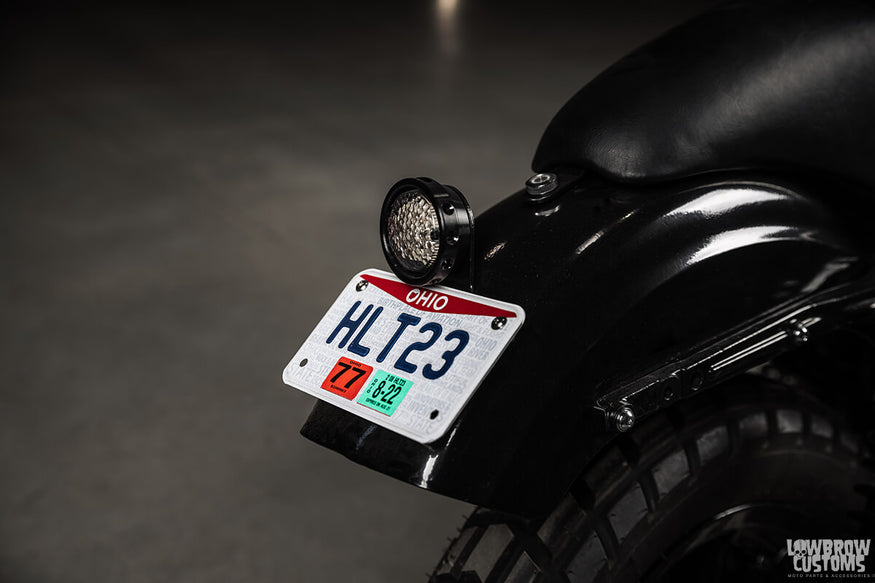 The Cycle Standard Comet tail light.
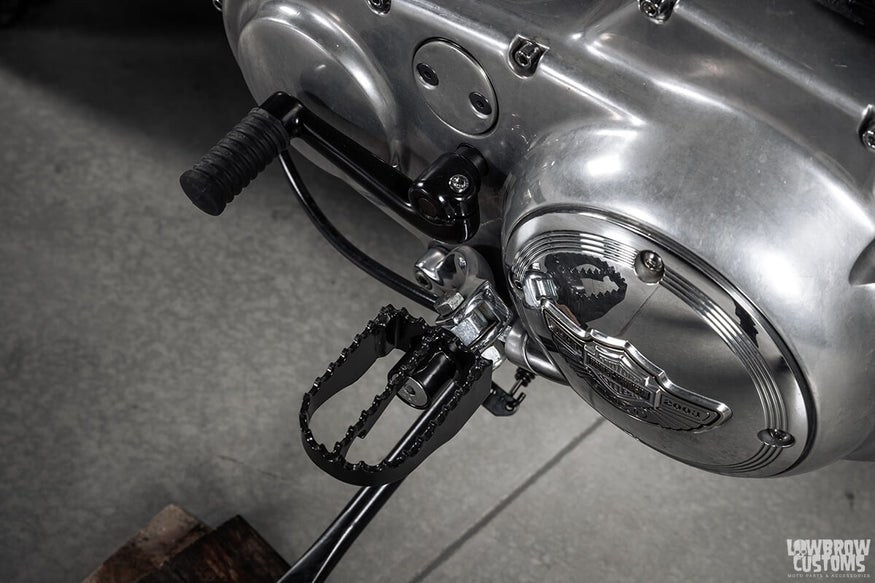 Burly Brand MX style motorcycle foot pegs.
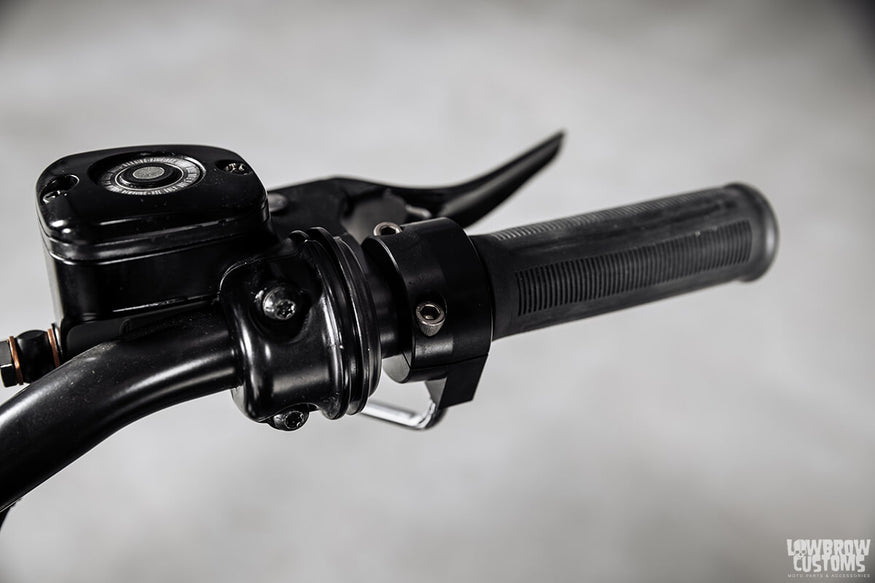 LC Fab brake switch pod delete, Lowbrow Customs Throttle housing, and Lowbrow Customs Beck Grips—or any motorcycle handlebar grips of your choice to suit your style.
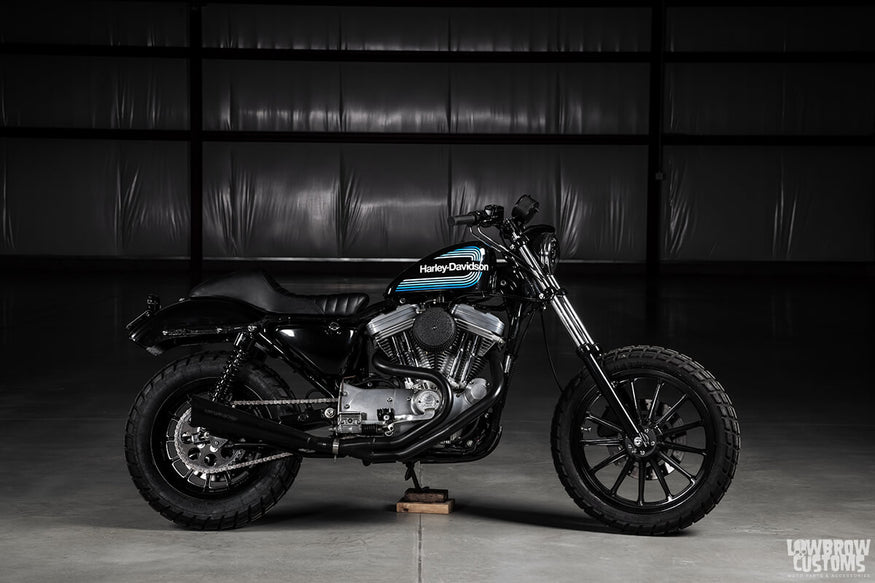 Grip it and Rip it!
Related Products


