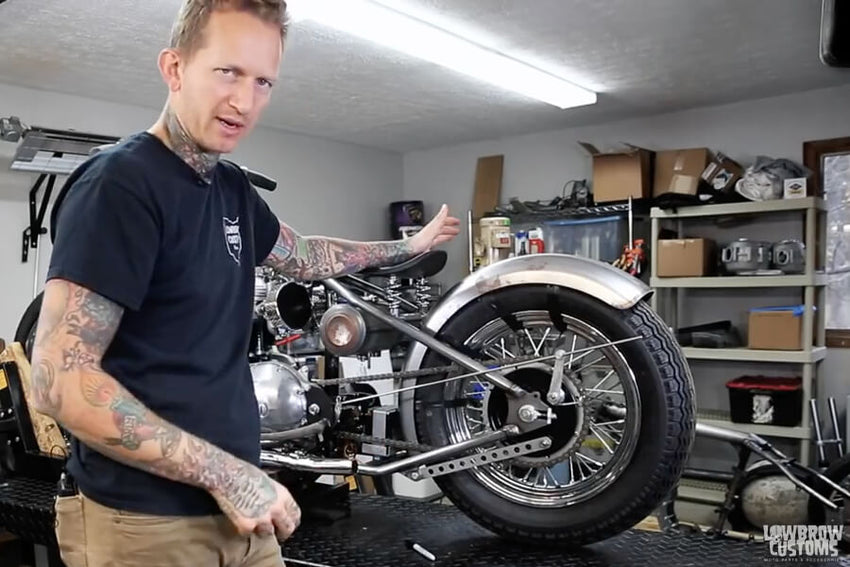
TIME TO GET CREATIVE. THERE ARE MANY WAYS TO MOUNT A FENDER!
We have many styles of rear fenders available and though Tyler shows just one way you can mount a rear fender, there are so many ways you can do it. Thats the beautiful thing about fabrication. Save time and money on our fabrication tabs, bungs, and strut kits and spend more time being creative.
So warm up those welders and let's get cracking and tackle this project head on. If you do not like this universal rear fender, check out another project how we install the Rogue Fender on the Harley Big Twin with a video or a detailed guide post here.
WATCH HOW TO INSTALL A CUSTOM MOTORCYCLE FENDER VIDEO
In this video Tyler walks you through how to install a Gasbox 16" Rear Fender on a Triumph Unit chopper project of Todd's. Utilizing the vast amount of fender fabrication tabs, brackets and strut kits we carry, installing a rear fender couldn't be simpler.
STEP-BY-STEP HOW TO INSTALL A BOBBER REAR FENDER WITH PHOTOS
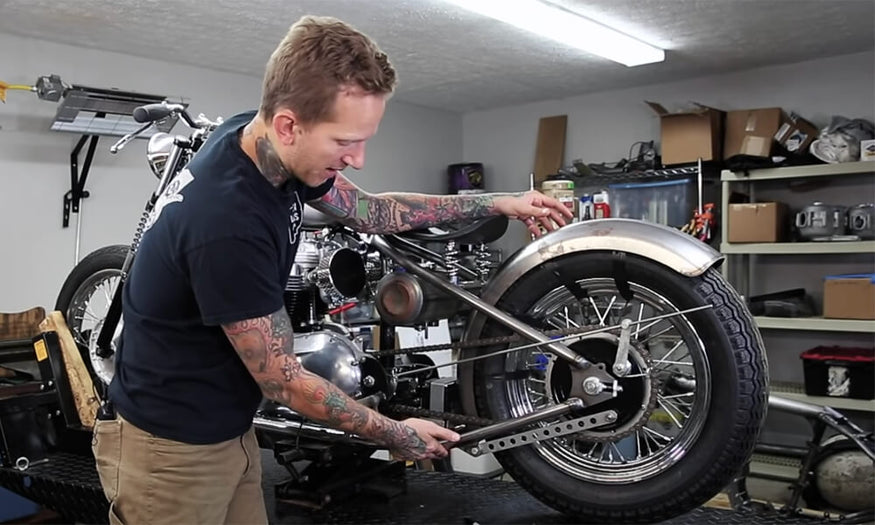
Aligning the fender on the rear tire, supported by a piece of garden hose, to keep the distance off the tire even along the profile.
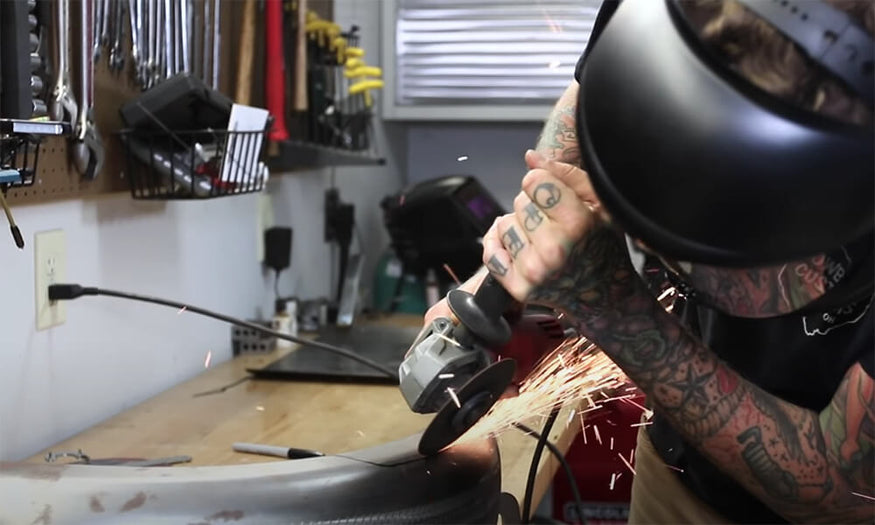
Cutting a chain relief (clearance for the chain) the rear fender. It is important to have your rear wheel spaced properly and your chain installed before installing the fender!
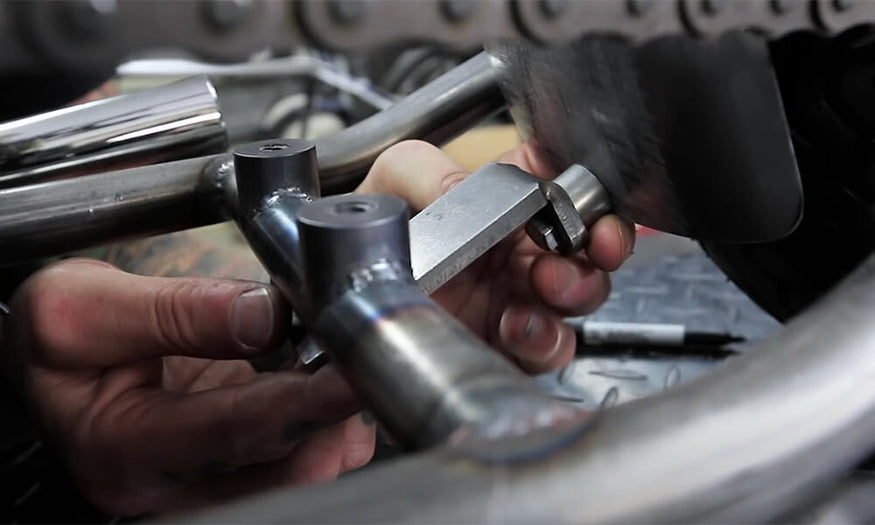
Aligning the lower fender mounting tab in preparation for fitment and welding.
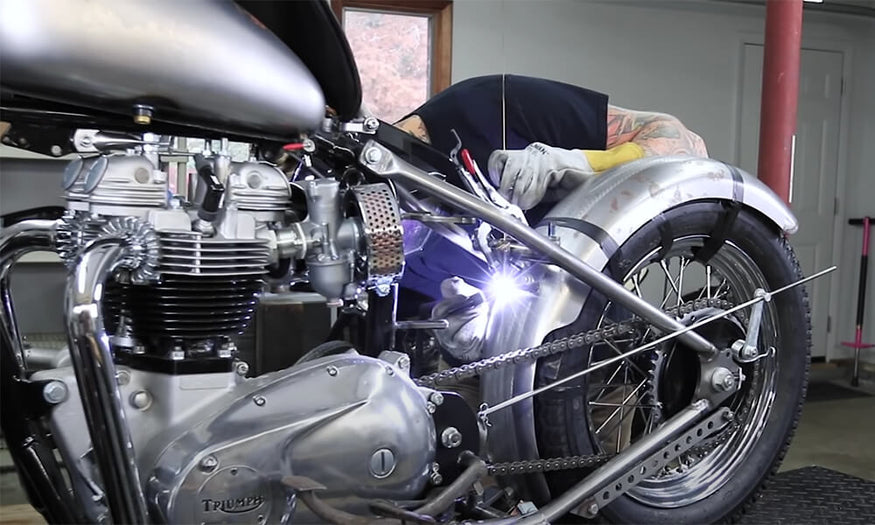
Welding the upper fender mount tab for curved fenders.
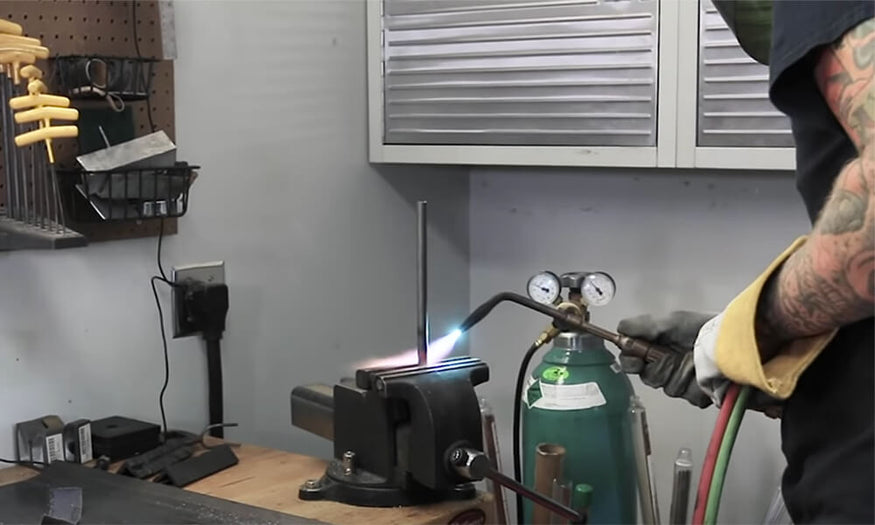
Heating up the DIY fender strut rod to cherry red, preparing to bend it.
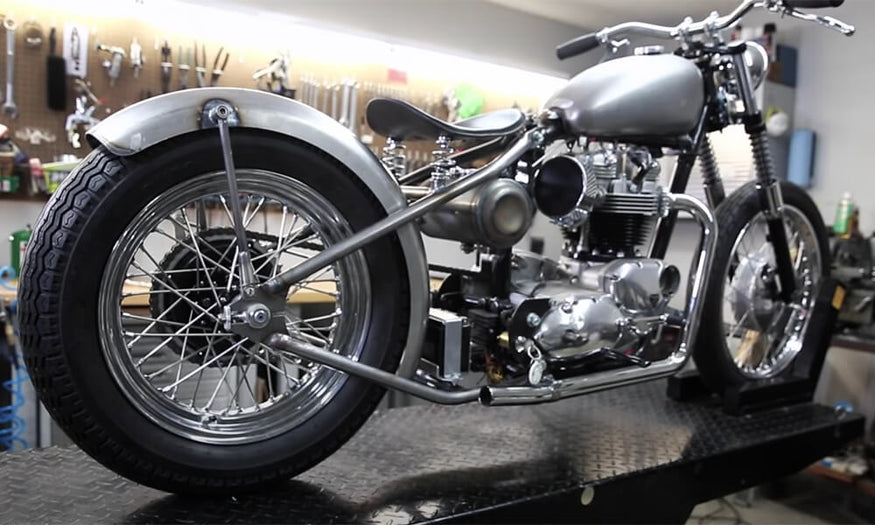
The finished, mounted rear fender on Todd's Triumph bobber.

Leave a comment at the bottom of this article:
You can read a full transcription of this video below:
Hey, it's Tyler with Lowbrow Customs. Today, we are in my home workshop in my garage and we're going to be mounting a fender on this unit triumph bobber which is Todd Muller from Lowbrow, our motorcycle tech who many of you may know at least from YouTube and other places. This is his bike and winter’s coming and we're going to get this fender mounted up get this bike out of my garage and make room for my projects.
The fender we're going to be mounting is a Gasbox 16-inch fender. The 16 inch refers not the tires, not the outside diameter of the tire but the rim size so this is like a 16 by 5 inch or something tire that Todd has mounted on here and this fender has the profile and radius so it'll fit quite nicely. Other things we're going to be using, well, these parts here from Gasbox. These are machined fender strut lowers or you could use them for anything but they're great for making custom fender struts, custom sissy bars anything like that and it's a perfect fit for half-inch rod, it makes it really nice easy finish look, very helpful when fabricating.
We've got our Lowbrow Customs DIY strut kit, which we've made for a dozen years or more and then some different tabs, this quarter inch thick steel deal lower fender mount tab, which is also useful for all types of things and we also have a couple of our fender mount tabs for ribbed and curved fenders and we have different styles and varieties of these available.
What I can tell you about these fab parts is that they're huge time savers. I've got my old Atlas craftsman lathe over there. I can make any bungs and do make all sorts of things. However, the amount of time it takes me to turn drill tap all kind stuff each individual bung, it's way more cost effective to spend a few dollars on a bung. Same thing making some of these this bracketry. While I can do it in my shop here, it takes way more time than the 20 bucks or whatever this bracket costs that I personally spent a lot of time designing and put a lot of thought into it. They work well, they save a lot of time and frustration and it's a lot of fun to be able to figure out how to use these components to mount your fender or finish that bike of your dreams. Follow along, I'll show you one way to do it and we'll see how it goes.
The first thing you want to make sure is completed before you go to mount your fender is that your wheel for one that it's the tire you're going run. Unless you have a ton of gobs of clearance from your fender to your tire, you really need to make sure this is the tire you're running. I just checked the air pressure and inflated this to 30 PSI, make sure that we are around at least the pressure it will be run at.
Todd delivered this bike to me as a roller already and he's got the rear wheel spaced left to right inside the frame. That's also extremely important. You can see he's got the chain on here, that's also useful one. He used it to make sure his wheel was aligned properly and two, the first thing we're going really do is cut a chain relief in the fender because this chain runs so close to the tire and it would definitely hit the fender and when we're centering that fender and getting ready to mount it, I want to make sure that the chains not pushing on it, we're not fighting anything. You want that fender to be able to be adjusted and moved wherever we want it.
To prepare I went ahead and I took a piece of hose. This is a one inch outside diameter piece of hose. I've used a chunk of old garden hose in the past, I've even used a normal 530 drive chain laid across the tire. That gives you really tight fender clearance though. The purpose of this is to hold the fender in place, it gives you the proper even spacing instead of trying to hold the fender up while your tack welding things. It just doesn't work. I just used a little bit of duct tape, which I ran out of. I just want some electrical tape, made sure it was nice and secure, the tube is centered on the tire and that gives us just a little support when we're mounting the fender.
The first thing I'm going to do to figure out where to put this chain relief is slide the fender in place. Now, there's a lot of different ways you can mount the fender as far as how short or how long it is et cetera. I had a discussion with Todd since this is his bike and this is what I would do with it as well. I'm going to basically rotate the fender forward until it is just shy of the bottom frame rail. The purpose for this is that say, the bike is finished and it's four years from now and for some reason you ride up a curb or you're are going over rough terrain or something. You don't want that fender to be hanging below your frame because that's going get smashed, right into your tire. I like to keep that fender up above the frame rail.
I'm just eyeballing it right now and I just slide it and it's sitting on that that piece of tubing and I'm not worrying about side-to-side location or anything now. I basically just move it where it's a little above that bottom of that lower tube. That's essentially where that fender is going to sit. We're not going to cut it shorter. You could if you want your fender really short, you can cut it off whatever. This is going to be run full length.
With the chain relief, you got to think when you're riding that chain flexes quite a bit not necessarily under load when you're on the throttle, but when you back off that whole chain really undulates. I want to give a good safety margin for sure. Probably an inch and a quarter maybe over the chain just to be safe. What I'll end up doing is just marking out a profile here and then taking the fender off and on the bench, drawing the line out little bit. That'll give me a cut line. Right now I'm just roughly getting an idea of where this will be.
The other thing I'll point out is it's you don't want a sharp corner. I'm going to cut this with just an angle grinder, but you don't want to leave a sharp point in there. You want to have a nice radius because if you have a sharp edge it will crack. That's where vibration will end up leading into a crack and cause you a lot of grief. At the top of this I'm going to actually match the angle of that chain as well just to follow that line.
Basically, that's all we're going to do. I'm going to cut this over far enough that it's about equal with the tire. The chain does have a little side play in it too, but in this case the tire so close that it would heat that before it would hit any of the remaining fender and we'll end up radiusing this corner a little too just on the belt sander. Now I'm going to take the fender, throw it on the bench, draw my line and go ahead and cut that relief, clean it up. It should only take 10 minutes at most and then we'll move on to mounting the fender.
One thing I think is worth mentioning to you guys, this is just as of late, any time I'm grinding cutting metal in with dust, I'm making sure I pick this little guy up, a face shield and also just some of the 3M little masks. I'm not going to the mask for this because it's such a small amount but when I had a CAT scan recently from a motorcycle rack, and there was stuff in my lungs they called broken glass, but it just means there's something in your lungs that's foreign. I'm sure it's abrasive grinding compound and dust and whatnot.
I do this as you know as a hobby, not full-time or anything and it still is enough, but, well, I better get this to keep that dust out of my face a little more wear masks et cetera and I just mention that because it's minor deal to have that little bit protection. Really for me, I don't want end up having some frickin lung problems when it could be stopped so easily and I don't but I don't want to get there. These days I always wear hearing protection. This also helps just keep all the grit and stuff off your face keeps little cleaner, but it's something I thought worth sharing for those of you out there who are doing metalwork in your garage.
I'm going go ahead and mark this line out. I'm just going to use a standard grinder with a cut-off wheel holding it at the angle that's equal to the arc of the fender and I'm going to cut this out real quick. The one thing this where I want to keep a larger radius, I'm going just cut a flat across and then I will probably use this little guy, little die grinder, pneumatic die grinder and get that radius in there. You could use a dremel, you could hand file it, there's lots options. Again, I don't want to cut and have a hard corner there because almost for sure we'll get a crack there eventually.
I'm going to clamp this to the table so that it doesn't move so much.
All right. I got that. That initial cut went real quick. This is a piece of scrap. I used that die grinder to clean up that big radius and to just take the burr of the edge off real fast. I'm going to take this over. I've got a belt sander in the garage here which is a very useful tool. I'm just going to go ahead and hit the face of this, smooth that all out really nice. Give a little radius there and that should be good to go.
You could also use a die grinder-- I'm sorry, angle grinder with a flap disc on it which is essentially overlapping sheets of sandpaper. You can also just do this by hand. Take a file and smooth it out, sand it. There's lots of ways to do it. I'm using the tools I have but there're both faster nicer ways to do it and slower nice ways to do it as well. I'll go ahead and clean this up and get back to mounting it.
I went ahead and cut the chain relief. I actually widened it a little bit more, brought it inbound a little bit more than in my original line and it seems fine now. The nice thing, once all the mounts are done we'll take a look at that again and you could always give it a little more breathing if necessary. Because I was going to be working in this area, I went ahead and pulled off the oil tank and just flipped the seat up out of the way. Gives myself a little more room to work. Leaving the battery box in place even though I'll remove it once I get further along to weld. I'm leaving that and the chain and things in place because it's easy to forget what parts aren't on the bike when you're working at it. When I go to make fender struts, et cetera, I just want to keep everything together. That's necessary to make sure I don't have any interference issues.
The fender, we slid it in place here and then threw some electrical tape around the fender. It's not super secure but it holds it pretty snug so I can actually shift it left to right in such as needed. A good way to tell when the fender center from the back you can just visually look but it's also using your fingers to feel the gap that it feels that it's the same. It's a quite accurate way to do so. You can fancy and try and measure everything if you want but honestly, if you start something long enough and you're not sure if it's center or not it probably is, meaning if you really can't tell but it's pretty centered here. I'm feeling above the cut area obviously just at the fender wells. This is pretty much where it needs to go.
I'm going to do a couple of things to help me visualize for the first mount, I'm going to do is this upper mid fender mount here which is going to be welded to the seat post tube. We're going to use this low brow curved fender mount for curved fenders. Something I already did here as well is real quick I just took a little bit off of these bungs on my belt sander. The radius of different fenders, different types of fenders will vary of course.
These bungs sat pretty nice but there's a little gap so I just took a bit of that material off. They sit real nice and flat. When I weld them, I'm not feeling a large gap or anything. To figure out where my bracket is going to go side to side, I'm going to give myself some visual reference points, a really easy one. It's simply going to be to mark the centerline of the seat post. Sorry, of the seat cross member.
Using just a standard tape measure in between the frame rails I'm at seven inches exactly. Three and a half inches. I'll go ahead and make a sharpie mark. That's just a good indicator showing me right where the center of that tube is. Actually, that brings up a good point. Something with certain bikes, like these old Triumphs, you have to keep in mind is that the wheel isn't necessarily centered perfectly between the frame rails. On a Triumph, the tire's actually shifted slightly away from the chain side.
The decision you have to make is do you center the bracket to the fender or to the frame? Or do you split the difference? Sometimes making something that is perfectly centered will actually look like it's off. What I tend to do personally is default to where I just think it looks the best. Even if you measure and it's off by an eighth of an inch, if it looks better there, that's where I would go for.
Before I get ready to actually position this and then tack weld the bungs to the fender I'm going to go ahead and mark this bracket. It comes over-length. This part is longer than need be potentially, so it could be used for a variety of fitments. What I'm going to do, I'm going to a lap weld where this bracket it's going to come up under that cross tube and I'm going to weld on both sides of it. It's a very strong weld. You could always cut it and butt it to the face of the tubing, but in this instance, the fender is close enough there, it's right at the bend. It wouldn't be nearly as strong, it'd be a total pain in the butt. I'm just going to go ahead and give myself a sharpie line.
Now I know this is going to be cut off and this piece I'll go ahead and just clean up and get ready to tack weld. I'm going to tack weld the bungs to the fender, which will hold the bracket in place and then I will go ahead and tack weld the bracket to the frame, make sure I get probably three good tacks on everything, move on to the next mount and then the bungs will be finished welded to the fender when it's removed and then the brackets will be finished welded then as well.
All right, I'm going go ahead and mark my lower tab as well, get that cut prepped at the same time I'm doing the upper tab, that way I can get both tack welded in place. I'm going to be using one of these Lowbrow lower fender mount tabs. Quarter-inch steel. What I'm going to do here is add a half-inch long five 5/16 18 threaded bung. The way this fender will end up being mounted is all mounting points. We're going to weld bungs to the fender. The brackets will bolt directly into those bungs, and there's no hardware on the inside of the fender because otherwise, you can drill holes in your fender and through bolts or even run the hardware through the fender into a bung.
I don't like that because I've done that before and then I've been on road trips or cruised around locally, it doesn't even matter. If you have one of those bolts back out and start rubbing your tire, runs a groove into it. Now, you've got to pull your whole rear wheel to tighten up your fender mount which is just a ridiculous amount of work that you shouldn't have to do. This style of mounting gives you easy access to all your bolts. Lock tight when you do final installation anyway, but you could throw a wrench on it if something is loose and tighten it right back up and it's really easy.
We removed the battery box here because I knew it wasn't going to be in the way for this tab and it was in the way for me to visually see how long I needed this tab and also where to center it.
I'm going to do a similar style weld that I'm going to do for the upper tab and it's going to be a lap joint where this butt up under the tube and then it's going get welded on both sides, very strong and it will be hidden behind the battery box anyhow. This is pretty straightforward. I need to seat the bung flat against the fender, slide it up until it's butting against this cross tube, and all I'm doing now is marking the tab so I know where I want to cut it. It's the proper length and ready for welding.
One thing I might mention is that I'm going to position that bottom tab in this direction so the hardware is easy to get to. If it flipped this way, the bung will be a little higher up on the fender, but it's going to be a lot more difficult to really get a wrench in there and remove that bolt. I made a little mark here where I'm going to just take, I'll draw a line on there, give myself a little better visual reference. I'm just going take the grinder cut that to the length I need it, deburr it and get the welder set up and get ready to get all these guys tack welded in place.
All right. We've got both of these mounting brackets cut to the proper length. You could just hold stuff intact well that I've done it plenty of times but it's nice to spend a short amount time figuring out clamps or magnets or something to hold them. It just makes life a lot easier. This is a nice clamp, one I picked up recently, it's got swivels on it. It'll clamp tubing it will clamp flat, it will clamp a combination such as in this case.
What I'm going to do on this is hold this mount in place. I decided I'm going to center this fender mount to the fender, which is slightly offset from the center point I drew on this cross tube, but I think it looks better and once the center mark is removed. It looks centered, I think it looks wrong if I line it up to the frame. Unless I'm just looking at the centerline of the fender and personally just eyeballing it though you can do whatever you want but this will hold this in place for when I tack it and it's going to hold the bracket to the cross member and then also I've got to make sure it's sitting forward against the fender when I clamp it, that it doesn't pull away. I have a little difficulty today. I had a broken wrist and just got my cast off of week and a half ago so I'm still not really be able to use my left hand properly.
Side to side brackets good. I've got a good contact where the bungs are sitting flush against the fender. There's a slight gap there, but it'll be filled in with weld. It's no problem at all and the brackets firm up against the cross member tube. I think that is good. I'm going to unclamp the lower one and then recheck and probably triple recheck that my fender is at this end and over here that it's centered on the tire that space is equal on both sides, and then I'll just go ahead and get tax on the bungs as well as the from the bung to the fender and then from the brackets to the frame. Then I'll remove the clamps and get some nice heavy tacks on there and we'll move along to the fender struts before finish welding everything.
This one's a little tricky just because getting it centered it's a little harder to get a good line of sight on it. This is when I'll definitely want to have it in position. I'll check multiple times before really welding. The clamp I'm using, a couple clamps down at the bottom these are just cheap regular tension clamps you can pick up at any hardware store. Good for light-duty work like this. They'll just hold this in place for me until I tack it. I honestly don't have nearly enough style of clamps here in my home workshop. A variety of clamps and magnets, you can get really creative for holding work pieces and it makes life easier when you actually go to the final mile and get everything welded. Another clamp here that will hold the bung against the fender,. It's looking pretty good.
I'm going to go and get the welder setup and I'll give this one last check again before I tack weld. All right, everything's clamped in place, triple checked that the fender gap is the same all the way around, that the mounting brackets are perpendicular to the frame rails, that everything centered on the fender. It's all clamped in place ready to go. I'm going to go ahead and tack weld everything. It might be a little tricky to get into some spots but even getting a couple-- You know want to make sure they're decent tacks, but then you can always move the clamps et cetera to get a little heavier tacks with some fill rod if I can't get it in certain areas. Get this thing going.
Got two good tacks on each of the bung to the fender. I'm going to go ahead and get the bracket tacked, remove this clamp, see if I can get a third tack then once that's out of the way on those bungs.
I think I'll go ahead and throw finish weld across that mean bracket because it's in a good area. I'll crank the amperage up a little on the welder.
Cool. That worked out well. It's easy to get to. I'm going to throw a bead, a full weld across the other side where the bracket meets that tube once the fender's off, but that top mount is good to go and I'll get the bottom one all mounted up.
All right. That went well. I got a good finish weld action on each of the brackets to the frames, the bungs are all tacked solidly in place. I'm going to leave this as is for now, going to leave the fender even taped in place. I'm going to move rearward, and we're going to work on the fender struts and get those all set up before taking it all apart and doing all the finish welding. All right. These mounts are more or less done. We are moving on to the fender struts. I'm going to use these Gasbox machined fender strut lowers. They don't come with hardware. These are just some hardware laying around, some one inch long 5/16s-18 thread.
The easiest way to start visualizing this pretty quickly is to bolt these components in place. On a Triumph here, this is a little tricky getting the nut in behind there. There we go. That wasn't so bad. I'm not going to go nuts on this, but I'll snug it up a little, so it doesn't move too much on this. You could see there's that nice fender strut lower with the Lowbrow Customs DIY strut kit. It gives you two pieces of half-inch round bar, round stock, mild steel as well as stainless steel hardware and an assortment of bungs.
What's nice about these Gasbox strut lowers is they're machined for a half-inch material. It's a really nice fit, or you could braze this lower mount in place, or you can weld it. In this case, we're just going to weld it. This allows you to start looking at the lines of your fender struts, getting an idea of where you wanted to sit. I've popped the seat back down, just to help with that. Again, this is Todd's bike, and I know where he wants his struts because I discussed it with him already. It's going to be angled back to around on the one o'clock position approximately.
Doing the first side, to me, always seems really easy because we're going just make it happen, get everything tacked up and cut, but then it usually takes quite a bit longer on the other side because it's trying to match that. It's not so bad on a project like this because the other strut lower bolts into the same place on this Lowbrow Customs Triumph hardtails. I already got the fender strut holder in place. We basically will need to make sure we get the bung on the fender on the exact same location to make the rod match.
What we're going to do for the fender following with the theme of what we did for the rest of the mounts, I don't want to have anything that you have to through bolt and have a knot on the inside. It would be a little tight clearance and everything. We're going to end up using one of the half-inch long threaded mounts. These are 3/8-16 threaded bungs that comes with the strut kit. We're going to use this counterbore along with the hardware that came with the kit.
When you thread these together, what's going to end up happening is the half-inch long bung is going to get welded to the fender. This strut is going to need to be bent and cut to length, and it's going to be welded to the counterbore bung. When you unbolt on here and pull this bold out, that strut can be removed, and then we'll duplicate that on the other side. First thing I'm going to do is figure out the placement of this bung and just tack it in place, and then we'll go ahead and put a slight bend in the fender strut material. In this case, what I'm going to do is take a sharpie, just make a mark where it's above the chain, and then I'm simply going to clamp this in my vise and give it a little elbow grease there, a little muscle, and just bend it slightly.
It's one of these operations where less is more. It's like I'll probably have to tweak it two or three times to get it just to the right location, and then I'll cut it to length. Don't cut it to length first because you're going to mark it and cut it, bend it and then it may be too short, and then you've wasted that piece of material. I'll go ahead and mark my location where this half-inch bung should go on the fender, half-inch duct bung and tack that in place, and then we'll go ahead, and we'll bend this rod and get it all situated, tacked in place and then move onto the other side. I'm going to clean off this fender very quickly using angled die grinder with a little scotch brite.
That will do. This is going to be really simple. Essentially, I'm just going to move the fender struts to where it looks like it should go, get out of the way, hold the bung where I think it should go, where I'm going to vertically center it on this flat skirt part. Let's see if this little clamp will just give it-- That will hold. I'm going to go ahead and tack that and tack that and pull that upper bung in place and start figuring out the angle for the bend of the rod.
I was about to just do a little fusion tack on that, but what I'm going to do before that is get the bend in that rod. It'll make it a little easier. Throw three tacks on that for now just to hold it in place. Went ahead and snugged up that counterbore bung which is what the strut will be welded to. You can see that it is sitting outside of that right now. All I'm going to do is give myself some sort of reference here. I'm just looking at it. It's more visual than anything about where that bend takes place, so I'm going to let this come up a little and then bend it so it comes in at an angle. You could like them straighter and do a sharper angle, but I think it looks better with a bend toward the bottom. I'm looking at it. I know it needs to come in five five degrees or 10 degrees at most or so.
I'll this over the device, just going to clamp it in and give it a little bend. I'm going to go ahead and these vise jaws have a little channel in them to hold a round stock vertically right there. All I'm doing is clamping it right at that mark. I don't know if that bent it enough. I'm going to get myself a little cheater bar. Let's do that. You could heat this up, cherry red, easily and bend it, but I feel lazy so I'm not going to do that. I'm just going to grab a piece of tubing and it'll give a lot of leverage where I can bend this easily. We'll take a look at this.
Just going to get a slight bend. It'll need more, but I like to check multiple times so I don't over bend. It needs to come over quite a bit more. Almost right on. It needs to come this way about a 16th of an inch. Looking pretty good. Got a nice gradual bend right there. If you heat it cherry red you can get a tighter bend right there, but I think this will work out quite well. It's there. We need to have right out there. It feels a little weird with these plastic soft drawers in there too. It's got a lot to give. I'm trying to get a feel for when it's actually bending.
It's right on. Took me a few attempts there to slightly tweak that to get the bend in it right here to where it will line up. Now what I'm doing is I'm going to take a look, make a mark, cut this to length. I'd way rather cut it slightly cut it too long where I can dress it on the grinder with a grinder, belt sander, whatever. What I want is that to be a nice firm touch under there. Potentially even with a little bit of a cope to it. I might cut it a little long and then slightly grind a depression in it so it'll sit nice and snug there. You don't want to pushing upward pressure.
You jam it in place because then once it's welded, it's going to be pushing pressure on that fender. You want everything to be happy and free, all your mounts. The fender should just fall in where it gets mounted, bolts go home, it's all good. If you're pulling your fender to get a bolt in, I guarantee you're going to get a crack in that fender later on. You don't want any tension stored in there. This fitment process, it's worth taking a little extra time on it. It'll save you grief later with your finished bike. The fender painted, et cetera, and you have a mount break.
It's a total pain in the butt. I'll go ahead and mark this. Make sure I bend facing in the right way. I think it's going to be about there. I'm going to cut about 3/16th of an inch longer that I think it'll need. I might even cut slightly about the line I made. What I'm thinking is I might dish the end of that rod a little so it hugs that bung nice, and I don't have too much to fill in with welds. I'll take this over the vise and use the grinder with a cut-off wheel and just cut it to length.
We've got this first strut and nothing's tacked yet, but I've got this in place. This is the first one that I showed bending with the cheater bar that was a little too large of an inside diameter. It made just too gradual of a bend, and I did not like it so I threw that one away. The other half of the thunderstruck piece was long enough so I just tried making a new one and I really liked the way this looked. I'll show you here when we do the other side. I grab my oxy-acetylene. I did go ahead and heat this up and did a bend which once it's hot happens very easily right at the end of the fender strut.
I went ahead and I coped the end of the strut using my little die grinder. You could use a grinder. You could use a rat tail file, whatever you got. What I was mentioning earlier about the tension, I have to lift up on this to get it to slide past the lip of the cope, but you can see that it moves freely. This is basically ideal. There's not a gap for welding or barely, but there's no tension on that strut.
This is good to go. I'm going to tack weld that in place, and then move over to the other side, measure back, locate where the other bung goes, bolt this piece in place and do the exact same process but spending a little extra time looking from above, behind, everywhere to make sure that the struts match each other so it looks and clean when it's done. I'll you the process of bending with heat as well. This is real thin filler rod for this ticky tack.
Moving onto the right-hand side
Related Products


